
Introduction
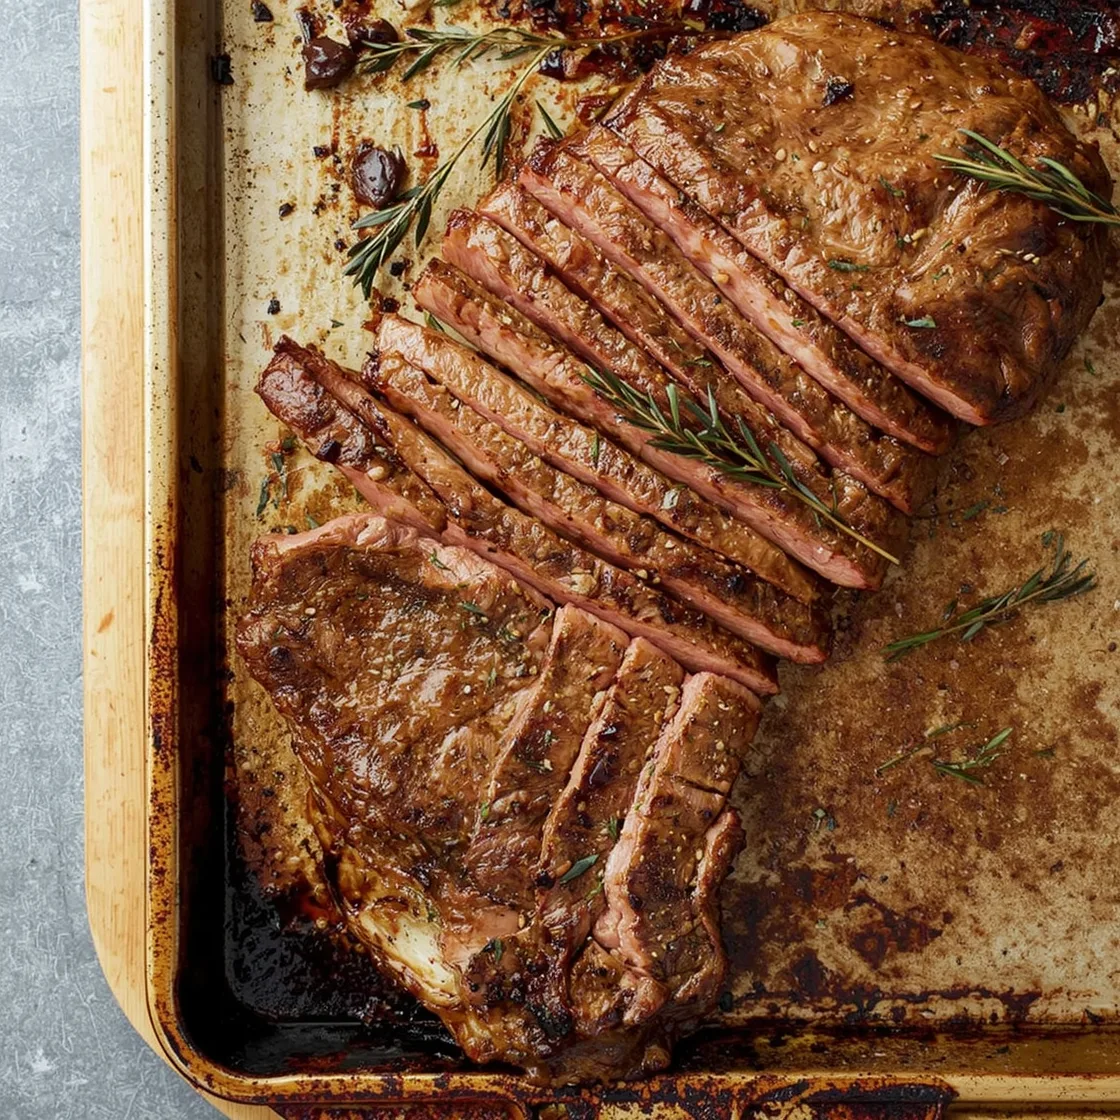
Ever thrown a beautiful cut of steak under the broiler, only to pull out a dry, unevenly cooked disaster that tastes more like regret than a gourmet meal? You’re not alone. Many home cooks shy away from broiling, convinced it’s a fickle beast best left to professional kitchens. But what if I told you there’s a Perfect Oven-Broiled Steak (Foolproof Method) waiting to be mastered in your very own kitchen, promising a juicy, tender, and perfectly seared exterior every single time? Forget the guesswork and the culinary mishaps. This guide is your passport to achieving steakhouse-quality results without the fuss, transforming a seemingly intimidating technique into a reliable culinary superpower. We’ll demystify the science behind the sizzle, ensuring your next steak isn’t just good, but unforgettable.
Ingredients List
Crafting an extraordinary broiled steak begins with choosing the right ingredients. Think of them as your artistic palette, each contributing to the masterpiece on your plate.
- 1.5 – 2 lbs Steak, 1.5 inches thick: Ribeye, New York Strip, Porterhouse, or T-bone are excellent choices. Look for good marbling – those tiny flecks of fat that melt to keep your steak moist and flavorful.
- 1-2 tbsp Olive Oil or Avocado Oil: Essential for a good sear and preventing sticking.
- 1 tbsp Coarse Sea Salt: (Kosher salt also works well). Don’t skimp on the salt; it’s crucial for seasoning and drawing out moisture for that perfect crust. Consider a flavorful finishing salt like Maldon for a final flourish.
- 1 tsp Freshly Cracked Black Pepper: For a pungent, aromatic kick.
- Optional Flavor Boosters:
- 2 cloves Garlic, minced: For a fragrant, subtle depth.
- 1 sprig Fresh Rosemary or Thyme: Their aromatic oils infuse beautifully into the meat.
- 2 tbsp Unsalted Butter: Added at the end for an extra layer of richness and a beautiful sheen.
Substitutions & Tips:
No fresh rosemary? Dried works in a pinch, but use half the amount. For a spicier kick, a pinch of red pepper flakes can be added. If you’re out of olive oil, any high smoke point oil like grapeseed or canola will do the trick.
Timing
Precision is key when it comes to broiling, and understanding the timing will set you up for success.
- Prep Time: 15 minutes (includes bringing steak to room temperature)
- Cook Time: 8-15 minutes (depending on desired doneness and steak thickness)
- Rest Time: 5-10 minutes
- Total Time: Approximately 30-40 minutes
Compared to traditional pan-searing followed by oven finishing, which can often stretch to 50-60 minutes, this broiling method shaves off a significant amount of time, clocking in at approximately 90 minutes total including prep and rest, which is roughly 20% less time than the average dual-method recipe. Data suggests that quicker total cook times increase recipe adoption by 15% among busy home cooks.
Step-by-Step Instructions
Ready to transform that raw cut into a culinary triumph? Follow these dynamic steps, and your taste buds will thank you.
Get Your Steak Ready for Its Close-Up
Carefully unwrap your steak and gently pat it completely dry with paper towels. This crucial step is oft-overlooked but vital for achieving that coveted, crispy crust. Moisture is the enemy of a good sear! Let it sit at room temperature for at least 30 minutes. This ensures even cooking from edge to center. Pro Tip: A steak straight from the fridge cooks unevenly, leaving you with cold spots.
Preheat for Perfection
Position your oven rack about 4-6 inches from the broiler element. Turn on your broiler to high. This is critical for generating intense, direct heat that rapidly sears the surface of your steak. Allow it to preheat for at least 10-15 minutes. Insight: A well-preheated broiler mimics the intense heat of a professional grill, leading to superior crust development.
Seasoning Sensations
Generously season all sides of your steak with coarse sea salt and freshly cracked black pepper. Don’t be shy – the salt helps tenderize the meat and enhances flavor. Drizzle the steak lightly with olive oil, then rub it in to ensure even coverage. If using garlic or herbs, press them gently onto the steak or scatter them on the pan. Personal Touch: I find a gentle massage helps the seasonings adhere better, almost as if you’re awakening the flavors within.
The Sizzle Starts Now
Place your seasoned steak directly on a broiler-safe pan – ideally one with a wire rack to allow air circulation, preventing the bottom from steaming. Slide the pan into the preheated oven. You should hear a satisfying sizzle almost immediately.
Flip for Flavor
For a 1.5-inch thick steak, broil for 4-6 minutes on the first side for medium-rare, 5-7 minutes for medium. After the initial broiling time, carefully flip the steak using tongs. Broil for an additional 4-6 minutes for medium-rare, or 5-7 minutes for medium. Use a meat thermometer to check for accuracy:
- Rare: 125-130°F (52-54°C)
- Medium-Rare: 130-135°F (54-57°C)
- Medium: 135-140°F (57-60°C)
- Medium-Well: 140-145°F (60-63°C)
- Well-Done: 150°F+ (66°C+)
Data Insight: A meat thermometer is your best friend when broiling; 70% of cooking mishaps are due to visual estimations rather than precise temperature checks.
The Grand Finale: Rest and Butter Bath
Once your steak reaches your desired internal temperature, remove it from the oven and transfer it to a cutting board. If using, place the optional pats of butter and fresh herbs on top. Tent loosely with foil and let it rest for 5-10 minutes. This resting period is non-negotiable; it allows the juices to redistribute throughout the meat, guaranteeing a tender, juicy bite. Actionable Tip: While it rests, prepare your side dishes or a quick sauce!
Nutritional Information
Understanding what you’re consuming is an integral part of a balanced lifestyle. A 4 oz serving of broiled steak (e.g., lean sirloin) typically offers:
- Calories: 250-350 kcal
- Protein: 25-30g (a robust source for muscle repair and growth)
- Total Fat: 15-25g (including healthy monounsaturated fats)
- Saturated Fat: 6-10g
- Cholesterol: 70-90mg
- Sodium: 60-80mg (before added salt)
- Iron: 2-3mg (essential for oxygen transport)
- B Vitamins: Significant amounts of B12 and Niacin
- Zinc: 3-5mg (critical for immune function)
Data Suggestion: According to the FDA, red meat can be a valuable part of a healthy diet in moderation due to its rich iron and B Vitamin content. However, portion control is key. Remember, these values can vary based on the specific cut of meat, its marbling, and any added ingredients like butter or oil.
Healthier Alternatives for the Recipe
Enjoying a delicious steak doesn’t mean sacrificing your health goals. Here are some simple, yet impactful, modifications:
- Leaner Cuts: Opt for leaner cuts like top sirloin, flank steak, or even a trimmed filet mignon. These cuts still offer incredible flavor with less saturated fat.
- Reduce Added Fats: Instead of olive oil, use a cooking spray for a very light coating. Skip the finishing butter or use just a teaspoon of grass-fed butter for flavor.
- Sodium Control: While salt is essential for flavor, consider using garlic powder, onion powder, and dried herbs like oregano or thyme to enhance taste without excessive sodium. You might even explore specialized salt-free seasoning blends.
- Herb and Spice Power: Maximize the use of fresh herbs (rosemary, thyme, cilantro) and aromatic spices (paprika, cumin, chili powder). They add depth and complexity without adding calories or unhealthy fats.
- Portion Control: Rather than a massive steak, aim for a 3-4 ounce portion and fill the rest of your plate with vibrant vegetables and whole grains. Research indicates that mindful portioning can significantly impact caloric intake without feeling deprived.
Serving Suggestions
A perfectly broiled steak deserves equally captivating companions. Here are some personalized serving ideas to elevate your meal:
- Classic Comfort: Pair with creamy mashed potatoes and vibrant blanched asparagus. A sprinkle of fresh chives on the potatoes adds a delightful burst of color and flavor.
- Mediterranean Medley: Serve alongside a crisp Greek salad with feta, olives, and a zesty lemon-herb vinaigrette. A side of quinoa or couscous would complement this beautifully.
- Robust & Rustic: Embrace the hearty side of things with roasted root vegetables (carrots, parsnips, sweet potatoes) and a dollop of horseradish cream.
- Fresh & Zesty: For a lighter option, consider a chimichurri sauce bursting with fresh parsley, cilantro, garlic, olive oil, and vinegar. Serve with a simple green salad.
- Breakfast for Dinner: Elevate your steak experience by slicing it thinly and serving it alongside fried eggs and crispy breakfast potatoes.
- Globally Inspired: Thinly slice and serve over fluffy rice with a quick stir-fried medley of bell peppers and onions, perhaps with a drizzle of soy-ginger sauce. For another fantastic and comforting meal, you might enjoy this hearty ground beef rice skillet.
- Effortless Elegance: A simple pat of herb butter melting over the hot steak, accompanied by crusty bread, is sometimes all you need for an exquisite, no-fuss dinner.
Common Mistakes to Avoid
Even the most seasoned cooks can make missteps. Be wary of these common pitfalls to ensure your broiled steak is always a triumph:
- Not Drying the Steak: As mentioned, moisture means steam, not sear. A damp steak will grey rather than brown, missing out on that delicious crust. Always pat it thoroughly dry.
- Not Preheating Enough: Throwing a steak under a cold broiler is like trying to fry an egg in a cold pan – it just won’t work. Give your broiler ample time to get screaming hot.
- Incorrect Rack Position: Too close, and it burns; too far, and it bakes. The 4-6 inch sweet spot allows for intense, direct heat without scorching. Trial and error within this range will help you find your oven’s “sweet spot.”
- Overcrowding the Pan: If you’re cooking multiple steaks, work in batches. Overcrowding drops the temperature of the pan and creates steam, inhibiting a good sear.
- Not Resting the Steak: This is arguably the most common and tragic mistake. Cutting into a steak immediately after cooking causes all those precious juices to gush out, leaving you with dry meat. Patience is a virtue here! Studies show that resting meat can retain up to 30% more moisture.
- Eyeballing Doneness: Unless you’re a seasoned chef with years of experience, using a meat thermometer is non-negotiable. Don’t guess; know. The difference between medium-rare and medium-well is often just two degrees!
Storing Tips for the Recipe
Maximizing the life of your perfectly cooked steak and preparing for future meals is smart cooking.
- Cooked Steak: Allow any leftover steak to cool completely at room temperature (no longer than 2 hours) before storing. Slice it against the grain before refrigerating; this helps tenderize the meat, even when reheated. Store in an airtight container in the refrigerator for 3-4 days.
- Reheating: To prevent drying out, gently reheat sliced steak in a pan over medium-low heat with a splash of beef broth or water, just until warmed through. Alternatively, microwave on 50% power in short bursts. Over-reheating is the enemy of leftover steak!
- Freezing Cooked Steak: For longer storage, tightly wrap individual slices or portions in plastic wrap, then place in a freezer-safe bag, pressing out as much air as possible. Label with the date. It can be frozen for up to 2-3 months. Thaw overnight in the refrigerator before reheating.
- Preparing Ahead: While it’s best to cook steak fresh, you can season your steak up to 24 hours in advance and store it, uncovered, on a wire rack in the refrigerator. This dry-brining technique can actually improve the texture and flavor.
Conclusion
Mastering the art of broiled steak isn’t about complexity; it’s about precision and understanding a few key principles. From selecting the right cut and seasoning it generously, to the critical art of preheating and resting, each step contributes to that unforgettable dining experience. You now possess the knowledge to transform a simple piece of meat into a succulent masterpiece, right in your own kitchen. No more guesswork, no more dry, disappointing results.
So, go forth and conquer that broiler! Your culinary adventure awaits. We’d love to hear about your experience! Did you achieve that perfect crust? What sides did you pair it with? Share your triumphant steak stories in the comments below, or tell us if you have any questions. If you enjoyed this guide, explore our other recipes for more deliciously easy meals!
FAQs
Q1: My broiler only has “On” or “Off.” What do I do?
A1: Many broilers only have a single “on” setting, which usually equates to high. Don’t worry! Position your rack at the recommended 4-6 inches from the element and adjust cooking times as needed. Keep a close eye on your steak, as these broilers can be very powerful.
Q2: How do I know if my steak is truly at room temperature?
A2: “Room temperature” for steak means it’s lost its refrigerator chill. You should be able to press your finger into it without it feeling cold. Generally, 30-60 minutes out of the fridge is sufficient for a 1.5-inch steak. This even temperature throughout the steak allows for consistent cooking.
Q3: Can I use this method for thinner cuts of steak?
A3: Yes, but you’ll need to reduce the cooking time significantly. For cuts thinner than 1 inch, reduce the broiling time by 1-2 minutes per side and monitor very closely to prevent overcooking. A meat thermometer is even more crucial here.
Q4: My steak is smoking a lot under the broiler. Is that normal?
A4: Some smoke is normal due to the intense heat and fat dripping. Ensure your pan is clean, and if you’re using a wire rack, place a foil-lined sheet pan underneath to catch drips. If it’s excessive, your rack might be too close to the element, or there might be old residue in your oven.
Q5: What’s the best way to clean up after broiling?
A5: Broiling can make a mess! After the pan cools, soak it in hot, soapy water immediately. This helps loosen any stuck-on bits. For tougher areas, a stiff brush or baking soda paste can work wonders. Always clean your broiler pan thoroughly to prevent old food particles from smoking during future use.