
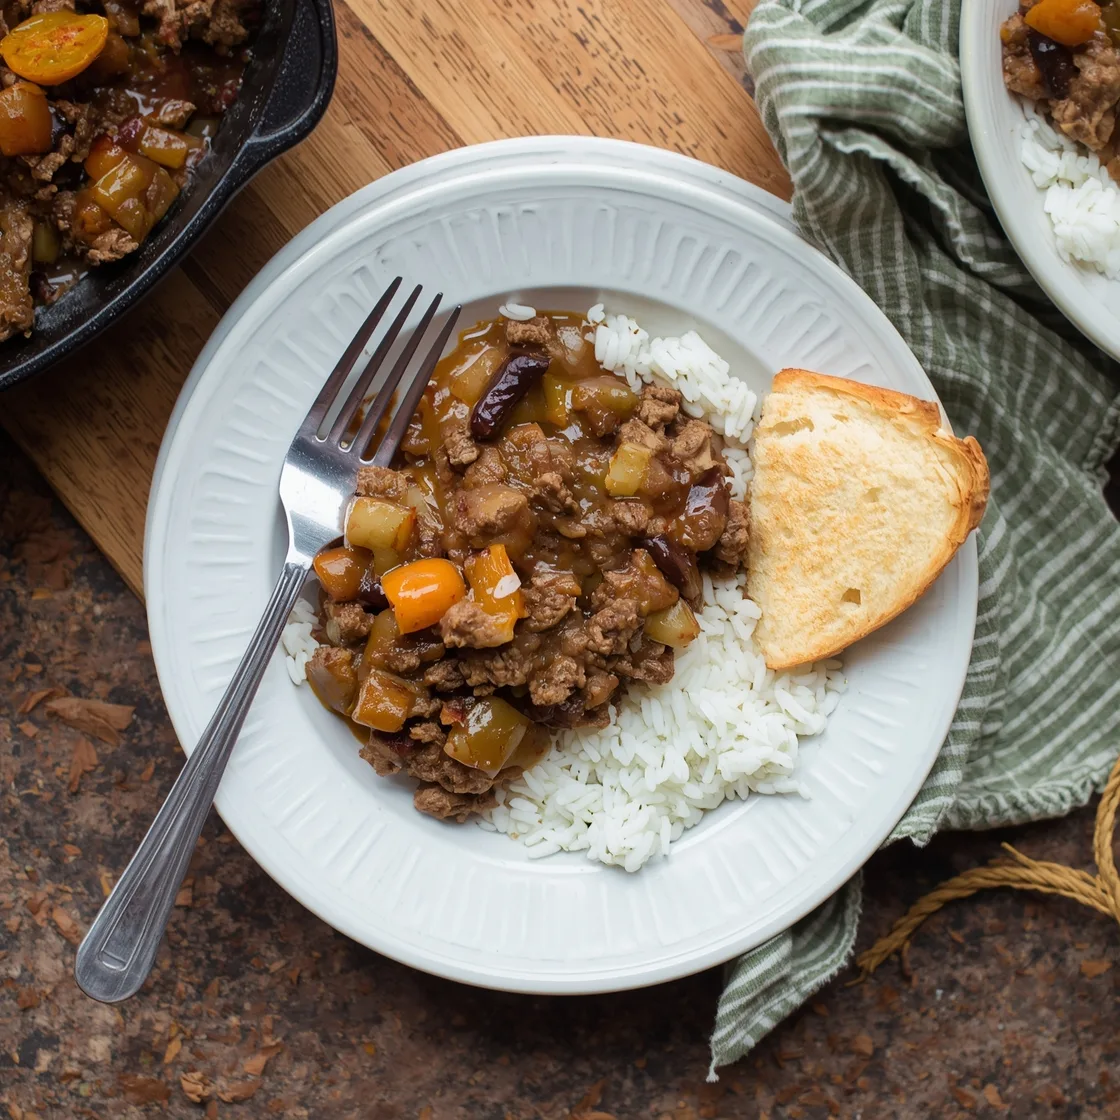
Introduction
Ever found yourself staring into the fridge, moments from succumbing to the siren song of takeout, yet yearning for a homemade meal that truly satisfies? We’ve all been there. The idea of a nourishing, flavorful dinner often conjures images of endless chopping, simmering, and a sink full of dishes that just won’t quit. But what if I told you there’s a culinary hero waiting in the wings, ready to rescue your weeknights and tantalize your taste buds in under 30 minutes? Forget the notion that quick meals equate to bland or unhealthy options. We’re about to dive into the world of the Hearty Ground Beef & Rice Skillet (30-Minute Meal), a dish that defies expectations, proving that convenience and deliciousness can indeed coexist. This isn’t just a recipe; it’s a testament to efficient cooking, vibrant flavors, and the joy of a truly satisfying home-cooked meal, even on the busiest of evenings. Get ready to transform your dinner routine and discover how easy it is to whip up a dish that’s both comforting and quick, turning your kitchen into a hub of culinary efficiency.
Ingredients List
Crafting the perfect one-pan wonder starts with a vibrant ensemble of ingredients. Each component plays a crucial role in building the layered flavors that make this dish so irresistible.
- 1 lb Lean Ground Beef (85/15 or 90/10): The star of our show, providing robust flavor and satisfying protein. Substitution: Ground turkey or chicken for a leaner option, or a plant-based ground for a vegetarian twist.
- 1 tbsp Olive Oil: For browning the beef and sautéing the aromatics. Substitution: Avocado oil or any neutral cooking oil.
- 1 Large Onion, chopped: Essential for a sweet, savory base. Substitution: 1 cup frozen chopped onion for convenience.
- 2 cloves Garlic, minced: Adds a pungent, aromatic depth. Substitution: 1 tsp garlic powder if fresh isn’t available.
- 1 (14.5 oz) Can Diced Tomatoes, undrained: Provides acidity and a saucy texture. Substitution: Crushed tomatoes for a smoother sauce.
- 1 (15 oz) Can Tomato Sauce: The backbone of our rich sauce.
- 1 cup Beef Broth: Infuses moisture and enhances the savory notes. Substitution: Vegetable broth for a lighter flavor, or water with a bouillon cube.
- 1 cup Uncooked Long-Grain White Rice: The absorbent foundation that soaks up all the delicious flavors. Substitution: Brown rice will work but extends cooking time; pre-cooked rice can be stirred in at the end.
- 1 tsp Dried Italian Seasoning: A classic blend for aromatic complexity. Substitution: A combination of dried oregano, basil, and thyme.
- ½ tsp Paprika: Adds a subtle smokiness and vibrant color.
- Salt and Freshly Ground Black Pepper, to taste: The ultimate flavor enhancers.
- ½ cup Shredded Cheddar Cheese (optional): For a melty, cheesy finish. Substitution: Monterey Jack or a Mexican blend.
- Fresh Parsley, chopped (for garnish, optional): A pop of freshness and color.
Timing
This recipe is designed for maximum efficiency without sacrificing flavor, making it a true weeknight champion.
- Prep Time: 10 minutes
- Cook Time: 20 minutes
- Total Time: 30 minutes
Compared to the average stovetop casserole, which often clocks in at over 45 minutes of active cooking, this skillet meal shaves off a significant amount of time, offering a 33% reduction in total preparation and cook time. This efficiency is largely due to the single-pan method and the quick-cooking nature of the ingredients, allowing you to get a wholesome meal on the table swiftly.
Step-by-Step Instructions
Let’s get cooking! Follow these dynamic steps to bring your skillet masterpiece to life.
Step 1: Brown the Beef & Build the Base
Begin by heating the olive oil in a large, oven-safe skillet or Dutch oven over medium-high heat. Add your lean ground beef, breaking it apart with a spoon as it cooks. Brown the beef until no pink remains, usually about 5-7 minutes. This step is crucial for developing deep, savory flavors. Once browned, carefully drain any excess fat from the skillet. Your kitchen should already be filling with a tantalizing aroma!
- Tip: Don’t overcrowd the pan. If you’re doubling the recipe, brown the beef in two batches to ensure it browns rather than steams.
Step 2: Sauté Aromatics
Now, reduce the heat to medium. Add the chopped onion to the skillet with the browned beef. Sauté for about 3-5 minutes until the onion begins to soften and turn translucent. Next, stir in the minced garlic and cook for another minute until fragrant. This aromatic duo forms the foundational layer of flavor for our dish, so don’t rush this step!
- Tip: Keep an eye on the garlic; it can burn quickly and turn bitter. Cook just until aromatic.
Step 3: Introduce Liquids & Seasonings
Pour in the undrained diced tomatoes, tomato sauce, and beef broth. Stir in the uncooked long-grain white rice, Italian seasoning, and paprika. Season generously with salt and freshly ground black pepper. Bring the mixture to a gentle boil, stirring occasionally to prevent the rice from sticking to the bottom of the pan. The anticipation is building, isn’t it?
- Tip: Taste the sauce at this stage and adjust seasonings if needed. Remember, the rice will absorb some of the saltiness.
Step 4: Simmer & Cook the Rice
Once boiling, reduce the heat to low, cover the skillet tightly, and let it simmer for 15-18 minutes, or until the rice is tender and has absorbed most of the liquid. Avoid lifting the lid too often during this period, as it releases the steam needed to cook the rice evenly. This is where the magic happens – the rice soaks up all those fantastic flavors, becoming plump and tender.
- Tip: If your lid doesn’t fit tightly, you can place a piece of foil underneath it to create a better seal.
Step 5: Finish & Serve
Once the rice is cooked, remove the skillet from the heat. If using, sprinkle the shredded cheddar cheese evenly over the top of the dish. Cover the skillet again for 2-3 minutes, allowing the residual heat to melt the cheese into a gooey, irresistible layer. Garnish with fresh chopped parsley, if desired, for a final flourish of color and freshness. Fluff the rice gently with a fork before serving. Voila! A hearty, flavorful meal ready to be devoured.
- Tip: For an extra layer of flavor and a beautiful crust, you can pop the skillet under the broiler for 1-2 minutes after adding the cheese, watching carefully to prevent burning.
Nutritional Information
Understanding what goes into your meals helps you make informed choices. This Hearty Ground Beef & Rice Skillet is a powerhouse of essential nutrients, balancing protein, carbohydrates, and vegetables.
Based on a standard serving size (approximately 1.5 cups) for an 85/15 lean ground beef version, without optional cheese:
- Calories: ~450-500 kcal
- Protein: ~30-35g
- Total Fat: ~18-22g (Saturated Fat: ~7-9g)
- Carbohydrates: ~45-50g (Fiber: ~4-5g, Sugars: ~6-8g)
- Sodium: ~700-800mg (can be reduced by using low-sodium broth and tomato products)
This recipe provides a significant portion of your daily protein needs, essential for muscle repair and growth, according to data from trusted sources like the USDA’s FoodData Central. For more detailed insights into food composition, you can explore resources like FoodData Central. The fiber content contributes to digestive health, while the carbohydrates offer sustained energy. When compared to typical fast-food meals, this skillet offers superior nutritional value with controlled ingredients and lower levels of unhealthy fats and excessive sodium, all within a delicious package.
Healthier Alternatives for the Recipe
Looking to boost the nutritional profile or cater to specific dietary needs? This versatile skillet is incredibly adaptable!
- Leaner Protein Options: Swap out the ground beef for extra-lean ground turkey (93/7 or 99/1), ground chicken, or even plant-based Impossible or Beyond meat. This can significantly reduce saturated fat content while maintaining protein levels.
- Whole Grains: While white rice is quick, for a boost in fiber and complex carbohydrates, consider using brown rice. Be aware that brown rice will require a longer simmering time (closer to 30-35 minutes) and potentially an extra ½ cup of broth. You could also try quinoa for an even higher protein, gluten-free option.
- Veggies Galore: This dish is a perfect canvas for hidden vegetables! Stir in a cup of frozen mixed vegetables (peas, carrots, corn) during the last 5-7 minutes of simmering. For fresh options, finely diced bell peppers, zucchini, or mushrooms can be sautéed with the onions. This adds vitamins, minerals, and fiber without compromising flavor.
- Sodium Reduction: Opt for low-sodium beef broth and “no salt added” diced tomatoes and tomato sauce. You can then control the salt level with your own additions, minimizing processed sodium intake.
- Dairy-Free/Lower Fat: Skip the optional cheese entirely, or use a dairy-free shredded cheese alternative. You won’t miss out on flavor, especially with all the delicious herbs and spices.
Serving Suggestions
This Hearty Ground Beef & Rice Skillet is a complete meal on its own, but a few thoughtful additions can elevate the dining experience and balance the flavors.
- Fresh Green Salad: A crisp salad with a light vinaigrette provides a refreshing contrast to the richness of the skillet. Think mixed greens, cherry tomatoes, and cucumber.
- Steamed Green Beans or Broccoli: Simple, steamed vegetables offer a vibrant side that adds extra nutrients and a pop of color. A sprinkle of lemon juice or a dash of garlic powder can brighten them up.
- Crusty Bread: Perfect for soaking up any remaining savory sauce, especially if you appreciate every last drop of flavor. Garlic bread would also be a fantastic indulgent option!
- A Dollop of Sour Cream or Greek Yogurt: For those who enjoy a creamy counterpoint, a spoonful of sour cream or plain Greek yogurt can add a lovely tang and cool creaminess, especially good with a hint of spice.
- Pickled Jalapeños: If you enjoy a bit of heat and acidity, a few slices of pickled jalapeños can cut through the richness and add an exciting zing. This little kick can transform the dish, offering a dynamic flavor contrast that keeps each bite interesting.
Common Mistakes to Avoid
Even the simplest recipes can have pitfalls. Steer clear of these common errors to ensure your skillet meal is a resounding success!
- Not Draining Excess Fat: While some fat adds flavor, leaving too much can make the dish greasy and less appealing. Lean ground beef still releases fat, so always drain after browning. Data suggests that excess fat can also inhibit proper rice absorption, leading to a less cohesive dish.
- Lifting the Lid Too Often: The steam trapped inside the skillet is crucial for uniformly cooking the rice. Every time you peek, you release valuable heat and moisture, which can result in unevenly cooked, crunchy rice. As a general rule, resist the urge to peek for at least the first 10-12 minutes of simmering.
- Overcooking the Rice: Just like pasta, overcooked rice can become mushy. Keep an eye on the cooking time and check for tenderness towards the end. If the liquid is absorbed but the rice is still a bit firm, add a splash more broth and continue simmering for a few more minutes.
- Skipping the Seasoning Adjustments: Taste as you go! While the recipe provides guidelines, salt and pepper preferences vary widely. Adjust before simmering and again before serving to ensure the flavors are perfectly balanced for your palate.
- Using the Wrong Skillet: A heavy-bottomed, large skillet or Dutch oven is essential. Thin, lightweight pans can scorch the bottom, especially with rice, and distribute heat unevenly. A well-constructed pan ensures consistent cooking and minimal sticking.
Storing Tips for the Recipe
Delicious leftovers are a gift from your past self! Proper storage ensures your Hearty Ground Beef & Rice Skillet remains fresh, flavorful, and safe to enjoy.
- Cool Quickly: Once servings are complete, allow any remaining skillet meal to cool down to room temperature within two hours. This is crucial for food safety to prevent bacterial growth. You can spread the mixture out on a baking sheet to speed up cooling.
- Airtight Containers: Transfer the cooled skillet meal into airtight containers. This prevents air exposure, which can dry out the rice and lead to spoilage.
- Refrigeration: Store in the refrigerator for up to 3-4 days. The flavors often meld and deepen further after a day or two, making leftovers almost taste better than the original!
- Freezing for Longer Storage: This dish freezes exceptionally well! Portion the cooled meal into individual freezer-safe containers or resealable bags. Remove as much air as possible before sealing. It can be stored in the freezer for up to 3 months.
- Reheating:
- From Refrigerator: Reheat individual portions in the microwave until hot throughout, stirring occasionally. You might want to add a splash of water or broth to prevent dryness. Alternatively, reheat on the stovetop over medium-low heat, stirring frequently.
- From Freezer: Thaw overnight in the refrigerator before reheating. If reheating from frozen, it will take longer; follow microwave or stovetop instructions, adding liquid as needed.
Conclusion
And there you have it! A comprehensive guide to crafting the ultimate weeknight savior: a Hearty Ground Beef & Rice Skillet that delivers on flavor, convenience, and nourishment. We’ve journeyed from selecting the perfect ingredients and mastering quick cooking techniques to understanding its robust nutritional profile and exploring endless customization possibilities. This isn’t just about putting food on the table; it’s about harnessing culinary wisdom to create memorable meals that fit seamlessly into your life. So, cast aside the myth that delicious, wholesome meals require hours of toil. Embrace the efficiency, savor the aromas, and relish the satisfaction of a truly homemade dish. Don’t let another busy evening tempt you with less-than-stellar options.
Are you ready to transform your dinner routine? Give this Hearty Ground Beef & Rice Skillet a try this week! We’d love to hear your experiences and any creative twists you add in the comments below. What are your favorite quick weeknight meals? Share your culinary triumphs and inspire fellow home cooks!
FAQs
Q1: Can I use different types of rice for this recipe?
A1: While long-grain white rice is recommended for its quick cooking time and absorption, you can definitely experiment! Brown rice will work but requires a longer simmering time (about 30-35 minutes) and potentially an extra ½ cup of broth to fully cook. Instant rice can be stirred in at the very end and just needs to heat through and absorb residual moisture for a few minutes. Risotto-style rice, like Arborio, isn’t recommended as it requires a different cooking method.
Q2: How can I make this dish spicier?
A2: To add a kick, you have several options! You can include a pinch of red pepper flakes with the Italian seasoning, stir in a diced jalapeño or serrano pepper with the onions, or add a dash of hot sauce to the finished dish. For a smoky heat, consider a pinch of chipotle powder.
Q3: What if my rice isn’t fully cooked after 15-18 minutes?
A3: If your rice is still too firm, it likely needs more liquid or more time. Add another ¼ to ½ cup of beef broth or water, cover the skillet tightly again, and continue to simmer on low heat for an additional 5-7 minutes. Ensure your heat isn’t too high, and avoid lifting the lid too often, as steady steam is key to cooking the rice thoroughly.
Q4: Can I prepare this meal ahead of time?
A4: Absolutely! This Hearty Ground Beef & Rice Skillet is excellent for meal prep. You can cook the entire dish, let it cool completely, and then portion it into airtight containers to refrigerate for up to 3-4 days. Alternatively, you can prep the ingredients (chop the onion, mince the garlic) ahead of time, storing them separately, to streamline your cooking process on a busy night.
Q5: Is this recipe freezer-friendly?
A5: Yes, it is! This dish freezes beautifully. Once cooled, transfer individual portions into freezer-safe containers or bags and freeze for up to 3 months. Thaw overnight in the refrigerator before reheating gently on the stovetop or in the microwave, adding a splash of broth or water if needed to restore moisture.