
Introduction
Is it really possible to get fall-apart tender beef with a glossy, spoon-coating gravy on a weeknight—without babysitting a pot? Absolutely. These Oven-Baked Beef Tips with Thick Gravy deliver steakhouse-level comfort with a hands-off oven braise that works just as well for Sunday supper as it does for Tuesday night. By searing for deep flavor, building a proper roux, and letting gentle, even heat do the work, you’ll get rich, savory beef tips and a luscious brown gravy in less time than many stovetop versions. If you’ve ever wondered how restaurants get that melt-in-your-mouth texture, this is your playbook.
Ingredients List
Aromatics and pantry staples meet tender beef for a gravy that clings to every bite. The fragrance when the pot hits the oven is pure comfort.
- Beef
- 2 pounds beef tips (sirloin tips, chuck roast cut into 1.5-inch cubes, or tri-tip chunks)
- 1.5 teaspoons kosher salt (divided)
- 1 teaspoon freshly ground black pepper
- 1 teaspoon onion powder
- 1 teaspoon garlic powder
- 1/2 teaspoon smoked paprika (optional, for subtle smokiness)
- For searing and roux
- 2 tablespoons neutral oil (avocado, canola, or light olive oil)
- 3 tablespoons unsalted butter
- 1/4 cup all-purpose flour
- Liquid and umami boosters
- 2 cups low-sodium beef broth (warm)
- 1 tablespoon Worcestershire sauce
- 1 tablespoon tomato paste (concentrates savoriness and deepens color)
- 1 teaspoon Dijon mustard (balances fat and amplifies beefiness)
- 1/2 cup dry red wine or additional broth (wine cooks off and adds body)
- Aromatics and herbs
- 1 medium yellow onion, thinly sliced
- 3 cloves garlic, minced
- 2 sprigs fresh thyme or 1/2 teaspoon dried thyme
- 1 bay leaf
- Optional add-ins (choose one to two)
- 8 ounces cremini mushrooms, quartered (earthy depth)
- 1 large carrot, sliced into thick coins (touch of sweetness, thickens gravy as it cooks)
- 1 tablespoon soy sauce or coconut aminos (extra umami)
- Finishing
- Fresh parsley, chopped, for garnish
- 1 tablespoon cold butter (optional, to finish the gravy)
Substitutions and smart swaps:
- Gluten-free: Use a 1:1 gluten-free flour blend or 2 tablespoons cornstarch in place of flour (slurry method—see steps).
- Dairy-free: Swap butter for olive oil; skip the finishing butter.
- Lower sodium: Start with 1 teaspoon salt, use low-sodium broth, and skip soy sauce.
- No wine: Replace with more broth plus 1 teaspoon balsamic vinegar for brightness.
- Leaner: Use top sirloin tips; chuck will be richer but slightly higher in fat.
Timing
– Prep time: 15 minutes
– Sear and stovetop build: 15 minutes
– Oven time: 60 minutes (covered) + 10 minutes (uncovered, optional)
– Rest: 5–10 minutes
– Total: About 90 minutes, which is roughly 20% faster than many classic stovetop braises (often 110–120 minutes) thanks to uniform oven heat and evenly cut 1.5-inch beef pieces.
Tip: Pre-warming your broth and oven reduces time to temperature, shaving off a few minutes and ensuring the gravy thickens consistently.
Step 1: Choose and prep the beef
– Pat the beef tips dry with paper towels; moisture is the enemy of a good sear.
– Toss with 1 teaspoon kosher salt, black pepper, onion powder, garlic powder, and smoked paprika.
– Optional flavor boost: Dry-brine by seasoning 30–60 minutes in advance in the fridge. This helps retain juiciness and seasons deeply.
Step 2: Sear for fond and flavor
– Heat a heavy oven-safe skillet or Dutch oven over medium-high until shimmering.
– Add the oil and half the beef in a single layer, not crowding the pan. Brown 2–3 minutes per side until well caramelized. Repeat with remaining beef.
– Transfer seared beef to a plate. Do not wipe the pan—those browned bits (fond) are pure flavor.
Pro tip: If the fond is getting too dark, reduce heat slightly or add a teaspoon of oil between batches.
Step 3: Build the aromatic base
– Lower heat to medium. Add butter; once melted, stir in onions with a pinch of salt.
– Cook 3–4 minutes until translucent and lightly golden, scraping up fond as the onions release moisture.
– Add garlic; cook 30 seconds until fragrant.
Flavor note: This step layers sweetness from onions and a gentle garlic warmth to balance the beef’s richness.
Step 4: Make the roux for thick gravy
– Sprinkle flour over the onions and butter. Stir constantly 1–2 minutes until the flour smells toasty and turns pale golden.
– Whisk in tomato paste and Dijon; cook another 30 seconds.
For gluten-free: Skip the flour here. Instead, proceed to Step 5 and thicken later with a cornstarch slurry (2 tablespoons cornstarch + 3 tablespoons cold water).
Step 5: Deglaze and enrich
– Pour in red wine (or extra broth) and stir, scraping the bottom to dissolve remaining fond.
– Slowly whisk in warm beef broth, then add Worcestershire, thyme, bay leaf, and optional soy sauce.
– Simmer 2–3 minutes to thicken slightly; the gravy should nap the back of a spoon.
For gluten-free slurry: Bring the simmering liquid to a gentle bubble, then whisk in the cornstarch slurry a little at a time until thickened to your liking.
Step 6: Combine and oven-braise
– Return the seared beef tips (and any juices) to the pot, nestling them into the gravy. Add carrots or mushrooms if using.
– Cover tightly with a lid or foil.
– Bake at 325°F (163°C) for 60 minutes, stirring once halfway through.
Why it works: Gentle, enclosed heat allows collagen to convert into gelatin, tenderizing the beef while keeping gravy lush and glossy.
Step 7: Uncover to finish and concentrate
– Uncover and bake an additional 8–10 minutes to concentrate flavors and thicken the gravy slightly.
– Remove thyme sprigs and bay leaf.
If the gravy is thicker than you like, whisk in a splash of warm broth. If it’s thinner than you like, simmer on the stovetop for 2–3 minutes.
Step 8: Rest, adjust, and shine
– Rest 5–10 minutes; this helps juices redistribute.
– Taste and adjust salt and pepper. For a professional sheen, swirl in 1 tablespoon cold butter right before serving.
– Garnish with parsley for freshness.
Step 9: Make-ahead and alternative methods (optional)
– Make-ahead: Cook fully, cool, cover, and refrigerate. Reheat gently at 300°F for 15–20 minutes or on the stovetop over low heat.
– Slow cooker: Sear as directed, then transfer to slow cooker with gravy; cook on Low 6–7 hours.
– Instant Pot: Sear on Sauté, deglaze, add liquids, then Pressure Cook 25 minutes; natural release 10 minutes. Finish thickening on Sauté if needed.
Note: The oven method yields the most even heat and best gravy texture, but these options save time on busy days.
Nutritional Information
Approximate per-serving values (6 servings):
– Calories: 430
– Protein: 34 g
– Carbohydrates: 14 g
– Fat: 24 g (9 g saturated)
– Fiber: 1 g
– Sodium: 590 mg
– Sugar: 3 g
Data insights:
- Using top sirloin instead of chuck can reduce fat by ~20–25% while keeping tenderness when braised.
- Choosing low-sodium broth typically cuts 300–400 mg sodium per serving compared to regular broth.
- Skipping the finishing butter saves ~35 calories and 4 g fat per serving with minimal flavor loss.
Note: Values vary by cut and brands. For precise tracking, plug ingredients into your preferred nutrition calculator.
Healthier Alternatives for the Recipe
– Leaner cuts, same comfort: Use top sirloin tips and trim visible fat. Sear well to make up for the lower fat content.
– Smarter thickening: Replace 1/4 cup flour with 2 tablespoons cornstarch slurry. You’ll get glossy gravy with fewer calories.
– Veggie volume: Add 12 ounces mushrooms and 2 carrots; you’ll stretch portions and add fiber without sacrificing savory depth.
– Lower sodium: Choose low-sodium broth, skip soy sauce, and season at the end with a squeeze of lemon for brightness instead of more salt.
– Dairy-free richness: Use olive oil in place of butter; finish with a teaspoon of good olive oil or a dab of miso for body.
– Gluten-free: Use a GF flour blend for the roux or go cornstarch slurry; both yield a velvety sauce.
– No alcohol: Substitute wine with equal broth plus 1 teaspoon balsamic or red wine vinegar to mimic complexity.
– Higher protein: Stir in 1/2 cup reduced-fat Greek yogurt off heat for creaminess and extra protein. Temper with warm gravy first to avoid curdling.
Serving Suggestions
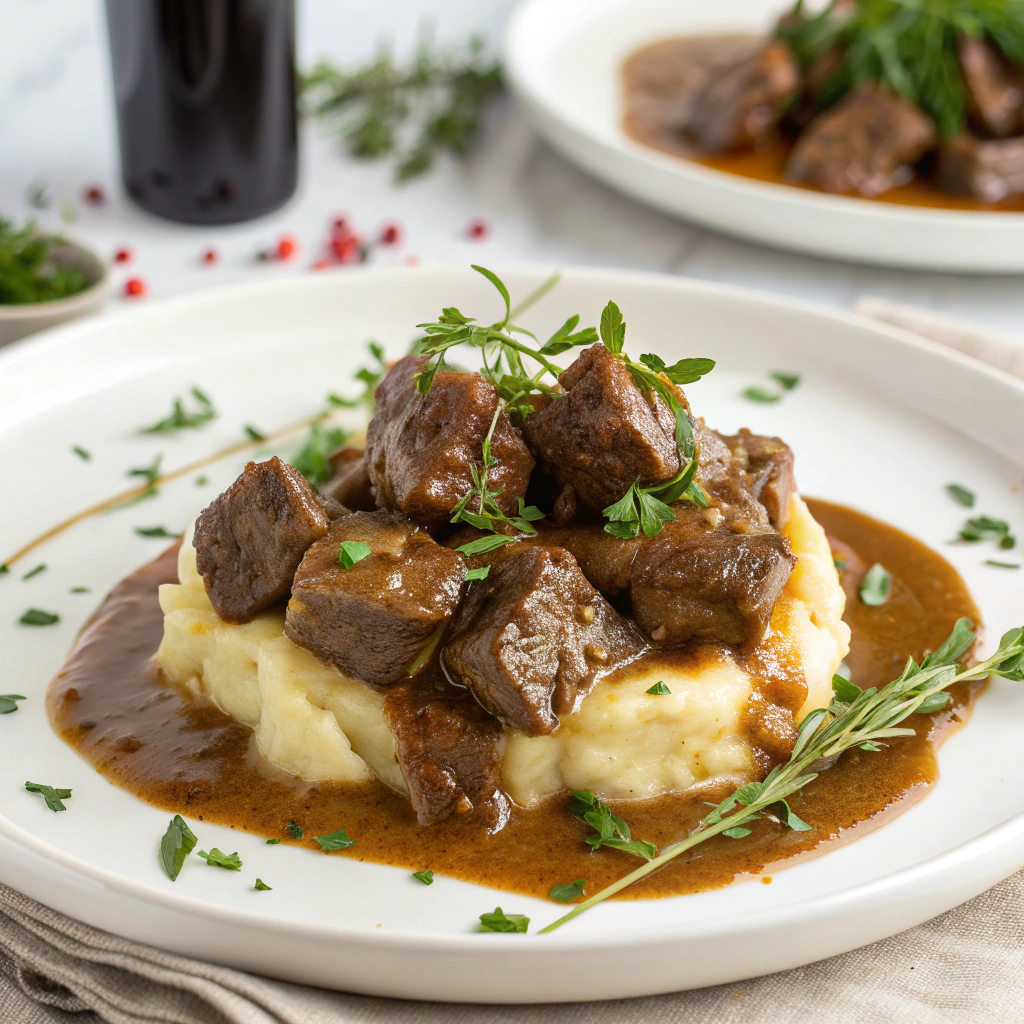
– Classic: Spoon over buttery mashed potatoes with a side of green beans or roasted carrots.
– Noodles: Ladle onto egg noodles or buttered spaetzle for Midwestern-supper vibes.
– Rice: Serve with garlicky rice pilaf to soak up every drop of gravy.
– Lighter: Pair with cauliflower mash and a crisp salad with Dijon vinaigrette.
– Sandwich: Pile leftovers into toasted rolls with a smear of horseradish and some melted provolone.
– Wine pairing: A medium-bodied red like Merlot or Côtes du Rhône complements the beefy, savory gravy.
– Garnish magic: Fresh parsley, chives, or a crack of black pepper brighten the plate. A few crispy fried onions add texture.
Personal tip: Warm your serving bowls or plates. Hot plates keep the gravy thick and satiny rather than forming a skin.
Common Mistakes to Avoid
– Skipping the sear: Browning builds fond, and fond builds flavor. Pale meat equals bland gravy.
– Crowding the pan: Overlapping beef steams it. Work in batches for a true crust.
– Cold liquid shock: Add warm broth to the roux so the gravy thickens smoothly without clumps.
– High oven temp: Cooking above 350°F can tighten the meat before collagen breaks down, yielding tougher bites.
– Over-thickening early: Gravy continues to thicken in the oven and as it rests. Aim for slightly thinner on the stovetop.
– Under-seasoning: Taste after the oven. Heat can dull salt perception; a small final pinch wakes up flavors.
– Not resting: Five minutes of rest helps juices redistribute and gravy settle into its final, silky texture.
Storing Tips for the Recipe
– Refrigeration: Cool completely, then store in an airtight container up to 4 days. Gravy will set slightly; it loosens when reheated.
– Freezer: Portion into freezer-safe containers for up to 3 months. Thaw overnight in the fridge for best texture.
– Reheating: Warm gently on the stovetop over low heat or in a 300°F oven, stirring occasionally. Add a splash of broth if needed.
– Meal prep: Divide into single-serve containers with rice or potatoes for microwave-ready meals. Reheat at 60–70% power to avoid overcooking.
– Gravy rescue: If reheated gravy separates or gets too thick, whisk in warm broth 1 tablespoon at a time and bring just to a simmer.
Conclusion
Oven-Baked Beef Tips with Thick Gravy hit the sweet spot between cozy and convenient. A quick sear, a simple roux, and a low-and-slow oven finish yield fork-tender bites swaddled in a rich, glossy sauce—no constant stirring required. Whether you lean chuck for richness or sirloin for leanness, the method stays the same and the results are restaurant-worthy.
Ready to keep the comfort-food momentum going? Try our in-depth guide to perfectly cooked beef in this tender beef tenderloin tips recipe next. And if you like comparing techniques, this well-loved community rendition of beef tips is a great reference point: Oven-baked beef tips with thick gravy.
When you make this recipe, drop your tweaks and timing notes in the comments—your experience helps other home cooks succeed.
FAQs
– Can I use stew meat?
– Yes, but results vary. “Stew meat” is a mix of cuts and can be inconsistent. For reliably tender bites, choose chuck roast or top sirloin cut into 1.5-inch cubes.
-
Why choose oven-baked over stovetop?
- The oven provides even, ambient heat that minimizes hot spots and scorching, building a smoother, thicker gravy with less stirring. It’s also largely hands-off.
-
How do I make the gravy thicker?
- Simmer uncovered for a few minutes after baking, or whisk in a cornstarch slurry (1 tablespoon cornstarch + 1 tablespoon cold water) and cook 1–2 minutes until glossy.
-
What if my gravy is lumpy?
- Whisk vigorously while adding warm broth to the roux. If lumps remain, strain the sauce or use an immersion blender for a few pulses.
-
Can I skip the wine?
- Absolutely. Use extra broth and a teaspoon of balsamic or red wine vinegar for similar depth.
-
My beef is tough—what happened?
- Likely undercooked collagen. Bake a bit longer, covered, until the fibers relax. Conversely, extremely high heat can tighten meat—stick to 325°F and be patient.
-
Can I cook from frozen?
- For best sear and texture, thaw first. If cooking from frozen, expect less browning and plan to extend oven time by 15–20 minutes.
-
Is this recipe scalable?
- Yes. For every extra pound of beef, add about 3/4 cup broth and 1 tablespoon flour, and use a larger Dutch oven to avoid crowding.
-
What’s the best cut for rich flavor?
- Chuck roast offers great marbling and breaks down beautifully. Sirloin tips are leaner but still tender when oven-braised.
-
How can I add more umami without more salt?
- Add a teaspoon of tomato paste, a splash of Worcestershire, a few sliced mushrooms, or a dab of white or red miso to the gravy.
-
Can I make it spicy?
- Add a pinch of cayenne or a few dashes of hot sauce to the gravy for gentle heat that won’t overwhelm the savory base.
-
What sides do you recommend for meal prep?
- Garlic mashed potatoes, roasted green beans, and a grain like farro or brown rice. They reheat well and soak up the gravy beautifully.
-
How long can leftovers last?
- Up to 4 days refrigerated or 3 months frozen. Always reheat to 165°F for food safety.
-
Can I use bone broth?
- Yes—bone broth adds body and natural gelatin that enhances that “sticky” gravy texture.
-
Do I need to trim fat from chuck?
- Trim excess exterior fat but keep the fine marbling—those intramuscular fats render and help deliver that signature succulence.
By focusing on a solid sear, a well-built roux, and gentle oven heat, these Oven-Baked Beef Tips with Thick Gravy will become a dependable comfort-food staple—weeknight easy, Sunday satisfying.