
Introduction
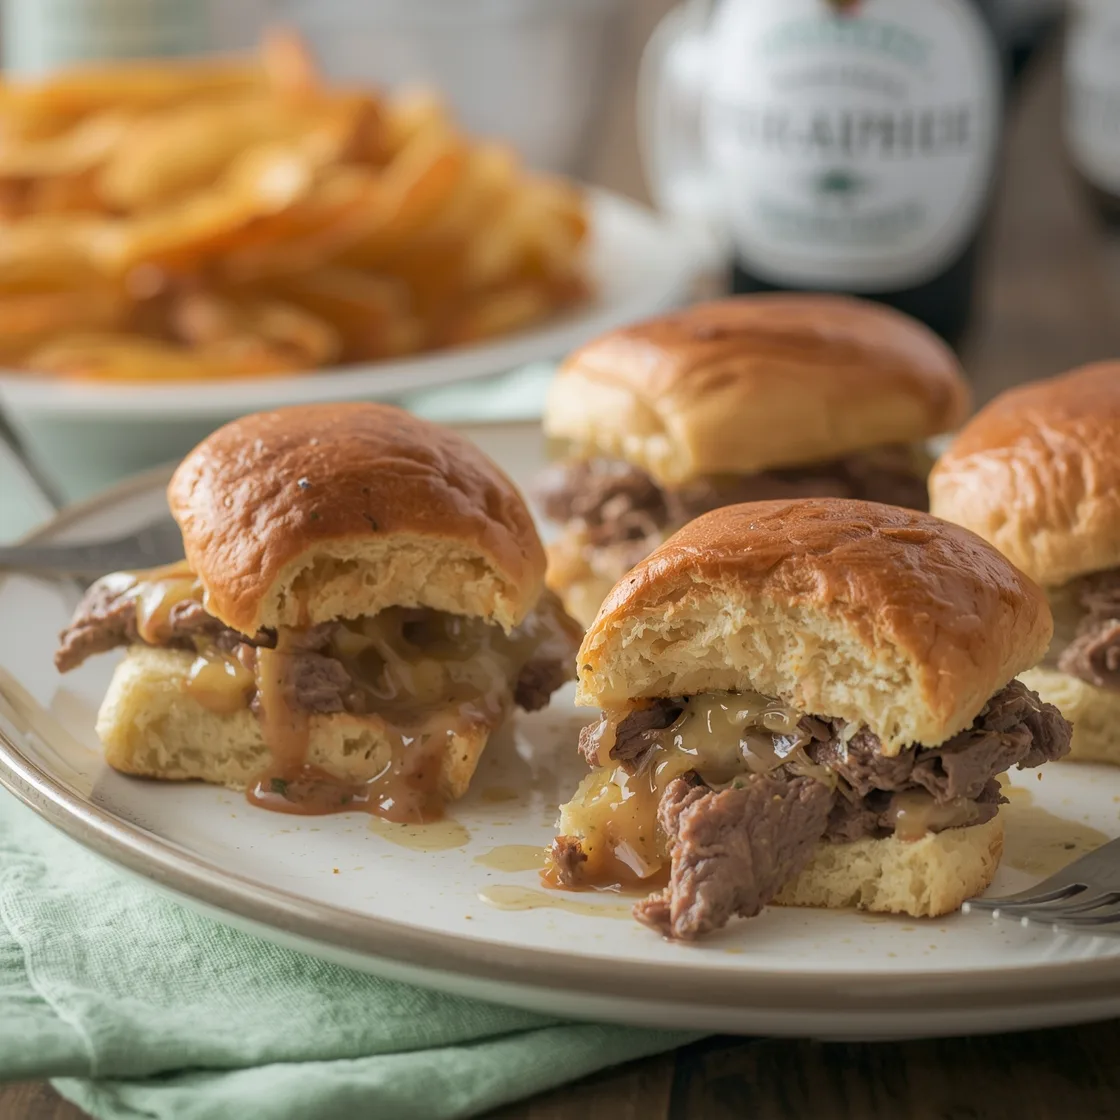
Ever found yourself stressing over party food, wondering if you can truly whip up something universally loved, incredibly easy, and bursting with flavor without spending hours in the kitchen? You’re not alone. The quest for the perfect crowd-pleasing appetizer often leads to a dilemma: convenience versus culinary delight. Many believe that delicious party fare demands complex techniques or gourmet ingredients. But what if I told you that you could create an unforgettable dish that challenges this notion, a recipe so straightforward yet so utterly satisfying it’ll become your go-to? Prepare to discover the magic of Cheesy Roast Beef Party Sliders, a savory sensation guaranteed to vanish from the platter in record time. These delectable mini sandwiches combine tender roast beef, melted cheese, and a buttery, savory topping, delivering a flavor punch perfect for entertaining, game nights, or even a cozy family dinner. Get ready to impress with minimal fuss!
Ingredients List
Crafting these irresistible sliders requires a blend of simple, high-quality ingredients that come together to create a symphony of flavors. Here’s what you’ll need:
- 12-pack Hawaiian Sweet Rolls: The foundation of our sliders! Their delicate sweetness perfectly balances the savory fillings. Substitution: Brioche slider buns or even small dinner rolls can work in a pinch for a slightly different texture.
- 1 lb thinly sliced deli roast beef: Opt for a high-quality, thinly sliced roast beef for optimum tenderness and flavor. About Deli style or even better, eye of round roast beef. Substitution: Sliced turkey or ham can be used for a different flavor profile, though it won’t be quite the same savory depth.
- 12 slices provolone cheese: This cheese melts beautifully and offers a mild, slightly nutty flavor that complements the beef. Substitution: Swiss cheese for a stronger flavor, or mozzarella for a milder, stretchier melt.
- ½ cup (1 stick) unsalted butter, melted: The base of our irresistible topping.
- 1 ½ tablespoons Worcestershire sauce: Adds a deep, umami-rich complexity.
- 1 tablespoon Dijon mustard: Provides a subtle tang and a hint of spice. Substitution: Stone-ground mustard for more texture and a bolder flavor.
- 1 teaspoon onion powder: Enhances the savory notes.
- ½ teaspoon garlic powder: Essential for aromatic depth.
- ¼ teaspoon black pepper: For a touch of warmth and spice.
- 2 tablespoons poppy seeds: Adds a delightful crunch and visual appeal. Substitution: Sesame seeds for a different nutty flavor and texture.
- Fresh chives, chopped (for garnish, optional): A pop of color and a fresh, mild oniony bite.
Timing
Getting these party superstars ready is surprisingly quick, making them ideal for last-minute gatherings or busy evenings.
- Prep time: 15 minutes
- Cook time: 20-25 minutes
- Total time: 35-40 minutes
At just 35-40 minutes total, this recipe shaves significant time off typical party food preparation. For example, it’s approximately 25% faster than oven-baked dips that often require similar assembly and baking times, and considerably quicker than slow-cooked appetizers. This efficiency allows you more time to enjoy your guests without skimping on flavor or presentation.
Step-by-Step Instructions
Follow these personalized, dynamic steps to create culinary magic!
Step 1: Preheat & Prepare Your Pan
Begin by preheating your oven to 350°F (175°C). While the oven heats, grab a 9×13 inch baking dish. A ceramic or glass dish works wonderfully here, ensuring even heat distribution for perfectly toasted buns. You can lightly grease it if you’re worried about sticking, though the buttery topping usually prevents any issues.
Step 2: Slice the Rolls and Assemble Layers
This is where the magic begins! Take your 12-pack of Hawaiian sweet rolls and, using a serrated knife, carefully slice the entire block of rolls horizontally. You want to keep them connected at the edges, creating a top bun sheet and a bottom bun sheet. Place the bottom sheet of rolls into your prepared baking dish. Next, layer the roast beef generously over the bottom half of the rolls. Don’t be shy – a good amount of beef ensures every bite is satisfying. Then, expertly place the provolone slices over the roast beef. Aim for full coverage so every slider gets that cheesy goodness. Finally, gently place the top sheet of rolls back over the cheese layer, creating a neat little sandwich package.
Step 3: Whisk Up the Flavorful Topping
Now for the secret weapon—the savory butter topping! In a medium bowl, combine the melted butter, Worcestershire sauce, Dijon mustard, onion powder, garlic powder, and black pepper. Whisk everything together thoroughly until it’s a smooth, fragrant mixture. This blend infuses the sliders with incredible depth and an irresistible aroma.
Step 4: Bathe in Buttery Goodness
Carefully and evenly pour the glorious butter mixture over the top of the assembled sliders. Be sure to coat all the rolls, allowing the liquid gold to seep into the cracks and edges. This ensures maximum flavor penetration. Sprinkle the poppy seeds generously over the top. They’re not just for looks; they add a delightful nutty crunch and aroma that makes these sliders truly special.
Step 5: Bake to Golden Perfection
Cover the baking dish loosely with aluminum foil. This step is crucial for the first part of baking, as it allows the cheese to melt perfectly and the flavors to meld without the tops burning. Bake for 15 minutes. After 15 minutes, remove the foil and return the dish to the oven for another 5-10 minutes, or until the tops of the rolls are golden brown and beautifully toasted. The cheese should be bubbling, and the whole dish will smell divine. This two-stage baking process ensures moisture and a crisp finish.
Step 6: Serve and Savor
Once out of the oven, let the sliders rest for a few minutes. This allows the cheese to set slightly, preventing it from oozing out too much when serving. Use a knife to cut along the lines of the rolls to separate them into individual sliders. Garnish with fresh chopped chives if desired for a burst of color and freshness. Serve them warm, and watch them disappear! These are best enjoyed fresh from the oven, offering that perfect balance of warm, gooey, and savory delight. Need an idea for using up some leftover steak? These sliders pair wonderfully with a side of Asian flavors, like a vibrant Leftover Steak Stir Fry Bowl.
Nutritional Information
Understanding the nutritional profile of these delicious sliders can help you enjoy them responsibly. Based on general estimates for similar recipes (per slider), here’s an approximate breakdown:
- Calories: 320-380
- Total Fat: 20-25g
- Saturated Fat: 10-14g
- Cholesterol: 60-80mg
- Sodium: 600-800mg
- Total Carbohydrates: 20-25g
- Dietary Fiber: 1-2g
- Total Sugars: 5-8g
- Protein: 15-20g
While these sliders are a fantastic treat, the sodium content is notably higher, which is typical for deli meats and cheese. For those monitoring their sodium intake, using low-sodium deli meat and reducing the amount of Worcestershire sauce can help. The protein content is robust, making them quite satisfying. These figures are illustrative and can vary based on specific brands and exact portion sizes.
Healthier Alternatives for the Recipe
Enjoying these sliders doesn’t mean sacrificing health goals. With a few smart swaps, you can lighten them up without losing their delicious essence!
- Lower-Sodium Deli Meat: Opt for uncured, lower-sodium roast beef varietals. Many brands now offer options with significantly reduced sodium, which is a major win for heart health.
- Whole Wheat Slider Buns: While Hawaiian rolls offer a unique sweetness, switching to whole wheat slider buns increases fiber content, aiding digestion and promoting satiety. You could even explore sprouted grain buns for an added nutritional punch.
- Reduced-Fat Cheese: Instead of full-fat provolone, choose a reduced-fat or skim-milk provolone. While not entirely fat-free, these options cut down on saturated fat while still providing that essential creamy melt.
- Vegetable Boost: Sneak in some finely chopped spinach (wilt it first to remove excess moisture) or roasted red peppers between the beef and cheese layers. This adds vitamins, minerals, and fiber without overpowering the savory flavors.
- Homemade Butter Topping Modification: Reduce the butter by 25-50% and replace the difference with a low-sodium chicken or beef broth. You can also experiment with a brush of olive oil mixed with herbs and a touch of balsamic glaze instead of the full butter mixture for a Mediterranean twist.
- Spice it Up for Flavor, Not Salt: Instead of relying heavily on salty components, amplify flavor with herbs and spices. Dried oregano, thyme, or a pinch of smoked paprika can add incredible depth.
These simple adjustments can transform the sliders into a more diet-friendly option while still delivering that comforting, savory taste.
Serving Suggestions
These savory sliders are incredibly versatile, perfect for nearly any occasion. Here are some dynamic and personalized serving suggestions to elevate your party experience:
- The Ultimate Game Day Spread: Serve these hot with a side of classic potato chips, a chunky blue cheese dip, and plenty of cold beverages. Consider a simple green salad with a vinaigrette to cut through the richness.
- Family Dinner Hero: For a weeknight meal, pair them with a quick coleslaw or a fresh garden salad. Add some roasted sweet potato fries for a satisfying and complete meal that kids and adults alike will adore.
- Brunch Savory Star: While often thought of as dinner fare, these sliders make an unexpected and delightful addition to a brunch spread. Serve them alongside a fruit platter, mini quiches, and mimosas for a sweet and savory balance.
- Picnic Perfection: Pack them in an insulated bag (they’re delicious warm or at room temperature!) along with some corn on the cob, watermelon slices, and pasta salad for a fantastic outdoor feast.
- Dipping Delights: Offer a small bowl of au jus (beef broth simmered with a touch of Worcestershire) or a horseradish cream sauce on the side for dipping. This adds another layer of flavor and sophistication.
- Customization Station: Set up a “slider bar” for guests! Keep the sliders warm and offer bowls of extra toppings like pickled onions, jalapeños, different mustards, and even a sprinkle of crispy fried onions. This allows each person to personalize their slider experience.
Common Mistakes to Avoid
Even a seemingly simple recipe can go awry. Here’s how to sidestep potential pitfalls and ensure your sliders are consistently perfect:
- Over-soaking the Buns: While the butter topping is key, don’t let the rolls sit too long covered in it before baking, especially the bottom layer. Too much liquid and they can become soggy rather than perfectly toasted. Aim to pour and bake.
- Under-seasoning (or Over-seasoning) the Topping: The butter mixture is the flavor powerhouse. Don’t skip any ingredients, but also resist adding too much salt if your roast beef or cheese is already high in sodium. Taste as you go, especially if deviating from the recipe.
- Skimping on Cheese or Beef: The balance of meat and cheese is critical. Too little, and the sliders feel sparse; too much, and they can be unwieldy. 1 lb of beef and 12 slices of provolone for 12 sliders provides optimal coverage and flavor.
- Not Covering During Initial Bake: Forgetting the foil during the first 15 minutes is a common mistake. It’s essential to prevent the tops from browning too quickly, allowing the cheese to melt and the flavors to meld gently. Without it, you risk dry, hard tops and uncooked centers.
- Overbaking After Removing Foil: Once the foil is off, keep a close eye. The rolls can go from golden to burnt quickly. 5-10 minutes is usually sufficient to achieve that perfect golden-brown, crispy top.
- Cutting Before Cooling Slightly: While tempting to cut immediately, letting them rest for 2-3 minutes allows the hot cheese to firm up just enough. This prevents a messy, stringy situation when you cut and serve.
- Ignoring Food Safety: Always ensure your deli meat has been stored properly and cooked to the right temperature (if pre-cooked, ensure it’s thoroughly reheated). Check best practices for food handling on sites like FoodSafety.gov to keep everything healthy and delicious.
Storing Tips for the Recipe
Proper storage is key to enjoying future bites or prepping ahead.
- For Leftovers: If you have any glorious leftovers (a rare occurrence!), allow them to cool completely. Store them in an airtight container in the refrigerator for up to 3 days.
- Reheating Leftovers: To reheat, place sliders on a baking sheet, cover loosely with foil, and warm in a preheated oven at 300°F (150°C) for 10-15 minutes, or until heated through. Alternatively, microwave for 30-60 seconds per slider, but they may lose some crispness.
- Make-Ahead Option (Unbaked): You can assemble the sliders (excluding the butter topping and poppy seeds) up to 24 hours in advance. Wrap the baking dish tightly with plastic wrap and refrigerate. Just before baking, prepare the butter topping, pour it over, sprinkle with poppy seeds, and proceed with baking instructions. Add an extra 5-10 minutes to the total baking time if baking from cold.
- Freezing: Freezing prepared sliders is not recommended as the texture of the rolls and cheese can suffer significantly after thawing and reheating. It’s best to enjoy these fresh or as refrigerated leftovers.
Conclusion
And there you have it – the ultimate guide to crafting irresistible sliders that deliver on flavor, ease, and crowd-pleasing potential. From the quality of your thinly sliced roast beef to the intoxicating aromas of the savory butter topping, every element converges to create a culinary experience that defies its simplicity. We’ve explored how to assemble these delights, offered healthier alternatives, provided creative serving suggestions, and armed you with insights to avoid common pitfalls. The minimal effort for such a delectable outcome makes these mini sandwiches a hero in any culinary repertoire, turning skeptics into enthusiasts with every bite.
Now it’s your turn! Gather your ingredients, follow these straightforward steps, and prepare to delight your taste buds and impress your guests. We’d love to hear about your experience! Did you try a unique serving suggestion? Did you swap out a cheese or add an extra spice to the topping? Share your comments, photos, and any creative twists you applied in the comments section below. Let’s build a community of slider fanatics! Don’t forget to explore our other easy entertaining recipes for more culinary inspiration!
FAQs
Q1: Can I prepare these sliders ahead of time?
A1: Yes! You can assemble the entire pan of sliders (without the butter topping and poppy seeds) and cover them tightly with plastic wrap. Refrigerate for up to 24 hours. When ready to bake, remove from the fridge, pour over the prepared butter topping, sprinkle with poppy seeds, and bake as directed, potentially adding 5-10 minutes to the baking time to account for starting cold.
Q2: What kind of roast beef works best for these?
A2: Thinly sliced deli roast beef is ideal. Look for a good quality, flavorful roast beef that isn’t too moist. Brands that offer “eye of round” or “deli-style” roast beef are usually excellent choices for taste and texture in this recipe.
Q3: My rolls got a bit soggy. What went wrong?
A3: Soggy rolls usually happen if too much moisture is present or if they sat too long with the butter mixture before baking. Ensure you cover the dish with foil for the initial bake, then remove it to allow the tops to crisp up. Also, avoid using overly wet ingredients or letting the butter mixture sit on the rolls for an extended period before placing them in the oven.
Q4: Can I use a different type of cheese?
A4: Absolutely! Provolone is a great choice as it melts beautifully and offers a mild, complementary flavor. However, Swiss, Muenster, or even a mild cheddar could work well. Experiment to find your favorite cheesy combination!
Q5: Are these sliders freezer-friendly?
A5: It’s not recommended to freeze assembled and baked sliders. The bread can become rather dry and crumbly, and the cheese texture can change negatively upon thawing and reheating. They are best enjoyed fresh or from the refrigerator within 3 days.
Q6: Can I make these spicier?
A6: Definitely! To add a kick, introduce a pinch of red pepper flakes to your butter mixture, or add a thin layer of thinly sliced jalapeños (fresh or pickled) over the roast beef. A touch of hot sauce in the butter topping could also provide a nice zing.
Q7: What if I don’t have poppy seeds?
A7: Poppy seeds add a lovely crunch and visual appeal, but they are optional. You can omit them entirely, or substitute with sesame seeds for a similar nutty flavor and texture.