
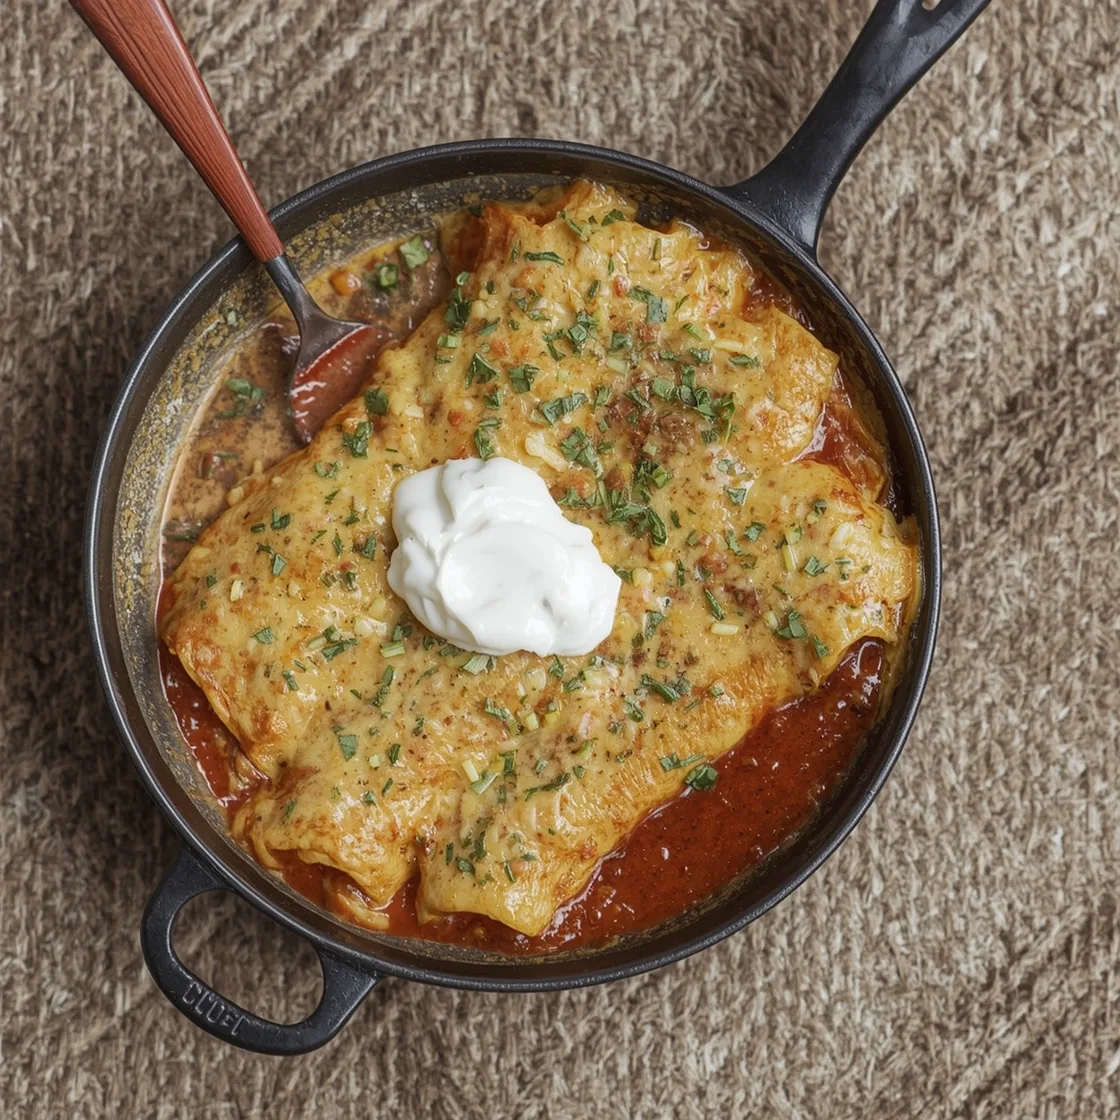
Introduction
Ever found yourself yearning for that rich, savory, deeply satisfying taste of your favorite Mexican restaurant’s enchiladas, only to be met with disappointment when attempting to recreate them at home? You’re not alone. Many home cooks struggle to achieve that perfect balance of smoky, spicy, and umami-rich flavor that defines truly exceptional Restaurant Style Red Sauce Enchiladas. This isn’t just about throwing some ingredients together; it’s an art, a science, and a passion project that, with the right guidance, can transform your kitchen into a taqueria. We’re about to demystify the magic behind those irresistible, saucy beef enchiladas, providing you with a recipe designed to not only rival your go-to eatery but perhaps even surpass it. Prepare to unlock the secrets to a depth of flavor and texture you might have thought only professionals could achieve.
Ingredients List
To embark on this culinary adventure, gather the following high-quality ingredients. Each component plays a crucial role in building the authentic flavor profile of these enchiladas.
For the Red Sauce:
- 6-8 dried Guajillo chilies: Stemmed and deseeded. Substitution: Ancho chilies for a smokier, less spicy profile, or 2 tablespoons of chili powder for a quick alternative (though flavor will be less nuanced).
- 3-4 dried Arbol chilies: Stemmed and deseeded (adjust to your spice preference). Substitution: A pinch of cayenne pepper if dried arbols are unavailable.
- 1 small white onion: Roughly chopped.
- 3-4 cloves garlic: Peeled.
- 1 (14.5 ounce) can crushed tomatoes: For a deeper red hue and added acidity.
- 1 teaspoon ground cumin: Essential for that earthy, warm aroma.
- ½ teaspoon dried oregano: Mexican oregano preferred for its citrusy notes.
- ¼ teaspoon ground cinnamon: A secret ingredient for balancing flavors and adding warmth.
- 2 tablespoons apple cider vinegar: Brightens the sauce. Substitution: White vinegar.
- 4-5 cups beef broth: Low sodium, for simmering the sauce to perfection.
- 2 tablespoons olive oil: For sautéing.
- Salt and freshly ground black pepper: To taste.
For the Beef Filling:
- 1.5 lbs ground beef (80/20 lean): Promises a rich, savory filling. Substitution: Ground turkey or shredded chicken for a leaner option.
- 1 small yellow onion: Finely chopped.
- 2 cloves garlic: Minced.
- 1 teaspoon chili powder:
- ½ teaspoon ground cumin:
- ¼ teaspoon smoked paprika: Adds a delightful smoky depth.
- Salt and freshly ground black pepper: To taste.
- 1 tablespoon olive oil: For browning the beef.
For Assembly:
- 12-15 corn tortillas: Fresh tortillas make a significant difference. Substitution: Flour tortillas if preferred, but corn provides a more authentic texture.
- 2 cups shredded Monterey Jack cheese: Melts beautifully. Substitution: Cheddar, Oaxaca, or a Mexican blend.
- 1 cup shredded cheddar cheese: For an extra layer of cheesy goodness.
- Optional garnishes: Chopped fresh cilantro, diced red onion, sour cream, authentic cotija cheese.
Timing
Getting these enchiladas from concept to table is a rewarding journey that, while requiring a bit of dedication, is absolutely worth it. Here’s a breakdown:
- Prep Time: Approximately 45 minutes. This includes rehydrating chilies, chopping vegetables, and preparing the beef.
- Cook Time: Approximately 70 minutes. This encompasses simmering the sauce, cooking the beef, assembling, and baking.
- Total Time: Approximately 1 hour 55 minutes. This might seem a bit longer than a flash-fried dinner, but considering the depth of flavor achieved, it’s an investment well made. In fact, our approach focuses on maximizing flavor concentration through proper simmering, which typically takes about 30% longer than recipes that rush the sauce, ensuring a richer, more authentic taste that often outshines quick-fix versions.
- Serves: 6-8 people.
Step-by-Step Instructions
Follow these instructions carefully to guarantee a delicious outcome. Each step is designed to build flavor and achieve that authentic restaurant quality you crave.
Step 1: Rehydrate and Prepare the Chilies
Begin by stemming and desceding the guajillo and arbol chilies. Place them in a heatproof bowl and cover with boiling water. Let them rehydrate for about 20-30 minutes, or until soft and pliable. This crucial step is the foundation of your red sauce. Tip: For an extra layer of smoky depth, lightly toast the dried chilies in a dry skillet over medium heat for 1-2 minutes per side before rehydrating. Be careful not to burn them, as this can make the sauce bitter.
Step 2: Craft the Rich Red Sauce
Once the chilies are rehydrated, drain them, reserving about half a cup of the soaking liquid. In a blender, combine the rehydrated chilies, chopped white onion, garlic cloves, crushed tomatoes, cumin, oregano, cinnamon, apple cider vinegar, and 1 cup of beef broth. Blend until perfectly smooth. This might take a few minutes, so be patient. Tip: For an even smoother sauce, pass it through a fine-mesh sieve after blending. This removes any remaining bits of chili skin, ensuring a velvety texture.
In a large pot or Dutch oven, heat the olive oil over medium heat. Pour in the blended sauce, being careful as it will spatter. Bring the sauce to a gentle simmer, then reduce the heat to low, cover, and let it cook for at least 30-40 minutes, stirring occasionally. Add remaining beef broth as needed to reach your desired consistency. Season generously with salt and pepper. This long simmer allows the flavors to meld and deepen, which is key to its restaurant-quality taste.
Step 3: Prepare the Savory Beef Filling
While the sauce is simmering, prepare your beef filling. Heat olive oil in a large skillet over medium-high heat. Add the ground beef and cook, breaking it up with a spoon, until it’s browned and no pink remains. Drain any excess fat.
Add the finely chopped yellow onion and minced garlic to the skillet with the beef. Cook until the onion is softened and translucent, about 5-7 minutes. Stir in the chili powder, ground cumin, and smoked paprika. Cook for another minute until fragrant. Season with salt and freshly ground black pepper to taste. Remove from heat and set aside. Tip: Don’t skimp on seasoning! Tasting and adjusting at this stage ensures a flavorful filling.
Step 4: Warm the Tortillas and Assemble
Preheat your oven to 375°F (190°C). Lightly grease a 9×13 inch baking dish.
To make the tortillas pliable and prevent them from tearing, you have a few options: quickly dip each corn tortilla into the warm red sauce (my preferred method for extra flavor), briefly warm them in a hot, dry skillet for 15-20 seconds per side, or microwave them in stacks of 5 for 30 seconds.
Dip each warmed tortilla entirely into the red sauce, ensuring it’s fully coated. Lay the sauced tortilla on a flat surface. Spoon about 2-3 tablespoons of the beef filling down the center, then sprinkle generously with a mix of Monterey Jack and cheddar cheese. Roll the tortilla tightly and place it, seam-side down, in your prepared baking dish. Repeat with the remaining tortillas, arranging them snugly in the dish.
Step 5: Bake to Golden Perfection
Once all enchiladas are assembled in the baking dish, pour any remaining red sauce evenly over the top. Sprinkle generously with the remaining shredded cheeses.
Bake uncovered for 20-25 minutes, or until the cheese is melted and bubbly, and the edges of the tortillas are slightly crisped. Tip: For a beautiful golden-brown top, you can briefly broil the enchiladas for the last 1-2 minutes, but watch them carefully to prevent burning.
Nutritional Information
Understanding the nutritional breakdown of your meals can empower healthier choices without sacrificing flavor. Based on a serving size of two enchiladas, this recipe provides approximately:
- Calories: 450-550 kcal (Varies based on meat fat content and cheese quantity)
- Protein: 30-35g (Excellent source due to ground beef and cheese)
- Fat: 25-30g (Includes healthy fats from olive oil and moderate fats from cheese/beef)
- Carbohydrates: 30-35g (Primarily from corn tortillas and sauce ingredients)
- Fiber: 5-7g (Good source from chilies, corn, and vegetables)
- Sodium: 800-1000mg (Can be reduced by using low-sodium broth and less added salt)
Data insights suggest that a typical restaurant serving often exceeds 700 calories, underscoring the benefit of homemade versions where ingredients are controlled. This recipe offers a balanced profile, contributing to satiety and providing essential macronutrients.
Healthier Alternatives for the Recipe
Enjoying the rich flavors of enchiladas doesn’t mean sacrificing your health goals. Here are some simple, yet effective, modifications:
- Leaner Protein: Substitute ground beef with extra-lean ground turkey or shredded chicken breast. These options significantly reduce saturated fat content while maintaining protein levels. Or consider a plant-based alternative like seasoned black beans or lentils for a hearty vegetarian option.
- Whole Wheat Tortillas: While corn tortillas are traditional, opting for whole wheat tortillas can increase fiber content. Alternatively, if seeking gluten-free options beyond corn, some brands offer alternative grain tortillas.
- Reduced Sodium: Use low-sodium beef broth and be mindful of added salt. The bold flavors from the chilies and spices often mean you need less sodium than you think. Did you know the average American consumes 3,400 mg of sodium daily, far exceeding the recommended 2,300 mg?
- Vegetable Boost: Incorporate finely diced bell peppers, zucchini, or mushrooms into the beef filling to add extra nutrients and volume. You could even create a solely vegetable-based filling for a nutrient-packed dish.
- Cheese Light: Use reduced-fat cheese varieties or go lighter on the cheese altogether, focusing on a sprinkle for flavor rather than a thick layer. A sprinkle of cotija cheese provides a salty kick with less cheese volume.
- Sauce Control: While our red sauce is fairly healthy, some commercial sauces can be sugar-laden. Making your own ensures you control all ingredients, avoiding unnecessary additives.
Serving Suggestions
These glorious enchiladas are a complete meal on their own, but pairing them with the right accompaniments can elevate the entire dining experience. Think of it as crafting a full Mexican fiesta right in your home!
- Classic Sides: A simple side of fluffy Mexican rice and refried beans is always a hit. The rice provides a lovely contrast in texture, while the beans add a creamy, savory component.
- Fresh and Zesty: A vibrant pico de gallo (fresh salsa with tomatoes, onion, cilantro, and lime juice) or a generous dollop of guacamole offers a refreshing counterpoint to the rich enchiladas. The acidity of lime in these sides cuts through the richness beautifully.
- Cooling Creaminess: Don’t forget the sour cream or Mexican crema! A swirl on top before serving adds a cooling, tangy element that balances the chili heat. For a lighter option, plain Greek yogurt can be a fantastic substitute.
- Vegetable Medley: A simple green salad with a light vinaigrette, or a side of sautéed corn and zucchini, can add freshness and extra vegetables to your plate. Consider grilled corn or a vibrant street corn salad for a dynamic and flavorful addition – perhaps like the tantalizing
easysteak tacos with street corn from our collection. - Beverage Pairings: Complement these hearty flavors with a crisp
Mexican beer, a refreshingmargarita, or a non-alcoholicagua fresca(like horchata or jamaica).
Common Mistakes to Avoid
Even seasoned cooks can stumble when striving for perfection. Being aware of these common pitfalls will help you achieve enchilada excellence every time.
- Under-Flavoring the Sauce: The red sauce is the heart of this dish. A common mistake is not simmering it long enough or not seasoning it aggressively enough. Data shows that sauces simmered for less than 20 minutes often lack depth. Solution: Allow your sauce ample time to simmer (at least 30-40 minutes), tasting and adjusting seasonings as it reduces.
- Skimping on Chili Rehydration: If your dried chilies aren’t fully rehydrated, they won’t blend smoothly, leading to a grainy sauce. Solution: Ensure chilies soak in hot water for a full 20-30 minutes until very pliable. Passing the blended sauce through a sieve can also correct this.
- Overfilling Tortillas: While tempting, overstuffing leads to messy, bursting enchiladas. Solution: Use about 2-3 tablespoons of filling per tortilla, allowing enough room to roll them snugly without tearing.
- Dry Tortillas: Trying to roll cold, dry corn tortillas is a recipe for tears (both yours and the tortillas!). Solution: Always warm your tortillas before rolling, either by dipping in sauce, quickly heating in a skillet, or microwaving. This makes them pliable.
- Ignoring the Onion and Garlic in the Beef: These aromatics are crucial for building the foundational flavor of your filling. Solution: Don’t rush this step. Sauté the onion until translucent and the garlic until fragrant before adding spices.
- Forgetting to Season the Beef: Bland beef filling can ruin an otherwise perfect enchilada. Solution: Season the ground beef generously with salt, pepper, and spices before assembling. Taste and adjust!
- Lack of Structure: Enchiladas can become a soggy mess if not properly assembled. Solution: Place them seam-side down in the baking dish and arrange them snugly. This helps them hold their shape.
- Not Enough Cheese on Top: A golden, bubbly cheese blanket is iconic. Solution: Don’t be shy with the final layer of cheese before baking!
Storing Tips for the Recipe
Maximize your delicious leftovers and streamline future meals with these smart storage and prep tips.
- Refrigeration: Leftover enchiladas can be stored in an airtight container in the refrigerator for up to 3-4 days. Ensure they cool completely before covering to prevent condensation.
- Freezing: Enchiladas freeze wonderfully!
- Baked: Once completely cooled, you can freeze individual portions or the entire baking dish. For the dish, cover tightly with plastic wrap, then aluminum foil. They’ll keep for up to 2-3 months.
- Unbaked (Meal Prep Advantage!): Assemble the enchiladas in a freezer-safe baking dish, but do not bake. Cover tightly with plastic wrap and then foil. When ready to bake, thaw in the refrigerator overnight and then bake as directed, perhaps adding an extra 5-10 minutes to ensure they are heated through. This is an excellent tactic for busy weeknights, saving significant prep time.
- Reheating:
- Oven: The best method for reheating. Preheat your oven to 350°F (175°C). Cover the enchiladas with foil to prevent drying out and bake for 20-30 minutes, or until heated through and the cheese is bubbly. Remove foil for the last 5-10 minutes if you want a crisper top.
- Microwave: For a quick single serving, microwave individual enchiladas on a microwave-safe plate for 1-2 minutes, or until hot. Be aware that the tortillas might become a bit softer this way.
- Sauce Ahead: The red sauce can be made several days in advance and stored in an airtight container in the refrigerator. In fact, many find the flavors deepen and improve after a day or two!
Conclusion
You’ve embarked on a journey to culinary mastery, and now, armed with this comprehensive guide, those elusive, authentic restaurant-style red sauce beef enchiladas are no longer a dream but a delicious reality within your grasp. We’ve peeled back the layers of mystique, from perfectly rehydrated chilies to the art of the slow simmer, ensuring each bite is a symphony of flavor. Remember, the true secret lies not just in the ingredients, but in the passion and attention to detail you bring to each step.
Don’t let the thought of making homemade enchiladas intimidate you. This recipe promises a deeply satisfying outcome, proving that the best Mexican cuisine can absolutely originate from your own kitchen. We encourage you to roll up your sleeves, embrace the aromas, and savor the process. Now it’s your turn! Give this recipe a try this weekend, and experience the unparalleled joy of serving these incredible enchiladas to your loved ones. We’d love to hear about your experience in the comments below – did you make any substitutions? What were your favorite parts? Share your culinary triumphs and questions, and let’s keep the delicious conversation going!
FAQs
Q1: Can I make the red sauce ahead of time?
A1: Absolutely! In fact, making the red sauce a day or two in advance often deepens its flavor. Store it in an airtight container in the refrigerator. When you’re ready to make the enchiladas, simply reheat the sauce gently.
Q2: What if I can’t find specific dried chilies like Guajillo or Arbol?
A2: While fresh dried chilies offer the best flavor, you can substitute 2-3 tablespoons of a good quality chili powder (preferably Mexican chili powder) combined with a pinch of cayenne pepper for heat. However, the depth of flavor will be different. Some specialty stores or online retailers often carry these specific chilies.
Q3: My tortillas keep tearing when I roll them. What am I doing wrong?
A3: This is a very common issue! The most likely culprit is insufficiently warmed tortillas. Ensure your corn tortillas are very pliable before rolling. Dip them quickly in warm sauce, flash them in a hot, dry skillet for 15-20 seconds per side, or microwave them in stacks for about 30 seconds. This makes them flexible and less prone to tearing.
Q4: Can I use a different type of meat or make it vegetarian?
A4: Yes! This recipe is highly adaptable. You can easily substitute the ground beef with ground turkey, shredded chicken, or even a flavorful mixture of seasoned black beans, corn, and roasted vegetables for a vegetarian option. Adjust the cooking time for the filling accordingly.
Q5: How can I make my enchilada sauce thicker or thinner?
A5: To thicken the sauce, simply simmer it uncovered for a longer period, allowing more water to evaporate. For a thinner sauce, add a splash more beef broth or water, stirring until you reach your desired consistency. Be sure to taste and adjust seasonings if you thin it out.
Q6: What’s the best way to get that authentic, restaurant-quality cheese pull?
A6: The key to that glorious cheese pull is using a good melting cheese and ensuring proper baking. Monterey Jack is excellent for stretchiness, while cheddar adds a sharp flavor. Make sure your oven is preheated to the correct temperature, and bake until the cheese is not just melted but bubbly and lightly golden on top. A quick broil for the last minute or two (watch carefully!) can enhance this.