
Introduction
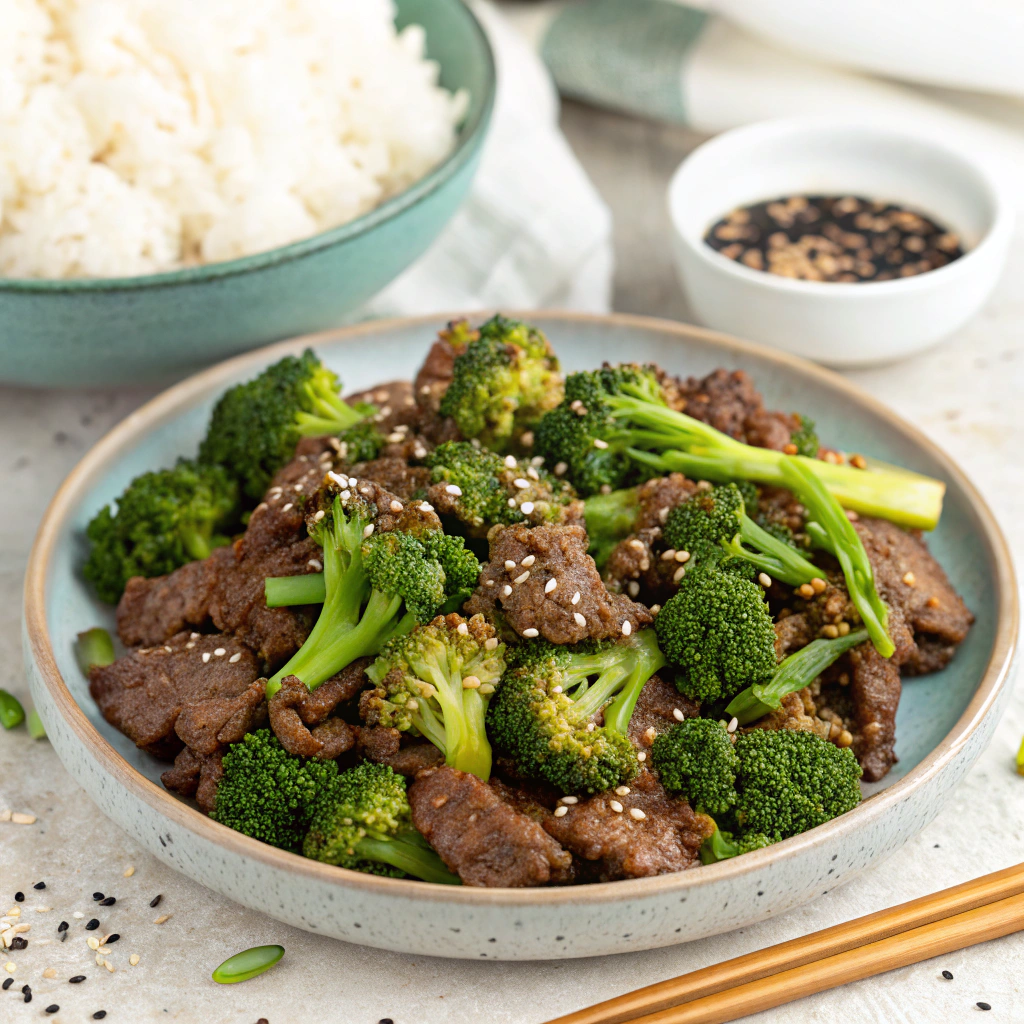
Craving that glossy, sweet-savory sauce you get from your favorite takeout spot—but in less time and with better ingredients? This Mongolian Ground Beef with Broccoli hits those big flavors without the price tag or long wait. In my kitchen, fast doesn’t mean bland: this stir-fry leans on ginger, garlic, and a caramelized soy glaze to wrap every bite in deep flavor. And yes, we’re using ground beef instead of flank steak to keep things budget-friendly, weeknight-easy, and incredibly tender. Ready to find out why this is better than takeout?
Ingredients List
Think crunchy-tender broccoli, fragrant aromatics, and a glossy Mongolian-style sauce. Here’s what you need:
- Ground beef: 1 lb (450 g), 90/10 lean if possible for rich flavor without excess grease. Substitution: ground turkey or chicken for a lighter profile; plant-based “beef” crumbles for a vegetarian twist.
- Broccoli: 4 cups small florets (about 2 medium heads)—fresh delivers the best texture. Frozen works, just thaw and pat dry to avoid watering down the sauce.
- Neutral oil: 1 tablespoon (avocado, canola, or grapeseed) for high-heat sautéing.
- Garlic: 4 cloves, finely minced.
- Fresh ginger: 1 tablespoon, finely grated.
- Green onions: 3–4, thinly sliced; separate whites and greens.
- Toasted sesame oil: 1–2 teaspoons for a nutty finish.
For the Mongolian-style sauce:
- Low-sodium soy sauce: 1/2 cup (use tamari for gluten-free, coconut aminos for a mellower, slightly sweeter option).
- Beef broth or water: 1/2 cup (broth adds depth; water is fine).
- Brown sugar: 1/3 cup, packed (swap with coconut sugar for a caramel note, or use a 1:1 monk fruit/brown sugar blend for reduced sugar).
- Hoisin sauce: 2 tablespoons (optional but recommended for body and umami; use gluten-free hoisin if needed).
- Rice vinegar: 1–2 teaspoons for brightness.
- Red pepper flakes: 1/4–1/2 teaspoon or 1 teaspoon chili-garlic sauce for heat, to taste.
- Black pepper: 1/4 teaspoon, freshly ground.
- Cornstarch: 1 tablespoon, dissolved in 2 tablespoons cold water (slurry to thicken).
Garnishes and serving:
- Sesame seeds
- Additional green onion tops
- Steamed jasmine rice, brown rice, noodles, or cauliflower rice
Chef’s notes for swaps and flavor:
- Soy sauce intensity varies. If using regular (not low-sodium), reduce to 6 tablespoons and add 2 tablespoons water to balance salinity.
- Coconut aminos are sweeter and less salty—reduce brown sugar to 2 tablespoons if using them.
- For extra vegetables, add thinly sliced bell peppers, snap peas, or carrots when sautéing the aromatics.
Timing
- Prep time: 10 minutes (chopping aromatics, whisking sauce)
- Cook time: 12–15 minutes (beef browning, broccoli tendering, sauce glazing)
- Total time: 22–25 minutes
Compared to typical beef-and-broccoli recipes that average around 30 minutes, this version shaves off roughly 15–25% of the time thanks to quick-cooking ground beef and a no-marinate sauce.
Step-by-Step Instructions
Step 1: Whisk the sauce
In a bowl, whisk soy sauce, broth, brown sugar, hoisin, rice vinegar, red pepper flakes, and black pepper. In a separate small cup, mix cornstarch with cold water to make a slurry. Keep both nearby. Tip: Dissolving sugar first (before cornstarch goes in) prevents gritty sauce.
Step 2: Prep the produce
Cut broccoli into small, bite-size florets for quick, even cooking. Slice green onions, separating whites from greens. Mince the garlic and grate the ginger. Tip: Use the back of a spoon to peel ginger quickly and minimize waste.
Step 3: Pre-tender the broccoli
Steam or microwave broccoli until crisp-tender (about 1–2 minutes in the microwave with a splash of water, covered). This jump-start ensures the broccoli stays vibrant and never soggy when tossed in the sauce later.
Step 4: Brown the beef for flavor
Heat a large skillet or wok over medium-high heat. Add the oil, then the ground beef. Season lightly with black pepper. Cook, breaking up into small crumbles, until browned with caramelized edges (5–6 minutes). Drain or blot away excess fat, leaving about 1 teaspoon in the pan. Tip: Don’t over-stir. Allow a minute of undisturbed searing at the start to develop flavorful browning.
Step 5: Bloom the aromatics
Push beef to the sides, leaving a small well. Add garlic, ginger, and the white parts of the green onions to the center. Stir 30–45 seconds until fragrant (not browned). Tip: Turn heat down slightly if the garlic threatens to scorch.
Step 6: Deglaze and thicken
Pour the sauce into the skillet, scraping up any browned bits. Bring to a lively simmer for 1 minute, then stir in the cornstarch slurry. The sauce will turn glossy and cling to the beef in 30–60 seconds. Tip: If it thickens too much, splash in 1–2 tablespoons water to loosen.
Step 7: Add broccoli and finish
Fold the crisp-tender broccoli into the saucy beef. Drizzle in sesame oil and toss to coat. Taste and adjust: add a dash more vinegar for brightness, a pinch of sugar for balance, or a sprinkle of red pepper for heat. Tip: Finish with green onion tops off heat to preserve their fresh bite.
Step 8: Serve like a pro
Spoon over steamed rice or noodles and shower with sesame seeds and extra green onions. For lower-carb, choose cauliflower rice or make lettuce-cup bowls. Tip: Warm bowls before plating—the glossy sauce stays silkier longer.
Nutritional Information
Approximate per serving (4 servings, without rice):
- Calories: 360–410
- Protein: 23–26 g
- Fat: 10–13 g
- Carbohydrates: 30–36 g
- Fiber: 3–5 g
- Added sugar: ~12–16 g
- Sodium: 750–950 mg (using low-sodium soy sauce)
Notes:
- Most sodium comes from soy sauce and hoisin; using low-sodium options can cut up to 30–40% sodium versus regular.
- Swapping part of the brown sugar for monk fruit or allulose can reduce added sugar by 30–50% while keeping that signature Mongolian sheen.
Healthier Alternatives for the Recipe
- Lower sodium: Use low-sodium soy (or tamari), reduce soy to 6 tablespoons, and add more broth. Add a squeeze of lemon or extra rice vinegar to keep flavor vivid without extra salt.
- Reduced sugar: Cut brown sugar to 2 tablespoons or use a 50/50 blend of brown sugar and monk fruit. A teaspoon of blackstrap molasses adds depth without a big sugar bump.
- Gluten-free: Use tamari and a certified gluten-free hoisin. Cornstarch is naturally gluten-free.
- Low-carb/keto: Replace brown sugar with a 1:1 brown sugar–style erythritol or allulose and thicken with a half-measure of xanthan gum (about 1/8 teaspoon) instead of cornstarch.
- Dairy-free and nut-free: This recipe is naturally both; just confirm hoisin and other condiments to avoid cross-contact according to your needs.
- More veggies, same sauce: Add snap peas, mushrooms, or shredded cabbage. Keep the total vegetable volume to about 5–6 cups so the sauce still coats luxuriously.
- Leaner protein: Ground turkey (93% lean) or ground chicken works beautifully; add 1 teaspoon oil when sautéing to prevent dryness.
Serving Suggestions
- Classic comfort: Serve over hot jasmine or basmati rice. The grain’s delicate fragrance pairs beautifully with ginger and garlic.
- Noodle night: Toss with lo mein, udon, or even rice noodles—add a splash of hot water to keep the sauce fluid.
- Low-carb bowls: Spoon onto cauliflower rice or a bed of shredded cabbage stir-fried with garlic and sesame oil.
- Lettuce cups: Spoon into butter lettuce leaves for crunchy, handheld wraps. Craving more lettuce wrap ideas? Try these flavor-packed ground beef lettuce wraps with peanut sauce for your next meal prep.
- Quick sides: Pair with a smashed cucumber salad, miso soup, or roasted edamame for protein and texture contrast.
- Finishing touches: Toasted sesame seeds, extra green onion, a drizzle of chili crisp, or a few dashes of toasted sesame oil make the dish pop.
Common Mistakes to Avoid
- Overcrowding the pan: Crowding traps steam and prevents browning. Use a wide skillet or cook in two batches for richly caramelized beef.
- Skipping the pre-tender broccoli step: Adding raw, large florets directly to sauce can lead to uneven doneness and a watery pan. Pre-steam or microwave briefly for crisp-tender results.
- Burnt garlic = bitter sauce: Add aromatics after browning and reduce heat slightly. Burnt garlic can overpower the delicate sweet-savory profile.
- Over-thickening the sauce: Cornstarch works fast. Add the slurry gradually and simmer 30–60 seconds; it will continue to thicken off heat.
- Using regular soy sauce without adjustments: If not using low-sodium soy, reduce quantity and boost broth to avoid an overly salty dish.
- Not draining excess fat: If your beef renders a lot of fat, blot or spoon off the excess. Too much fat dulls the sauce’s flavor.
- Neglecting balance: Mongolian sauce is all about sweet, salty, and tangy harmony. Taste at the end—add a splash of vinegar for brightness or a pinch of sugar for roundness if needed.
Storing Tips for the Recipe
- Refrigeration: Store in an airtight container for 3–4 days. Keep rice or noodles separate to prevent sogginess.
- Freezing: Cool completely, then freeze for up to 2–3 months. Freeze in flat portions for quick thawing.
- Reheating: Warm gently on the stovetop over medium heat with a splash of water to loosen the sauce, or microwave in 45-second bursts, stirring between rounds.
- Make-ahead prep: Whisk sauce up to 3 days in advance and pre-chop aromatics. Blanch broccoli and dry thoroughly—store in a towel-lined container to prevent excess moisture.
- Lunchbox strategy: Pack with rice in a divided container. Add a lime wedge or extra vinegar packet for a fresh pop when reheating.
Conclusion
Mongolian Ground Beef with Broccoli delivers takeout-level satisfaction with weeknight simplicity: tender beef crumbles, crisp-tender broccoli, and a shiny soy-ginger glaze that clings to every bite. It’s flexible, fast, and wildly flavorful—perfect for busy nights and meal prep alike. If this recipe becomes your new go-to, share it with a friend who loves quick stir-fries, leave a comment with your tweaks, and tag your bowl builds. Hungry for more bold, weeknight-friendly ideas? Save this one and explore similar dinners that bring big flavor without a big time investment.
FAQs
Q: Can I use frozen broccoli?
A: Yes. Thaw completely and pat dry to avoid watering down the sauce. Microwave-steam for 1–2 minutes until crisp-tender before tossing with the beef.
Q: How do I make this gluten-free?
A: Swap soy sauce for tamari and use a certified gluten-free hoisin. Cornstarch is naturally gluten-free, but always confirm labels based on your dietary needs.
Q: What can I use instead of hoisin?
A: Mix 1 tablespoon oyster sauce with 1 teaspoon brown sugar and 1/2 teaspoon rice vinegar. Or use a little extra brown sugar and a splash of molasses for body and depth.
Q: Is there a way to cut the sugar without losing that Mongolian-style shine?
A: Use a brown sugar–style monk fruit or allulose sweetener for 50–100% of the sugar, and keep the cornstarch slurry. Both the sweetener and starch help create that classic glossy finish.
Q: Can I double the recipe?
A: Absolutely. Brown the beef in two batches to maintain caramelization, then combine for the sauce step. Increase the sauce by 1.75x (not a full 2x) to prevent oversaucing.
Q: My sauce turned too thick—what now?
A: Add 1–3 tablespoons of water or broth and simmer briefly, stirring, until glossy and fluid again.
Q: How can I keep leftovers from tasting “flat” the next day?
A: Add a splash of rice vinegar or a squeeze of lime when reheating to reawaken the sweet-savory balance, and finish with fresh green onions.
Q: Can I use a different protein?
A: Yes—ground turkey or chicken works great. For a traditional sliced beef option, flank steak or sirloin is classic in Mongolian-style dishes; see this guide to Mongolian beef for steak-based techniques and inspiration.
Q: What’s the best pan for this recipe?
A: A wide, heavy skillet or carbon-steel wok. The larger surface area boosts browning and prevents steaming, giving you better flavor in less time.
As the cook behind Feast of Savory, my goal is to help busy home cooks land maximum flavor with minimal stress—reliable techniques, balanced sauces, and weeknight-proof methods that don’t sacrifice joy. This Mongolian Ground Beef with Broccoli is exactly that: simple steps, smart shortcuts, and a delicious payoff. Now it’s your turn to make it yours.