
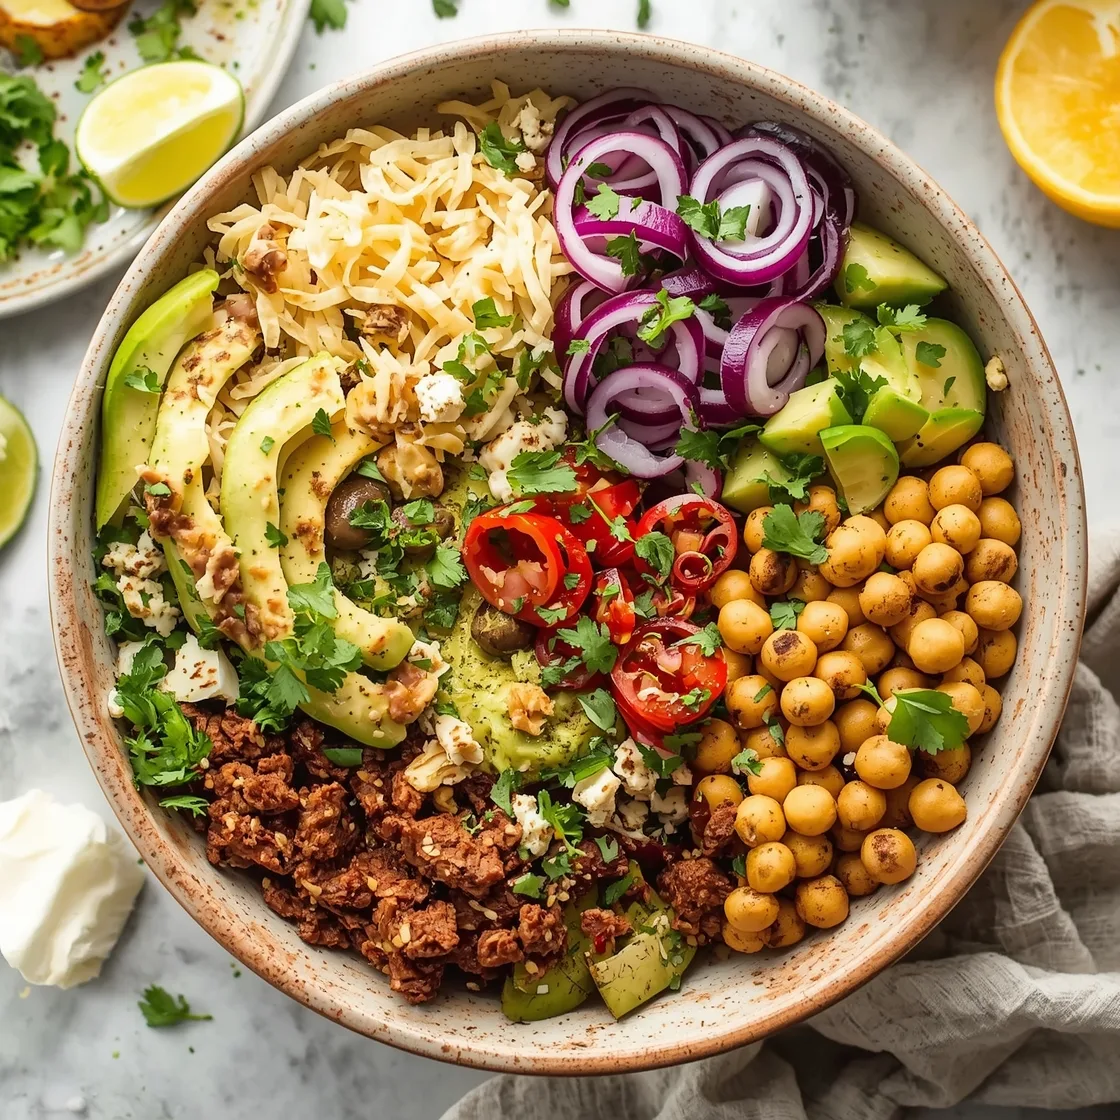
Introduction
Are you tired of bland, uninspired weeknight meals that leave you feeling sluggish and unsatisfied? Do you dream of a dinner that’s bursting with flavor, easy to prepare, and genuinely good for you, but often find yourself reaching for takeout menus instead? It’s a common dilemma in our fast-paced lives: the desire for wholesome, home-cooked food often clashes with the reality of limited time and energy. But what if I told you that crafting a vibrant, mouth-watering meal doesn’t have to involve hours in the kitchen or a culinary degree? Imagine a dish that brings all the zesty, savory satisfaction of your favorite Mexican-inspired cuisine right to your dinner table, without the added guilt. Today, we’re diving into the world of truly delectable yet uncomplicated cooking with a recipe that’s about to become your new weeknight hero: Easy Ground Beef Burrito Bowls. This isn’t just another meal idea; it’s a strategic culinary move to reclaim your evenings, nourish your body, and delight your taste buds, proving that healthy eating can indeed be both convenient and incredibly delicious.
Ingredients List
Crafting the perfect burrito bowl starts with a harmony of fresh, vibrant ingredients. Here’s what you’ll need to assemble this symphony of flavors:
- **For the Seasoned Ground Beef:**
- 1 lb (450g) lean ground beef (90/10 recommended for less grease, but 80/20 works beautifully if you drain excess fat).
- *Substitution Suggestion:* Ground turkey or chicken for a leaner protein alternative; black beans or lentils for a vegetarian option.
- 1 tablespoon olive oil (or avocado oil).
- 1 small onion, finely diced (about ½ cup).
- 2 cloves garlic, minced.
- 1 packet (1 oz / 28g) low-sodium taco seasoning (or your homemade blend of chili powder, cumin, paprika, oregano, and a pinch of cayenne).
- ½ cup water or beef broth.
</ul
- 1 lb (450g) lean ground beef (90/10 recommended for less grease, but 80/20 works beautifully if you drain excess fat).
- **For the Rice Base:**
- 1 cup uncooked brown rice (yields about 3 cups cooked).
- *Substitution Suggestion:* Quinoa, cauli-rice for a low-carb alternative, or even white rice in a pinch.
- 2 cups water or vegetable broth.
- 1 cup uncooked brown rice (yields about 3 cups cooked).
- **For the Fixings & Toppings (adjust to your preference!):**
- 1 (15-oz / 425g) can black beans, rinsed and drained.
- 1 (15-oz / 425g) can corn, drained (or 1 cup frozen corn, thawed).
- 1 cup grape tomatoes, halved (or 1 large tomato, diced).
- ½ red onion, thinly sliced or finely diced.
- 1 avocado, diced or sliced.
- ¼ cup chopped fresh cilantro.
- ½ cup shredded Monterey Jack or cheddar cheese (optional, but highly recommended for that melty goodness).
- Salsa (mild, medium, or hot – your choice!).
- Sour cream or plain Greek yogurt (for a healthier, higher-protein swirl).
- Lime wedges, for serving.
- Hot sauce, for those who love an extra kick.
Timing
One of the true beauties of this beef bowl recipe is its remarkable efficiency without compromising on flavor. Here’s a breakdown:
- **Prep Time:** 15 minutes. This includes chopping your onion and garlic, rinsing beans, and gathering your toppings.
- **Cook Time:** 25-30 minutes. This accounts for browning the beef, simmering the seasoned mixture, and cooking the rice concurrently.
- **Total Time:** 40-45 minutes. Compared to the average homemade meal preparation of 60 minutes, this recipe is a swift 25-33% faster, freeing up more of your evening for what truly matters to you. Imagine finishing a delicious, fulfilling meal and still having time for a walk, a good book, or quality family time!
Step-by-Step Instructions
Step 1: Get Your Rice Going
First things first, let’s get our foundation cooking. Rinse your brown rice thoroughly under cold water – this helps remove excess starch for a fluffier result. In a medium saucepan, combine the rinsed brown rice with 2 cups of water or vegetable broth. Bring it to a boil, then reduce the heat to low, cover, and simmer for 20-25 minutes, or until all the liquid is absorbed and the rice is tender. Pro Tip: Resist the urge to lift the lid! Let it do its magic.
Step 2: Sauté Aromatics & Brown the Beef
While the rice is simmering, heat 1 tablespoon of olive oil in a large skillet or Dutch oven over medium-high heat. Add the finely diced onion and sauté for 3-4 minutes until it starts to soften and become translucent. Now, add the minced garlic and cook for another minute until fragrant, being careful not to burn it. Push the aromatics to one side and add the lean ground beef to the skillet. Break it up with a spoon and cook, stirring occasionally, until it’s fully browned and no pink remains. Data Insight: Browning the beef well before adding seasonings creates a richer, more complex flavor profile by encouraging the Maillard reaction.
Step 3: Season & Simmer Your Savory Beef
Once the beef is fully browned, drain any excess fat from the skillet. Sprinkle the entire packet of low-sodium taco seasoning over the beef and stir well to coat every morsel. Pour in ½ cup of water or beef broth. Bring the mixture to a gentle simmer, then reduce the heat to low and let it cook for 5-7 minutes, allowing the flavors to meld beautifully and the sauce to thicken slightly. Your kitchen should be smelling absolutely incredible right now!
Step 4: Prepare Your Toppings & Assemble
While the beef is simmering and the rice finishes cooking, it’s assembly line time! Rinse and drain your black beans and corn. Halve your grape tomatoes, dice your avocado, and chop your fresh cilantro. Once the rice is ready, fluff it with a fork. It’s time to build your masterpiece! Start with a generous scoop of fluffy rice in each bowl. Top with a hearty portion of the seasoned ground beef. Then, get creative! Artfully arrange portions of black beans, corn, diced tomatoes, sliced red onion, and avocado. Sprinkle with shredded cheese if using, a dollop of salsa, and a swirl of sour cream or Greek yogurt. A squeeze of fresh lime juice over everything will brighten all the flavors beautifully. Personalized Tip: For an extra pop of texture, consider adding some crumbled tortilla chips!
Nutritional Information
Fueling your body with intention is a cornerstone of a healthy lifestyle. These beef burrito bowls are not just delicious; they’re packed with valuable nutrition. A single serving (approximately 1/4 of total recipe, without extra cheese or sour cream) provides a robust profile designed to keep you feeling satisfied and energized:
- **Calories:** Approximately 450-500 kcal. This range offers a substantial yet portion-controlled meal, aligning with general recommendations for main meals.
- **Protein:** 35-40g. Thanks to the lean ground beef and black beans, this dish is a protein powerhouse, crucial for muscle repair, satiety, and overall body function.
- **Fiber:** 10-12g. The brown rice, black beans, corn, and fresh vegetables contribute significantly to your daily fiber intake, aiding digestion and promoting gut health. This is significantly higher than the average American meal, which often lacks sufficient fiber.
- **Healthy Fats:** 15-20g. Primarily from the avocado and olive oil, these monounsaturated fats are essential for hormone production and nutrient absorption, contributing to heart health. About 5-7g of this will be saturated fat from the beef.
- **Carbohydrates:** 45-50g. A balanced mix of complex carbohydrates from brown rice and fiber-rich vegetables, providing sustained energy release.
- **Vitamins & Minerals:** Rich in Vitamin C (from tomatoes and lime), Vitamin K (from cilantro), Folic Acid (from black beans), and essential minerals like Iron (from beef and beans) and Potassium (from avocado and beans).
- **Sodium:** Around 500-600mg (when using low-sodium taco seasoning and broth). This is a mindful approach to sodium intake, crucial for maintaining healthy blood pressure as recommended by the CDC’s guidelines for healthy weight.
Data Insight: Compared to a fast-food burrito bowl, which can often exceed 800-1000 calories and carry double the sodium, this homemade version offers superior nutritional control and a diverse spectrum of micronutrients.
Healthier Alternatives for the Recipe
This recipe is incredibly versatile, making it easy to adapt to various dietary needs and preferences without sacrificing flavor. Here are some smart swaps:
- **Lower Carb:**
- **Rice Replacement:** Swap brown rice for cauliflower rice. Simply sauté riced cauliflower with a little oil and season with salt and pepper until tender. This can slash the carb count by over 70% per serving.
- **Extra Veggies:** Double down on green leafy vegetables like shredded romaine lettuce or spinach as your base instead of, or in addition to, rice.
- **Increased Protein & Leaner Options:**
- **Protein Swap:** Replace ground beef with ground chicken breast or turkey breast for a lower-fat, lower-calorie protein source. Season as directed.
- **Dairy Alternatives:** Use plain Greek yogurt instead of sour cream for a protein boost and probiotic benefits. Opt for dairy-free shredded cheese if needed.
- **Plant-Based Power:**
- **Meatless Marvel:** Substitute ground beef with extra black beans, pinto beans, or seasoned lentils. For a hearty texture, try plant-based ground “meat” alternatives cooked with the same seasonings.
- **Veggie Boost:** Incorporate roasted bell peppers, zucchini, or sweet potatoes for added nutrients and bulk.
- **Sodium-Conscious:**
- **Homemade Seasoning:** Create your own taco seasoning blend using individual spices (chili powder, cumin, paprika, oregano, garlic powder, onion powder) and control the salt content precisely. This can reduce sodium by up to 50% compared to store-bought mixes.
Creative Idea: Try adding a homemade cilantro-lime dressing made with olive oil, lime juice, cilantro, and a touch of honey for a fresher, brighter drizzle over your bowls, replacing heavier, store-bought dressings.
Serving Suggestions
These burrito bowls are fantastic on their own, but a few thoughtful touches can elevate the experience:
- **Family Style:** Set out all the components in separate bowls and let everyone build their own custom creation. This is especially fantastic for picky eaters or diverse preferences, making dinner feel like a fun, interactive event.
- **On a Bed of Greens:** For a lighter meal, serve the warm beef and toppings over a bed of crisp romaine lettuce or mixed greens instead of rice.
- **Wrap It Up:** Scoop the filling into large lettuce cups or warm tortillas for a deconstructed burrito or taco night.
- **Chips and Dip Duo:** Serve with a side of crunchy tortilla chips, perfect for scooping up any runaway beans or corn.
- **Batch Fiesta:** Prepare a larger batch of the seasoned beef and cooked rice at the beginning of the week. This makes for super-fast meal prep. Just store components separately and assemble fresh bowls daily for lunch or dinner. You can even find more meal prep inspiration on our meal prep ideas.
- **Gourmet Garnish:** A sprinkle of cotija cheese, a dollop of chipotle mayo, or pickled jalapeños can add an unexpected layer of flavor and texture.
Common Mistakes to Avoid
Even the simplest recipes can have pitfalls. Here’s how to ensure your burrito bowls are consistently perfect:
- **Overcooking the Beef:** Ground beef cooks quickly. Overcooking can lead to dry, crumbly meat that lacks tenderness. Brown it until just no pink remains, then simmer gently. Data shows that simmering for more than 10 minutes often begins to compromise texture.
- **Not Draining Excess Fat:** If you’re using 80/20 ground beef, you’ll likely have a good amount of fat after browning. Not draining this can make your meal greasy and heavy. Take the extra minute to carefully tilt the skillet and pour off the excess.
- **Bland Seasoning:** Relying solely on the beef and rice can lead to an uninspired bowl. Don’t be shy with the taco seasoning, and make sure to fully incorporate it. Taste and adjust. A squeeze of lime at the end is a game-changer for brightness.
- **Mushy Rice:** This often happens from lifting the lid too early or using too much water. Follow the rice-to-water ratio carefully, and let it rest undisturbed after cooking to steam properly.
- **Cold Toppings:** While some toppings are meant to be cold (like salsa and sour cream), ensure your core ingredients (beef, rice, beans, and corn) are warm for the best experience. A cold burrito bowl can be a bit jarring.
- **Forgetting the Cilantro & Lime:** These two ingredients aren’t just garnishes; they are crucial flavor enhancers that provide freshness and zest, cutting through the richness of the beef. Skipping them is a missed opportunity for peak flavor.
Storing Tips for the Recipe
Meal prepping these burrito bowls is a genius move for busy weeks. Here’s how to keep them fresh and delicious:
- **Separate Storage is Key:** The best way to maintain freshness and texture is to store components separately.
- **Cooked Beef & Rice:** Allow both to cool completely before transferring to airtight containers. They can be stored in the refrigerator for up to 3-4 days. For longer storage, the seasoned beef can be frozen for up to 3 months. Thaw overnight in the fridge before reheating.
- **Black Beans & Corn:** Store these together or separately in airtight containers in the refrigerator for up to 5 days.
- **Fresh Toppings:** Avocado, tomatoes, red onion, and cilantro are best stored separately and added just before serving. Diced avocado, in particular, tends to brown quickly; a squeeze of lime juice can slow this process if it must be prepped ahead.
- **Salsas & Creams:** Keep these in their original containers or separate airtight containers in the fridge for up to a week.
- **Reheating:**
- For individual servings, scoop the desired amount of rice and beef into a microwave-safe bowl. Reheat in the microwave in 1-minute intervals, stirring in between, until heated through.
- Alternatively, gently reheat the beef and rice in a skillet over medium-low heat until warm.
- Add fresh toppings (avocado, tomatoes, cilantro, sour cream, salsa) after reheating to maintain their crispness and fresh texture.
</ul
- **Optimal Freshness:** For maximum flavor and texture, assemble the bowls no more than 1-2 days in advance if you’re mixing everything. If preparing for the entire week, keep components separate and assemble daily. This prevents the rice from absorbing too much moisture from the salsa or the avocado from browning.
Conclusion
There you have it: a culinary roadmap to creating irresistible, healthy, and incredibly easy ground beef burrito bowls that will revolutionize your mealtime routine. We’ve journeyed from bustling ingredient lists to a step-by-step assembly, uncovered essential nutritional insights, explored versatile modifications for every palate, and even armed you with the secrets to perfect storage. This isn’t just a recipe; it’s an invitation to embrace a lifestyle where vibrant flavors and wholesome goodness effortlessly coexist with your busy schedule. Imagine the satisfaction of dishing up a meal that not only tantalizes your taste buds but also nourishes your body, all while reclaiming precious minutes from your evening. So, why wait? Roll up your sleeves, gather those ingredients, and bring these delightful burrito bowls to life in your kitchen tonight. We guarantee your family – and your taste buds – will thank you. Don’t forget to share your culinary creations and tell us your favorite toppings in the comments below! We love hearing how you make these recipes uniquely yours.
FAQs
Q1: Can I make these burrito bowls vegetarian or vegan?
Absolutely! To make them vegetarian, simply swap the ground beef for extra black beans, pinto beans, or seasoned lentils. For a vegan version, additionally, omit the cheese and sour cream, opting for plant-based alternatives like a cashew-based crema or extra salsa. The rich seasonings ensure the plant-based versions are just as flavorful!
Q2: How can I spice up my burrito bowls for more kick?
There are several ways to turn up the heat! Add a pinch of cayenne pepper or red pepper flakes to the ground beef as it simmers. Incorporate finely diced jalapeños or serrano peppers (with seeds for extra heat!) into the beef mixture or as a fresh topping. A drizzle of your favorite hot sauce or a dollop of chipotle mayo can also add a delightful fiery dimension.
Q3: What are some good make-ahead options for meal prep?
These bowls are fantastic for meal prep! Cook the seasoned ground beef and brown rice ahead of time and store them in separate airtight containers in the refrigerator for up to 3-4 days. You can also rinse and drain your black beans and corn. Chop firmer toppings like red onion. Keep soft toppings like avocado, tomatoes, and cilantro separate, and add them fresh when you assemble your bowl to maintain optimal texture and prevent browning.
Q4: My rice always turns out mushy. Any tips?
Mushy rice is often a result of too much water or lifting the lid too early during cooking. Ensure you use the correct rice-to-water ratio (typically 1:2 for brown rice). Bring to a boil, then immediately reduce to the lowest simmer, cover tightly, and do not lift the lid for the entire cooking time (20-25 minutes for brown rice). Once cooked, remove from heat and let it rest, covered, for another 5-10 minutes before fluffing with a fork. This allows the steam to redistribute and grains to firm up.
Q5: Can I use different types of beans or grains?
Definitely! Pinto beans or kidney beans would work wonderfully as an alternative to black beans, offering a slightly different texture and flavor profile. For grains, quinoa is an excellent, protein-rich substitute for brown rice, cooking in about 15 minutes. White rice can also be used if you prefer its classic texture, though brown rice offers more fiber and nutrients. Feel free to experiment with what you have on hand or what aligns with your dietary goals!