
Introduction
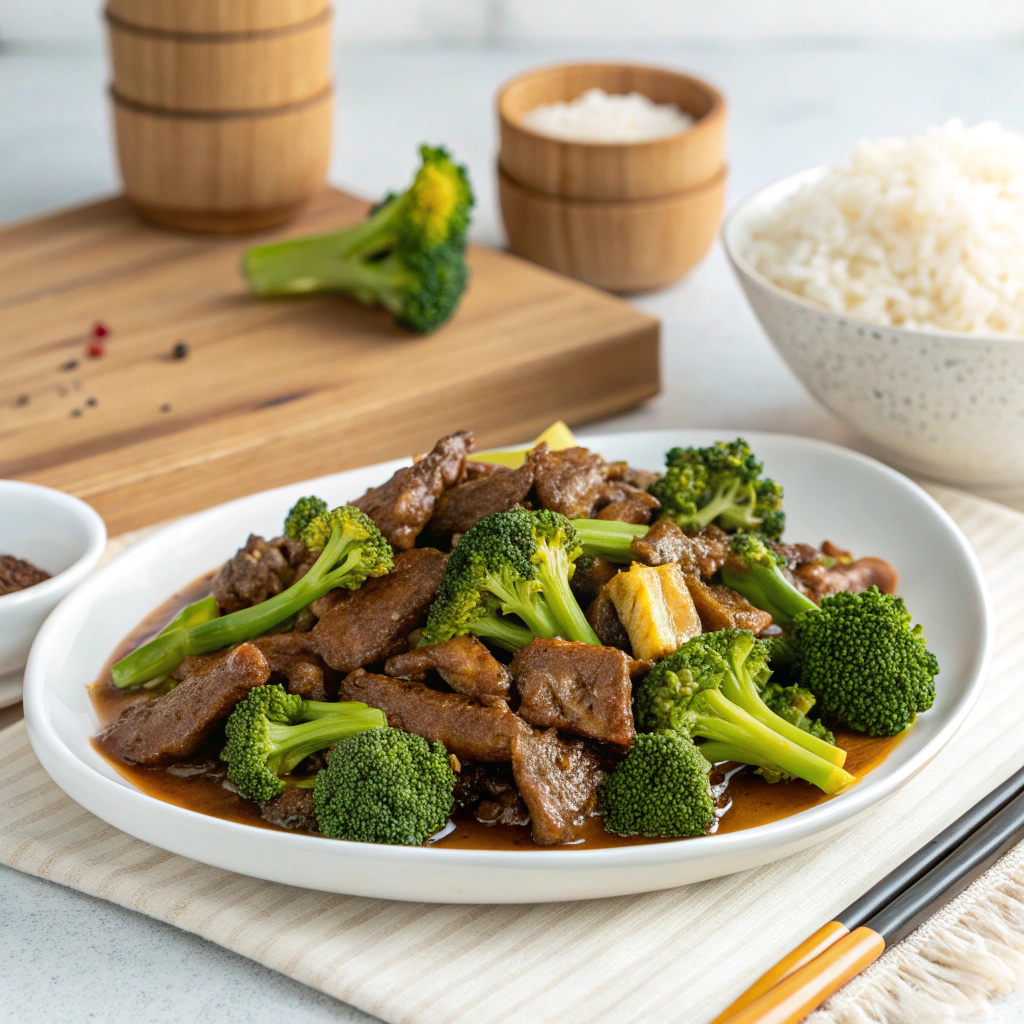
What if your favorite takeout staple could be on your table faster than delivery, with juicier beef, crisper broccoli, and a glossy sauce that actually clings? This Easy Chinese Beef and Broccoli (Better Than Takeout) – Quick Stir-Fry Recipe is built for real weeknights and real kitchens. In the first bite, you’ll notice the tender, restaurant-style beef, the vibrant greens, and the deep umami that makes this Chinese-American classic so satisfying. If you’ve ever thought perfect stir-fry required a specialty wok, mystery ingredients, or a chef’s wrist flick, I’m here to challenge that belief. With the right cut, a smart velveting technique, and a 10-minute cook, you’ll nail it—every time.
I’ve cooked this dish for busy families, meal-preppers, and flavor-maximizers who want consistent results without fuss. My kitchen philosophy is simple: high-impact flavor from everyday ingredients, informed by chef-tested tweaks. That’s why this recipe leans on flank or flat iron steak for tenderness, a quick cornstarch marinade to lock in moisture, and a sauce that balances salty, savory, and just a touch of sweet. Expect char-kissed edges, crisp-tender broccoli, and a better-than-takeout finish that keeps everyone circling the stove for “just one more taste.”
Ingredients List
For 4 servings
Beef and marinade:
- 1 to 1.25 lb flank steak or flat iron steak, thinly sliced against the grain
- 1 tbsp soy sauce (or tamari for gluten-free)
- 1 tsp oyster sauce (optional but adds depth)
- 1 tsp Shaoxing wine or dry sherry (or rice vinegar for alcohol-free)
- 1 tsp cornstarch
- 1/2 tsp baking soda (velveting for tenderness; especially helpful with flank)
- 1 tsp neutral oil (canola, avocado, or grapeseed)
- 1/4 tsp white pepper (or black pepper)
Sauce:
- 1/3 cup low-sodium soy sauce (or coconut aminos for soy-light)
- 1/3 cup beef or chicken stock (or water)
- 1.5 tbsp oyster sauce (or vegetarian oyster sauce/mushroom stir-fry sauce)
- 1 tbsp brown sugar or honey (balance; adjust to taste)
- 1 tbsp cornstarch (thickener)
- 2 tsp toasted sesame oil
- 1 tsp rice vinegar (brightness)
Stir-fry and aromatics:
- 4–5 cups broccoli florets (from about 1 large head), cut into bite-size pieces
- 3 tbsp neutral oil, divided
- 3 garlic cloves, thinly sliced
- 1 tbsp fresh ginger, julienned or minced
- 2–3 scallions, sliced (whites for stir-fry, greens for garnish)
- Optional heat: 1–2 tsp chili crisp or 1/2 tsp red pepper flakes
Garnish and serving:
- Sesame seeds, scallion greens, extra chili oil
- Steamed jasmine rice, brown rice, cauliflower rice, or cooked noodles
Substitution ideas:
- Beef cuts: skirt steak, sirloin, tri-tip, or even thin-sliced chuck (longer velveting).
- Veg swaps: broccolini, snap peas, green beans, or a broccoli/pepper mix.
- Gluten-free: use tamari and gluten-free oyster sauce; confirm stock is GF.
- Lower sodium: use low-sodium soy and stock; add a squeeze of lemon at the end to lift flavor without more salt.
Timing
– Prep: 15 minutes
– Optional marinating/velveting rest: 10–15 minutes (while you prep broccoli and sauce)
– Cook: 10 minutes
– Total: 25–30 minutes
Context: Many stovetop beef-and-broccoli recipes average 35–40 minutes including chopping and sauce prep. At 25–30 minutes, this version is roughly 20–35% faster without sacrificing tenderness or flavor, thanks to streamlined mise en place and a two-pan or steam-fry option for the broccoli.
Step 1: Slice the beef like a pro
– Freeze the steak for 15 minutes to firm it up. Slice thinly—1/8 inch is ideal—across the grain at a slight bias. Thin slices cook evenly and absorb the marinade quickly, producing that classic restaurant tenderness.
Pro tip: If using sirloin or a thicker cut, trim excess connective tissue and keep slices uniformly thin for consistent doneness.
Step 2: Velvet the beef
– In a bowl, toss the sliced beef with soy sauce, oyster sauce, Shaoxing wine, cornstarch, baking soda, oil, and white pepper. Massage gently for 30 seconds so every piece is coated.
– Rest 10–15 minutes while you prep the broccoli and whisk the sauce.
Why it works: A small amount of baking soda and cornstarch changes the meat’s surface pH and creates a protective coating, helping the beef stay juicy and tender even at high heat—exactly what you want in a fast stir-fry.
Step 3: Whisk the glossy stir-fry sauce
– In a measuring cup, whisk low-sodium soy, stock, oyster sauce, brown sugar, cornstarch, sesame oil, and rice vinegar until no cornstarch lumps remain.
Flavor dial: Taste now. If you prefer sweeter, add 1/2 tsp more sugar. For more savory depth, add an extra teaspoon of oyster sauce. If you like heat, stir in chili crisp.
Step 4: Prep the broccoli for perfect texture
Two-options approach:
– Steam-blanch (maximum crunch): Boil or steam broccoli for 1 minute until just bright green, then drain well. This preserves crunch and speeds up the stir-fry.
– Steam-fry (one-pan convenience): You’ll cook it directly in the skillet with a splash of water later. Slightly softer than blanching but saves a pot.
Step 5: Heat the pan properly
– Use a carbon steel wok or a large 12-inch stainless or cast-iron skillet. Heat 1.5 tbsp oil over medium-high until shimmering and just smoking. High heat equals better browning and “wok hei”-like flavor in a home kitchen.
Pan readiness test: A drop of water should sizzle and evaporate on contact.
Step 6: Sear the beef in batches
– Add half the beef in a single layer; don’t stir for 45–60 seconds to get caramelized edges. Flip and cook 30–45 seconds more until mostly browned but still slightly pink. Transfer to a plate.
– Repeat with remaining beef, adding a touch of oil if the pan looks dry.
Batching prevents steaming and ensures your sauce won’t turn watery.
Step 7: Build aromatic flavor
– Reduce heat slightly. Add 1/2 tbsp oil, then garlic, ginger, and scallion whites. Stir-fry 20–30 seconds until fragrant.
– If using red pepper flakes, bloom them now for deeper heat.
Step 8: Cook the broccoli
– If steam-blanched: Toss broccoli into the aromatics and stir-fry 60–90 seconds to pick up flavor.
– If steam-frying: Add broccoli plus 2–3 tbsp water. Cover for 1–2 minutes to steam, uncover, and stir-fry until water evaporates and broccoli is crisp-tender.
Seasonal swap: In spring, add snap peas in the last minute for extra crunch.
Step 9: Combine and thicken
– Return beef and its juices to the pan. Whisk the sauce once more (cornstarch settles), then pour it in.
– Stir and toss for 60–90 seconds until the sauce thickens and turns glossy, evenly coating beef and broccoli. Finish with sesame oil if you held it back and fold in scallion greens.
Sauce check: If it’s too thick, add 1–2 tbsp water. Too thin? Simmer 30 seconds longer.
Step 10: Plate and finish
– Garnish with sesame seeds and extra scallions. Serve immediately over hot jasmine rice, brown rice, cauliflower rice, or noodles.
– Drizzle with chili oil if you love a little fire.
Make it a set: A simple cucumber salad with rice vinegar and a pinch of sugar brightens the plate.
Nutritional Information
Per serving (about 1/4 of the recipe, without rice):
– Calories: ~320–340
– Protein: ~28–32 g
– Carbohydrates: ~16–20 g
– Sugars: ~5–7 g
– Fiber: ~3–4 g
– Fat: ~14–18 g
– Saturated Fat: ~3–5 g
– Sodium: ~800–1,050 mg (varies by soy and oyster sauce)
– Iron: ~15–18% DV
– Vitamin C (from broccoli): ~100–130% DV
Notes:
- Using low-sodium soy and stock can reduce sodium by ~25–35%.
- Coconut aminos can further lower sodium but may slightly sweeten the profile; reduce added sugar by 1/2 tsp if using.
Healthier Alternatives for the Recipe
– Leaner beef choices: Use top sirloin or eye of round; increase velveting rest to 20 minutes to maintain tenderness.
– More greens: Increase broccoli to 6 cups and add mushrooms or bok choy for extra fiber and micronutrients.
– Sodium-smart: Choose low-sodium soy, skip the added salt, and finish with lemon juice or rice vinegar for perceived saltiness without extra sodium.
– Lower sugar: Replace brown sugar with 1–2 tsp mirin or a few drops of liquid monk fruit; taste and adjust.
– Gluten-free: Use tamari and gluten-free oyster sauce; thicken with cornstarch or arrowroot.
– Lower fat: Use 2 tbsp oil total and a well-seasoned cast-iron skillet; add a splash of stock if the pan gets dry instead of more oil.
– Low-carb: Serve over cauliflower rice or spiralized zucchini; reduce sauce cornstarch to 2 tsp and simmer slightly longer to thicken.
Serving Suggestions
– Classic bowl: Jasmine rice piled high, topped with beef and broccoli, finished with toasted sesame seeds.
– Noodle night: Toss with cooked lo mein or rice noodles; double the sauce if you love it extra glossy.
– Light and fresh: Spoon into crisp lettuce cups with sliced cucumbers and a squeeze of lime.
– High-protein meal-prep: Pair with quinoa or farro; portion into containers with extra steamed broccoli.
– Family-style platter: Add a quick egg drop soup or a chilled sesame cucumber salad for a complete dinner.
– Flavor extras: Chili crisp, black vinegar, or a hint of orange zest turns the profile from classic to chef-y without adding time.
If you’re in a comfort-food mood, my weeknight-friendly pasta like Cheesy Penne with Garlic Butter Ground Beef is another crowd-pleaser to bookmark.
Common Mistakes to Avoid
– Overcrowding the pan: Crowding steams the meat. Sear in two batches for proper browning.
– Skipping the rest after marinating: Even 10 minutes of velveting noticeably improves tenderness.
– Slicing with the grain: Always slice against the grain to shorten muscle fibers and ensure a tender bite.
– Using wet broccoli: Pat dry after blanching; excess water thins the sauce.
– Overcooking the broccoli: Aim for vibrant green and crisp-tender—test a floret at 90 seconds.
– Neglecting high heat: Preheat until the oil shimmers; a hot pan is key to quick sear and flavor.
– Forgetting to re-whisk the sauce: Cornstarch settles; whisk just before pouring to avoid lumps.
– Heavy-handed salt: Taste first; soy and oyster sauce already bring saltiness, so you may not need extra.
Storing Tips for the Recipe
– Refrigerate: Store in airtight containers for 3–4 days. Keep rice or noodles separate to prevent sogginess.
– Freeze: Cool completely, then freeze in meal-size portions for up to 2–3 months. Thaw overnight in the fridge.
– Reheat: For best texture, reheat in a skillet over medium heat with 1–2 tbsp water to re-loosen the sauce. Microwave in 60–90 second bursts, stirring in between.
– Make-ahead components: Slice and velvet beef up to 24 hours ahead; whisk sauce up to 3 days ahead (stir before using). Blanch broccoli, dry thoroughly, and refrigerate for 2 days.
– Freezer meal kit: Freeze sliced, marinated beef flat in a zip-top bag; freeze sauce separately; broccoli can be frozen in florets. Thaw overnight and cook as directed.
Food-safety note: Cool leftovers to room temp within 2 hours, then refrigerate promptly.
Conclusion
From the first sizzling sear to the last glossy toss, this Easy Chinese Beef and Broccoli (Better Than Takeout) proves you don’t need a restaurant or a delivery app to eat like a pro. A simple velveting step, high heat, and a balanced sauce deliver tender beef, emerald broccoli, and that signature shine every single time. Make it once for a quick dinner; make it again for meal prep; make it yours with the swaps that suit your kitchen.
If you cooked this, I’d love to hear how it went—what you served it with, how spicy you made it, and which variations you tried. Drop a comment, rate the recipe, and share a photo so we can all learn from your plate. Hungry for more weeknight wins? Explore other fast, flavor-packed dinners on the blog and build your own takeout-at-home playbook.
FAQs
Q1: What’s the best cut of beef for tenderness?
– Flank steak and flat iron are my top picks. Flank is lean with big beefy flavor; flat iron is naturally tender. Sirloin works well too—just slice thin and velvet for at least 15 minutes.
Q2: Can I make this without a wok?
- Absolutely. A 12-inch stainless or cast-iron skillet gives great sear. The key is high heat, hot oil, and cooking the beef in batches.
Q3: How do I prevent a watery sauce?
- Dry your broccoli after blanching, sear beef in batches, and re-whisk the sauce before adding. If it’s still thin, simmer 30–60 seconds longer or add 1 tsp cornstarch mixed with 1 tbsp cold water.
Q4: What if I don’t have oyster sauce?
- Use mushroom stir-fry sauce, hoisin (sweeter—reduce sugar slightly), or a splash of fish sauce for umami. You can also skip it and add an extra teaspoon of soy plus a pinch of sugar.
Q5: Is this recipe gluten-free?
- Yes, with tamari and gluten-free oyster sauce. Confirm your stock is certified gluten-free and you’re set.
Q6: Can I use chicken or tofu instead of beef?
- Yes. For chicken, use thin-sliced thighs or breast; velvet 15 minutes and cook through. For tofu, use extra-firm, press well, dust lightly with cornstarch, and pan-sear until crisp before saucing.
Q7: How spicy is it?
- The base recipe is mild. Add chili crisp, red pepper flakes, or a sliced fresh chili to taste. Start small; heat intensifies in the sauce.
Q8: Can I double the sauce for noodles?
- Definitely. If serving with noodles, double the sauce so there’s enough to coat. Keep cornstarch proportional so it still thickens properly.
Q9: What kind of oil should I use?
- Use a neutral, high-smoke-point oil like canola, avocado, or grapeseed. Toasted sesame oil is for finishing, not for high-heat searing.
Q10: How do I get that takeout-style tenderness?
- Thin slices against the grain, a short velveting rest with cornstarch and a touch of baking soda, and fast, high-heat cooking. Don’t overcook the beef—slightly pink before saucing is perfect.
Q11: Can I make it lower sodium?
- Use low-sodium soy and stock, skip added salt, and finish with rice vinegar or lemon juice. Taste before adding more salt—most people find it balanced as-is.
Q12: Where can I learn more techniques for beef and broccoli?
- For a helpful perspective and another approach to balance and technique, check out this guide: Beef and Broccoli.
Personal note on approach:
I built this recipe around the techniques I rely on when teaching busy home cooks: tight mise en place, a brief velveting step for tenderness, and a balanced sauce that stays glossy. The result is a fast, reliable, and deeply flavorful stir-fry you can customize endlessly—exactly the kind of weeknight win that keeps people cooking at home.