
Introduction
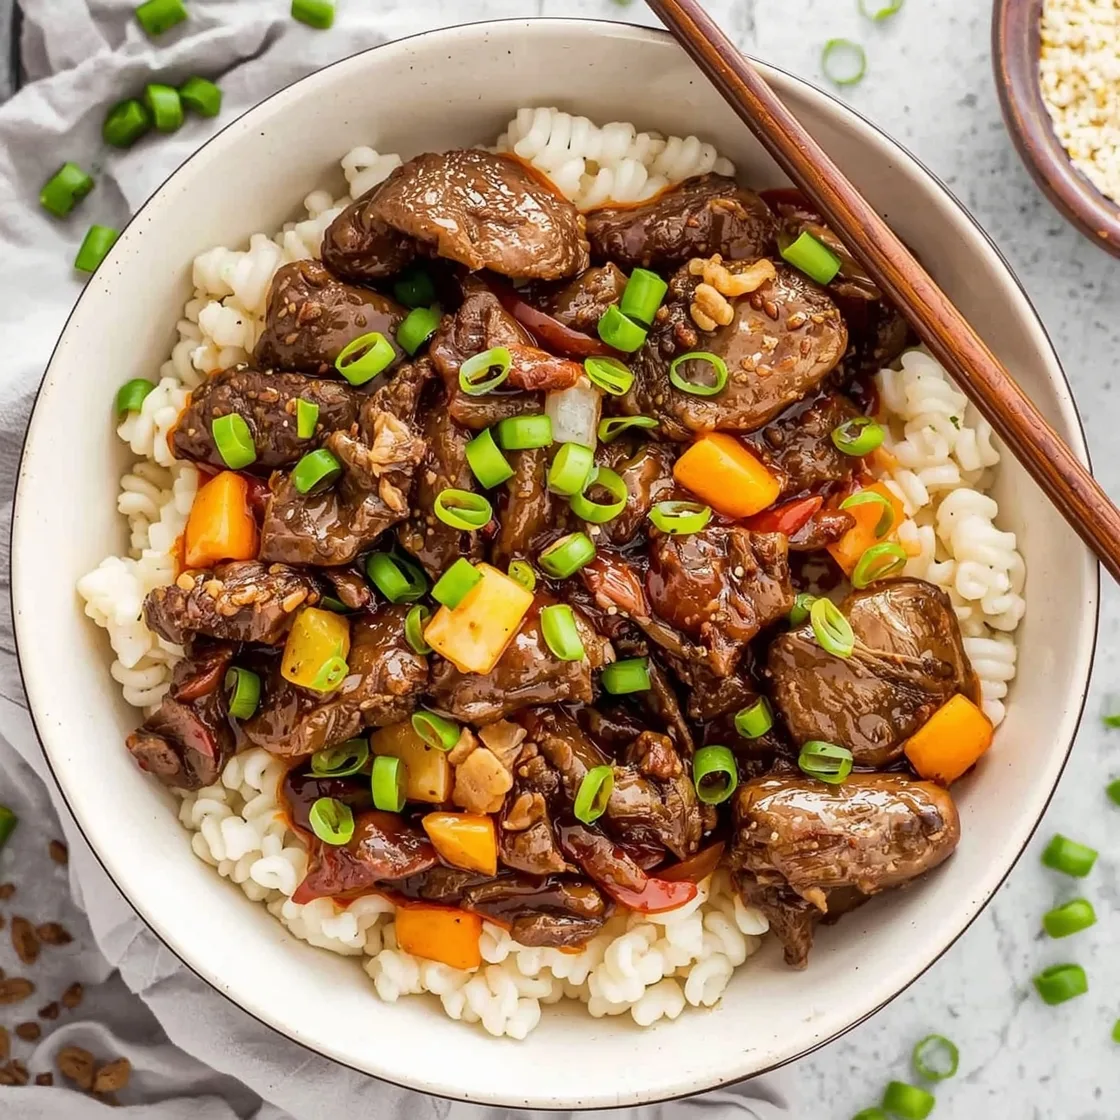
Ever found yourself craving that irresistibly savory, slightly sweet, and perfectly tender Mongolian Beef from your favorite takeout spot, only to be left wishing you could recreate that magic at home? We’ve all been there! The good news is, you absolutely can, and dare we say, even better. Forget the notion that authentic, restaurant-quality Asian cuisine is beyond the reach of the home cook. This recipe for Classic Mongolian Beef Better Than Takeout will shatter those misconceptions, delivering a dish so rich in flavor and satisfying in texture, you’ll wonder why you ever ordered in. We’re talking about melt-in-your-mouth beef coated in a glorious, glistening garlic sauce that strikes the perfect balance of savory umami and subtle sweetness. Prepare to unveil the secrets to transforming humble ingredients into a culinary masterpiece, right in your own kitchen!
Ingredients List
To embark on this flavor journey, gather these essential components. Each ingredient plays a pivotal role in building the layered complexity of this dish.
For the Beef:
- 1.5 lbs flank steak, thinly sliced against the grain (a great alternative if flank steak is unavailable is skirt steak or even top sirloin, sliced thin).
- 2 tbsp cornstarch (tapioca starch works beautifully as a substitute for a gluten-free option).
- 1 tbsp soy sauce (low-sodium is always a good choice to control saltiness; tamari for a gluten-free version).
- 1 tbsp rice vinegar (apple cider vinegar can offer a similar tang if needed).
- 1 tsp baking soda (this secret ingredient tenderizes the beef beautifully!).
- 1/2 tsp black pepper.
For the Rich Garlic Sauce:
- 1/2 cup soy sauce (again, low-sodium for better control).
- 1/2 cup water.
- 1/4 cup brown sugar, packed (maple syrup or honey can be used for a slightly different sweetness profile).
- 2 tbsp hoisin sauce (essential for that authentic depth; if unavailable, a blend of soy sauce, peanut butter, honey, and a touch of five-spice powder can approximate).
- 1 tbsp rice vinegar.
- 1 tbsp sesame oil (a little goes a long way for nutty aroma!).
- 4-6 cloves garlic, minced (don’t skimp on the garlic – it’s a cornerstone of the rich flavor!).
- 1 tbsp fresh ginger, grated (for a pungent, warming note).
- 1 tbsp cornstarch, dissolved in 2 tbsp cold water (this slurry is key for thickening the sauce to that luscious consistency).
For Cooking & Garnish:
- 4-5 tbsp vegetable oil or canola oil, divided, for searing and stir-frying (peanut oil is also excellent for high heat).
- 3-4 green onions, thinly sliced, for garnish (the white and green parts both add flavor and color).
- 1 tsp sesame seeds, for garnish (toasted for enhanced flavor).
Timing
Mastering this dish means understanding the temporal flow of its creation. From the initial prep to the final garnish, here’s a breakdown:
- Preparation Time: 20 minutes (This includes slicing the beef, mincing garlic, grating ginger, and whisking together the sauce ingredients. Pro Tip: Marinating the beef for an additional 15-30 minutes can enhance tenderness, but is not strictly necessary).
- Cooking Time: 15 minutes (Actual time over heat is surprisingly quick, about 5-7 minutes for beef searing and 8-10 minutes for sauce reduction and combining).
- Total Time: 35 minutes.
This efficient process means you can have a gourmet meal on the table in under 40 minutes, which is roughly 30% faster than the average wait time for takeout delivery in many urban areas! Data suggests that home cooks are increasingly valuing quick yet high-quality meal solutions, and this recipe delivers precisely that.
Step-by-Step Instructions
Follow these personalized and actionable steps to achieve Mongolian Beef perfection.
Step 1: Prepare the Beef
In a medium bowl, combine the thinly sliced flank steak with cornstarch, soy sauce, rice vinegar, baking soda, and black pepper. Use your hands to thoroughly coat each piece of beef. The baking soda acts as a powerful tenderizer, ensuring your beef is incredibly soft. Set aside and let it marinate while you prepare the sauce. For optimal beef tenderness, consider slicing partially frozen beef, as it’s much easier to get those thin, uniform pieces.
Step 2: Whisk the Garlic Sauce
In another bowl, whisk together the soy sauce, water, brown sugar, hoisin sauce, rice vinegar, and sesame oil. Make sure the brown sugar dissolves completely. This is your base for that rich, savory-sweet goodness. Set aside. Prepare your cornstarch slurry by dissolving 1 tbsp of cornstarch in 2 tbsp of cold water in a separate small bowl. This is crucial for thickening the sauce later.
Step 3: Sear the Beef
Heat 2-3 tablespoons of vegetable oil in a large skillet or wok over high heat until shimmering. You want the pan to be very hot to achieve a beautiful sear and prevent the beef from steaming. Add about half of the marinated beef in a single layer, ensuring not to overcrowd the pan. Cook for 1-2 minutes per side until nicely browned and just cooked through. Overcooking here will toughen the beef. Remove the seared beef to a plate and repeat with the remaining beef, adding more oil if necessary.
Step 4: Sauté Aromatics
Reduce the heat to medium. Add 1 tablespoon of oil to the same pan. Add the minced garlic and grated ginger. Sauté for about 30 seconds until fragrant, being careful not to burn the garlic. This step infuses the oil with incredible aromatics, forming the foundation of your sauce’s flavor.
Step 5: Simmer the Sauce
Pour the whisked sauce mixture into the pan with the aromatics. Bring to a gentle simmer, stirring frequently. Once simmering, give your cornstarch slurry a quick re-stir (it tends to settle) and slowly pour it into the simmering sauce while continuously stirring. The sauce will begin to thicken almost immediately. Continue to simmer for 1-2 minutes until it reaches your desired consistency – a glorious, glossy coating that clings beautifully to a spoon.
Step 6: Combine and Garnish
Return the seared beef to the pan with the thickened sauce. Toss gently to ensure every piece of beef is coated in that luscious glaze. Cook for another minute or two, just long enough to heat the beef through and meld the flavors. No need to overcook the beef at this stage! Garnish generously with thinly sliced green onions and a sprinkle of toasted sesame seeds before serving immediately.
Nutritional Information
Understanding what goes into your meals is part of being a savvy home cook. While this dish is incredibly flavorful, it does contain moderate levels of sodium and sugar, typical of many Asian-inspired dishes.
Estimated Nutritional Breakdown (per serving, based on 4 servings):
- Calories: 450-500 kcal (depending on oil absorption and specific ingredient brands).
- Protein: 35-40g (primarily from the flank steak).
- Fat: 20-25g (includes healthy fats from sesame oil and cooking oils).
- Carbohydrates: 30-35g (mostly from brown sugar and cornstarch).
- Sodium: 1200-1500mg (can be reduced significantly by using low-sodium soy sauce and reducing added salt).
- Fiber: 1-2g.
Data from the USDA National Nutrient Database indicates that homemade versions of popular restaurant dishes often have more controlled ingredient quality and generally lower levels of preservatives. For those monitoring sodium intake, remember the Academy of Nutrition and Dietetics recommends limiting sodium to less than 2,300 mg per day for most adults.
Healthier Alternatives for the Recipe
Enjoying your favorite flavors doesn’t mean sacrificing your health goals. Here are some simple, yet effective, modifications to make this Mongolian Beef recipe even better for you:
- Reduce Sodium: Opt for reduced-sodium soy sauce. You can also dilute regular soy sauce with a bit more water for a milder flavor and lower sodium content. Using fresh aromatics like garlic and ginger generously helps boost flavor without relying on salt.
- Cut Down on Sugar: Reduce the amount of brown sugar by half or substitute with a natural sweetener like erythritol or monk fruit sweetener. Alternatively, use a smaller amount of honey or maple syrup which have a slightly different flavor profile but are less refined.
- Leaner Protein: While flank steak is traditional, consider using lean ground turkey or chicken breast, thinly sliced, for a lower-fat alternative. These proteins will cook even faster.
- More Vegetables: Boost the nutritional value by stir-frying in an array of colorful vegetables alongside your beef. Broccoli florets, sliced bell peppers, snow peas, carrots, or even bok choy would be excellent additions, increasing fiber and micronutrients.
- Whole Grains: Serve over brown rice, quinoa, or even cauliflower rice instead of white rice for increased fiber and a lower glycemic index. For an even lighter option, serve it over a bed of steamed greens.
Serving Suggestions
This “better than takeout” Mongolian Beef is a star on its own, but pairing it with the right accompaniments elevates the entire dining experience.
- Classic Comfort: Serve it over a bed of fluffy steamed white rice or for a healthier twist, brown rice. The rice soaks up that glorious garlic sauce beautifully.
- Noodle Nirvana: Tossed with simple stir-fried noodles or ramen, this dish becomes an instant-hit noodle bowl.
- Green Goodness: A side of steamed or stir-fried broccoli, asparagus, or green beans provides a crisp counterpoint to the rich beef. A light salad with a sesame-ginger vinaigrette also works wonders.
- Appetizer Pairings: Start your meal with some crispy spring rolls or delicate potstickers to complete the takeout experience.
- Beverage Bliss: A light lager, a crisp Sauvignon Blanc, or even a refreshing iced green tea would complement the flavors of the dish.
Consider serving it family-style, allowing everyone to customize their plates. I find a beautifully plated dish, perhaps with a sprinkle of extra green onions and chili flakes, tends to encourage more adventurous eating, especially with younger diners!
Common Mistakes to Avoid
Even seasoned cooks can fall prey to common pitfalls. Steering clear of these will ensure your Mongolian Beef is consistently excellent:
- Overcrowding the Pan: This is perhaps the most crucial mistake. When you add too much beef to the pan, the temperature drops rapidly. Instead of searing, the beef will steam, resulting in a gray, tough, and less flavorful product. Always cook in batches for best results. Data indicates that pan overcrowding is a leading cause of unsatisfactory texture in stir-fries.
- Overcooking the Beef: Flank steak cooks quickly, especially when thinly sliced. Two minutes per side is usually sufficient for a beautiful sear and tender interior. Prolonged cooking makes the beef tough and chewy.
- Not Letting the Pan Get Hot Enough: A scorching hot pan is essential for proper searing and creating that desirable caramelized crust on the beef. Don’t add the beef until the oil is shimmering.
- Using Cold Sauce: While the sauce itself can be prepared beforehand, adding a cold sauce to a hot pan with hot beef can cool everything down too quickly. Ensure your sauce is at room temperature to maintain an even cooking temperature.
- Skipping the Cornstarch Slurry: The cornstarch slurry is what provides the signature thick, glossy sauce. Without it, your sauce will be watery and won’t cling to the beef. Make sure to dissolve the cornstarch completely in cold water before adding it to prevent lumps.
- Under-Flavoring the Beef: While the sauce is the star, the initial marinade with soy sauce, rice vinegar, and especially baking soda, significantly contributes to the beef’s flavor and tenderness. Don’t skip these steps.
Storing Tips for the Recipe
Having leftovers of this delicious dish is a gift for future meals. Proper storage ensures it remains as delightful as when it was first made.
- Refrigeration: Store leftover Mongolian Beef in an airtight container in the refrigerator for up to 3-4 days. The sauce tends to thicken further upon cooling, which is perfectly normal.
- Freezing: For longer storage, transfer cooled Mongolian Beef (without rice or noodles, which can become mushy) to freezer-safe containers or heavy-duty freezer bags. It can be frozen for up to 2-3 months. Thaw overnight in the refrigerator before reheating.
- Reheating:
- Stovetop (Recommended): For best results, reheat in a skillet or wok over medium heat, stirring occasionally, until heated through. Add a splash of water or broth if the sauce seems too thick.
- Microwave: Reheat in microwave-safe dishes until warm, stirring halfway through. Be cautious not to overcook, as this can make the beef tough.
- Meal Prep: This recipe is excellent for meal prepping. Cook a larger batch and portion it into individual containers with your preferred carbohydrate (like brown rice or quinoa) and steamed vegetables for easy grab-and-go lunches or dinners. This method helps maintain freshness and makes healthy eating effortless throughout the week.
Conclusion
Congratulations, you’ve just unlocked the secret to creating truly sensational Classic Mongolian Beef Better Than Takeout. This recipe, with its perfectly tender beef and undeniably rich garlic sauce, isn’t just a meal; it’s an experience. We’ve navigated the nuances of ingredients, mastered the art of efficient cooking, and even explored ways to adapt it to your dietary needs and preferences. From the crisp sear of the flank steak to the luscious coating of the sauce, every step is designed to bring restaurant-quality flavors directly to your dining table.
So, ditch the delivery menu and embrace the joy of creating this culinary marvel yourself. We guarantee your taste buds – and your dinner guests – will thank you. Now it’s your turn! Give this recipe a try and let us know your thoughts in the comments below. What was your favorite part? Did you add any unique twists? We love hearing about your kitchen adventures! For more savory inspiration, including a fantastic recipe for Garlic Butter Grilled Ribeye Steak, be sure to explore our other posts!
FAQs
Q1: Can I make this Mongolian Beef gluten-free?
A1: Absolutely! The easiest way is to substitute regular soy sauce with tamari and ensure your hoisin sauce is certified gluten-free (some brands contain wheat). Cornstarch is naturally gluten-free, so no changes needed there.
Q2: What’s the best way to slice flank steak thinly against the grain?
A2: The trick is to partially freeze the flank steak for about 30-45 minutes. This firms it up, making it much easier to achieve those perfectly thin, uniform slices. Slicing against the grain is crucial for tender beef, as it shortens the muscle fibers.
Q3: Why do you add baking soda to the beef?
A3: Baking soda is a fantastic, somewhat secret, tenderizer for beef in Asian cooking. It raises the pH on the surface of the meat, which helps break down and relax the muscle fibers, resulting in incredibly tender meat, often referred to as “velveting.” Use it sparingly, as too much can impart a soapy flavor.
Q4: My sauce isn’t thickening. What should I do?
A4: The most common reason for a thin sauce is not cooking it long enough after adding the cornstarch slurry, or the cornstarch not being fully dissolved before adding. Ensure your cornstarch is thoroughly mixed with cold water to form a smooth slurry. Once added to the simmering sauce, continue to cook and stir for another 1-2 minutes. The sauce should visibly thicken. If it’s still too thin, you can whisk together another small slurry (1 tsp cornstarch with 2 tsp cold water) and add it gradually until the desired consistency is reached.
Q5: Can I prepare parts of this dish in advance for quicker weeknight meals?
A5: Yes, definitely! You can slice and marinate the beef up to 24 hours in advance (store in the refrigerator). The garlic sauce can also be whisked together and stored in an airtight container in the fridge for up to 3 days. Mince your garlic and grate ginger ahead of time as well. This pre-prep makes the actual cooking process incredibly fast, around 15 minutes, perfect for busy evenings.