Introduction
What if your weeknight pasta could taste like your favorite taco night—zesty, cheesy, and ready in one pot—without a sink full of dishes? That idea is exactly what inspired this Cheesy Taco Ground Beef Pasta, a skillet-to-oven dinner bake that balances bold Tex-Mex flavors with creamy, comforting pasta. Many home cooks assume richly spiced sauces require long simmer times and multiple pans, but this recipe proves otherwise: you can build deep flavor fast and keep clean-up minimal.
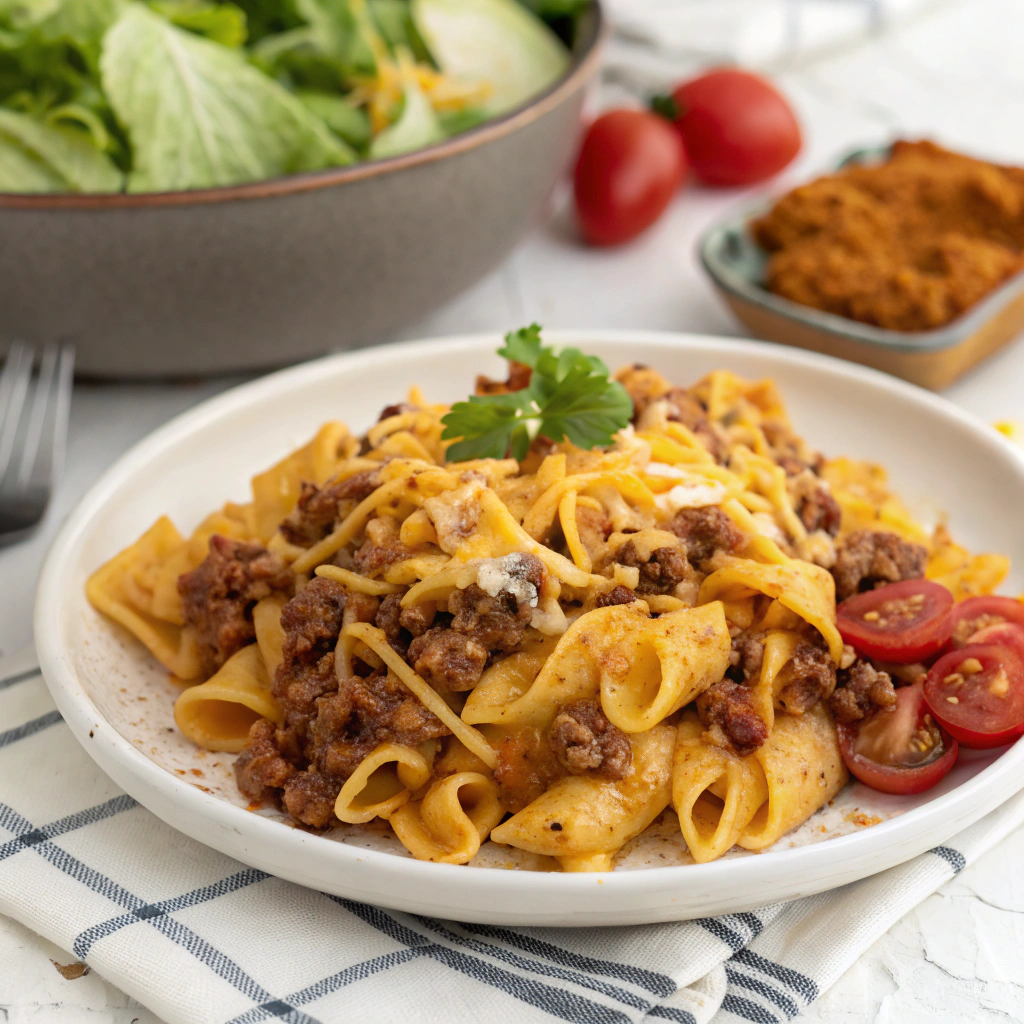
Think of it as a taco pasta bake meets skillet mac-and-cheese—savory ground beef, aromatic spices, tender pasta, a silky sauce, and a bubbly, golden cheese finish. It’s a crowd-pleaser, a kid-favorite, and a budget-friendly champion that adapts to your pantry and dietary needs. Below, you’ll find a data-backed timing guide, ingredient swaps, nutrition breakdown, and step-by-step instructions to ensure this becomes your most reliable one-pot dinner.
Ingredients List
– Ground beef: 1 lb (90% lean recommended for flavor-to-fat balance)
– Olive oil: 1 tablespoon (optional, helps with browning if your pan is very lean)
– Yellow onion: 1 small, finely diced (sweetness to balance heat)
– Garlic: 2–3 cloves, minced
– Tomato paste: 2 tablespoons (adds umami and richness)
– Taco seasoning: 2 tablespoons (store-bought packet or homemade; see tips below)
– Diced tomatoes with green chiles: 1 can (10 ounces) such as Ro-Tel, undrained
– Beef broth: 2 cups (low-sodium preferred to control salt)
– Milk: 1 cup 2% milk (or whole milk; for extra richness, use half-and-half)
– Short pasta: 8 ounces dry (shells, rotini, or cavatappi excel at holding the sauce)
– Black beans: 1/2 cup, drained and rinsed (optional protein and fiber)
– Corn kernels: 1/2 cup (frozen or canned, optional sweetness and texture)
– Cheddar or Mexican blend cheese: 1 to 1 1/2 cups, shredded (divided; melt-in and topping)
– Cream cheese: 2–4 ounces, cubed (optional for ultra-creamy finish; swap with Greek yogurt for lighter)
– Kosher salt and cracked black pepper: to taste
– Fresh toppings for serving: chopped cilantro, sliced green onions, lime wedges, diced avocado, crushed tortilla chips, pickled jalapeños
Substitution ideas:
- Beef: Substitute with ground turkey, chicken, or plant-based crumbles. For extra depth with lean meats, add 1 tablespoon olive oil and 1 extra tablespoon tomato paste.
- Pasta: Use whole wheat or chickpea pasta for extra fiber and protein. Gluten-free pasta works; choose a sturdy shape and reduce simmer time slightly.
- Dairy: Lactose-free milk and dairy-free cheeses melt well in this style of sauce. Omit cream cheese and use a splash of unsweetened oat or almond milk for creaminess.
- Seasoning: Combine 1 tablespoon chili powder, 1 teaspoon each ground cumin and smoked paprika, 1/2 teaspoon each garlic powder, onion powder, and oregano, plus 1/4 teaspoon cayenne (optional), and 1/2 to 3/4 teaspoon kosher salt for a DIY taco blend.
Timing
– Prep time: 10 minutes (dice onion/garlic, shred cheese, gather spices)
– Cook time: 25 minutes stovetop + optional 5-minute broil
– Total time: 35–40 minutes
Data insight:
- Many baked pasta casseroles average 45–60 minutes. At 35–40 minutes, this one-pot version delivers your cheesy taco pasta about 20–40% faster, with fewer dishes and less preheating.
- Yield: 6 servings
- Difficulty: Easy
- Budget estimate: About $10–$12 total (roughly $1.70–$2.00 per serving depending on market prices)
- Equipment: 5–6 quart oven-safe skillet or Dutch oven, wooden spoon, box grater
Step 1: Preheat and prep
– If planning to finish under the broiler, position a rack 6 inches from the heat and preheat the broiler to high.
– Dice your onion, mince garlic, and shred cheese. Having ingredients prepped ensures smooth timing once the pasta goes in.
Tip: Shred cheese from a block for a smoother melt. Pre-shredded blends contain anti-caking agents that can make sauces grainy.
Step 2: Brown the beef for flavor
– Heat your skillet over medium-high. Add olive oil (if using), then the ground beef.
– Season lightly with salt and pepper. Brown for 5–6 minutes, breaking it into crumbles until no longer pink and you see caramelized bits.
Tip: Don’t stir too often at the start. Letting the beef sear undisturbed for 1–2 minutes creates flavorful browning that amplifies the final sauce.
Step 3: Soften aromatics and bloom spices
– Add diced onion and cook 2–3 minutes until translucent. Stir in garlic for 30 seconds.
– Push meat and onions to the edges, add tomato paste to the center, and cook 60–90 seconds to caramelize. Stir in taco seasoning and cook another 30 seconds to bloom the spices.
Tip: Blooming spices in fat wakes up their oils, giving you a rounder, restaurant-quality flavor in less time.
Step 4: Deglaze and build the sauce base
– Pour in the diced tomatoes with green chiles, scraping up any browned bits.
– Add beef broth and milk. Stir to combine and bring to a lively simmer.
Tip: Taste the liquid now. If you used a salty broth or packet seasoning, you may not need additional salt later.
Step 5: Add pasta and optional mix-ins
– Stir in the dry pasta, ensuring it’s submerged. If using black beans and/or corn, add them now.
– Adjust heat to maintain a steady simmer.
Tip: Shells and rotini are ideal; they trap cheese and sauce. If using a very small shape (like elbows), check for doneness earlier.
Step 6: Simmer to al dente
– Cover and cook, stirring every 2–3 minutes to prevent sticking, until pasta is al dente, about 10–12 minutes (check package timing and start checking 2 minutes early).
– If sauce thickens too quickly before pasta is done, add warm broth or water 1/4 cup at a time.
Tip: A one-pot pasta needs a touch more attention than boiling separately—gentle, occasional stirring keeps it creamy without breaking the pasta.
Step 7: Make it cheesy and silky
– Lower heat to medium-low. Stir in half the shredded cheese until melted. If using cream cheese, add it in cubes and stir until smooth.
– Taste and adjust seasoning: add more taco seasoning or a pinch of salt, pepper, or lime juice for brightness.
Tip: For a lighter option, fold in 1/3–1/2 cup plain Greek yogurt off heat. It’s creamy but tangy, and boosts protein.
Step 8: Optional broil for a bubbly top
– Sprinkle remaining cheese over the top. Transfer to the broiler for 2–4 minutes, watching closely, until the cheese is melted and speckled golden.
Safety tip: Use oven mitts and let the skillet rest 3–5 minutes before serving; the sauce thickens slightly as it cools, making perfect spoonfuls.
Step 9: Finish with fresh toppings
– Garnish with cilantro, green onions, and a squeeze of lime. Add crushed tortilla chips, pico de gallo, or pickled jalapeños if you like a punch.
Flavor tip: A little acidity (lime) balances the rich cheese and beef, making each bite pop.
Step 10: Serve smart
– Spoon into bowls and serve with a side salad or simple slaw for crunch. Keep lime wedges on the table for last-minute brightening.
Meal-prep note: This reheats beautifully with a splash of broth or milk to loosen the sauce.
Nutritional Information
Estimated per serving (1/6 of the recipe), without optional cream cheese and toppings:
– Calories: 400–480
– Protein: 24–28 g
– Carbohydrates: 28–36 g
– Total fat: 15–22 g
– Saturated fat: 7–10 g
– Fiber: 3–6 g (higher if including black beans/corn)
– Sodium: 650–900 mg (varies by broth and seasoning)
– Sugars: 4–8 g
Data insights:
- Using 90% lean beef keeps richness while lowering total fat compared to 80% lean (about 30–35% less fat).
- Swapping 8 ounces of regular pasta for chickpea pasta can add 20–30% more protein and double the fiber, with similar cook times in a one-pot method.
Note: Nutrition varies with exact ingredients, cheese amounts, salt levels, and chosen add-ins.
Healthier Alternatives for the Recipe
– Leaner protein: Use 93–96% lean ground beef or ground turkey. Add 1 tablespoon olive oil to help brown lean meats.
– Protein boost: Substitute chickpea or lentil pasta for 50–100% of the pasta amount. It increases protein and fiber substantially.
– Lower sodium: Choose no-salt-added broth and a low-sodium taco seasoning or make your own. Add salt at the end to taste.
– Smarter dairy: Replace cream cheese with 1/2 cup plain Greek yogurt stirred in off-heat. It adds tang and about 8–10 grams of extra protein per serving.
– More veggies: Stir in diced bell peppers, zucchini, or baby spinach with the pasta. The heat wilts greens and keeps everything one-pot.
– Lighten the carbs: Use half pasta and half riced cauliflower. Add the cauliflower in the last 5 minutes to keep texture from getting mushy.
– Dairy-free: Use a creamy, meltable dairy-free cheese and unsweetened oat milk or almond milk. Add 1 tablespoon nutritional yeast for extra cheesy depth.
Serving Suggestions
– Fresh and crunchy: Top portions with shredded lettuce, diced tomatoes, and crushed tortilla chips for “taco salad meets pasta bake.”
– Citrus and heat: Serve with lime wedges and pickled jalapeños; a little acidity lifts the cheese sauce.
– Family platter: Spoon the Cheesy Taco Ground Beef Pasta into a casserole dish and set up topping bowls (cilantro, scallions, avocado, salsa) so everyone customizes their plate.
– Game day spread: Add sides like charred corn salad, guacamole, and a quick slaw with lime-cumin dressing.
– Leftover glow-up: Reheat with a splash of broth and fold in a handful of spinach for a 2-minute refresh.
– Pair it up: If you like globally inspired bowls, you’ll love these Greek Ground Beef Bowls with Tzatziki for a bright, tangy counterpoint later in the week.
Common Mistakes to Avoid
– Overcooking the pasta: Start checking 2 minutes before package al dente time since it cooks in sauce, not plain water.
– Skipping the spice bloom: Adding taco seasoning without blooming it in fat can taste flat. Those 30–60 seconds make a difference.
– Adding dairy too early: Cheese and yogurt can separate on high heat. Reduce heat first or stir off-heat.
– Not scraping the fond: Those browned bits are flavor gold—deglaze thoroughly when adding tomatoes/broth.
– Oversalting: Preseason lightly; packet seasonings and broth already contribute sodium. Adjust at the end.
– Using the wrong pot size: Too small and you’ll have uneven cooking. A 5–6 quart skillet or Dutch oven gives pasta space to move.
– Walking away: One-pot pasta needs a stir every few minutes to prevent sticking and ensure even cooking.
Storing Tips for the Recipe
– Cool quickly: Spread leftovers in a shallow dish for 15 minutes before refrigerating. This prevents overcooking from residual heat.
– Refrigerate: Store in an airtight container 3–4 days.
– Freeze: Portion into freezer-safe containers for up to 2 months. For best texture, undercook pasta by 1 minute if freezing.
– Reheat: Add 1–2 tablespoons broth or milk per cup of pasta. Microwave in 60–90 second bursts, stirring between, or reheat on the stovetop over medium-low.
– Revive texture: A squeeze of lime and fresh scallions bring back brightness after reheating.
– Make-ahead kit: Pre-dice onion and portion dry pasta and homemade taco seasoning in jars. On a busy night, you’ll go from zero to dinner in under 30 minutes.
Conclusion
Cheesy Taco Ground Beef Pasta is the definition of a weeknight win: one pot, big flavor, and a perfectly creamy, zesty sauce that clings to every bite. With a few smart techniques—blooming spices, simmering pasta in a seasoned liquid, and finishing with a melty cheese top—you’ll get a dish that tastes slow-cooked without the wait. Make it your own with beans, corn, peppers, or a dairy swap, and use the tips above to tailor the heat and nutrition to your table.
If this makes your dinner rotation easier, leave a comment and rating, share your tweaks, and tell me which toppings your family loved. Then plan a contrast night with bright Mediterranean vibes using those Greek Ground Beef Bowls with Tzatziki—they’re meal-prep friendly and just as weeknight-proof.
Craving more taco pasta ideas? You may also enjoy this take from another kitchen for inspiration: Taco Pasta.
FAQs
– What pasta shape is best for Cheesy Taco Ground Beef Pasta?
Shells, rotini, and cavatappi are top picks because ridges and curves hold onto sauce and cheese. Avoid very thin shapes; they can overcook in one-pot methods.
-
Can I make it without broiling?
Yes. The broiler adds a bubbly top, but you can simply stir all the cheese into the sauce and serve. For a “bake” feel, cover the pot off-heat for 3–5 minutes to melt the top layer. -
How do I make it gluten-free?
Use a sturdy gluten-free pasta (corn, brown rice, or chickpea). Start checking doneness 2 minutes early and stir gently—GF pasta softens quickly. Ensure your seasoning and broth are certified gluten-free. -
What can I use instead of ground beef?
Ground turkey or chicken works well; add a tablespoon of olive oil and 1 extra tablespoon tomato paste to boost richness. Plant-based crumbles also thrive in this recipe; add them after the aromatics so they don’t dry out. -
How can I make it dairy-free?
Use dairy-free milk (unsweetened almond or oat) and a meltable dairy-free cheese. Skip cream cheese or use a dairy-free cream cheese. Stir in 1 tablespoon nutritional yeast for extra savory depth. -
How do I prevent the pasta from sticking or burning?
Stir every 2–3 minutes while simmering and keep the heat at a steady medium simmer (not a rolling boil). If sauce thickens too fast, add a splash of warm broth. -
What cheese melts best here?
Mild or sharp cheddar, Monterey Jack, or a Mexican blend are ideal. For extra pull, add a little pepper jack. Shredding your own gives the smoothest melt. -
Can I use homemade taco seasoning?
Absolutely. Aim for a blend with chili powder, cumin, smoked paprika, garlic and onion powders, oregano, cayenne (optional), and kosher salt. Bloom in the fat for best results. -
How do I make it spicier or milder?
Spicier: add chipotle powder, diced jalapeños, or a pinch of cayenne. Milder: use plain diced tomatoes instead of those with green chiles and skip any hot peppers. -
Can I double the recipe?
Yes. Use a large Dutch oven (at least 6–7 quarts). Increase simmer time by 2–4 minutes and stir diligently to ensure even cooking. Add extra broth as needed to keep pasta submerged. -
Is this good for meal prep?
Very. Portion into containers and refrigerate up to 4 days. Reheat with a splash of broth or milk and finish with a squeeze of lime and fresh herbs to wake it up.