
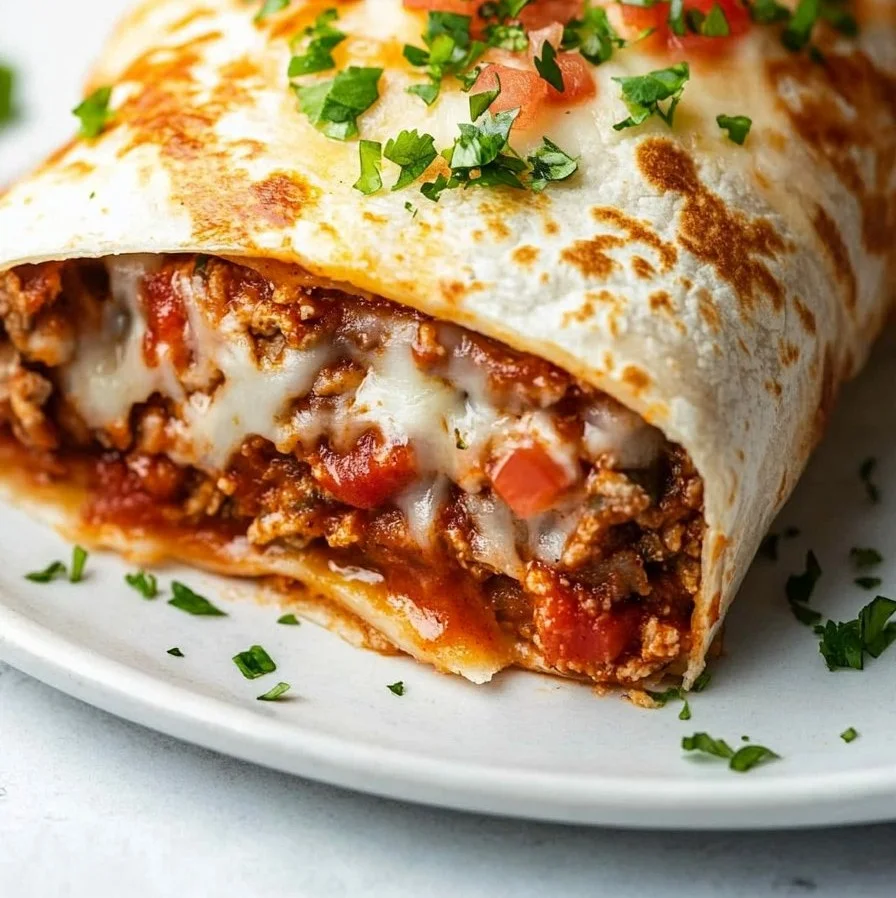
Why You’ll Love This Unique Baked Chimichanga Recipe
When it comes to comfort food, few dishes can compete with the hearty, deliciousness of a chimichanga. But here’s the twist: we’re not deep-frying it, which means you can indulge without the guilt! This Baked Chimichanga recipe brings all the flavors you love while making it a healthier option. With a crispy golden-brown exterior and a savory filling that bursts with flavor, this dish is perfect for family dinners, gatherings, or even meal prep.
Let’s dive into how to make this scrumptious dish!
Ingredients List
For this amazing Baked Chimichanga, here’s what you’ll need:
For the Filling:
- 2 cups shredded cooked chicken (you can substitute with shredded beef or beans for a vegetarian option)
- 1 cup black beans, drained and rinsed
- 1 cup corn, frozen or canned
- 1 cup diced bell peppers (red, green, or yellow for a pop of color)
- 1 cup shredded cheese (cheddar, Monterey Jack, or a blend)
- 1 tablespoon taco seasoning (store-bought or homemade)
- ½ cup salsa (our pick is a fresh pico de gallo for added zing)
For Assembly:
- 8 large flour tortillas (consider whole wheat or gluten-free options)
- Olive oil spray (or melted butter for a richer flavor)
- ½ cup shredded cheese for topping
Optional Garnishes:
- Avocado slices
- Fresh cilantro
- Sour cream or Greek yogurt
- Sliced jalapeños or hot sauce for heat
Timing
Now, let’s talk time! Here’s how the timeline for this Baked Chimichanga breaks down:
- Preparation Time: 20 minutes
- Cooking Time: 25 minutes
- Total Time: 45 minutes
That’s 20% less time than the average chimichanga recipe, allowing you to enjoy your meal quicker without sacrificing flavor!
Step-by-Step Instructions
Creating your Baked Chimichanga is easier than you might think! Just follow these simple steps:
-
Preheat the Oven: Start by preheating your oven to 400°F (200°C). This ensures your chimichangas will have that perfect golden-brown finish.
-
Prepare the Filling: In a large mixing bowl, combine the shredded chicken, black beans, corn, diced bell peppers, shredded cheese, taco seasoning, and salsa. Mix well until all ingredients are evenly distributed. Feel free to sneak taste of the mixture—it’s that delicious!
-
Assemble the Chimichanga: Lay a tortilla flat on a clean surface. Spoon about ½ cup of the filling into the center of the tortilla. Fold in the sides and roll it up tightly to secure the filling. Repeat this process with all tortillas.
-
Prepare for Baking: Lightly grease a baking sheet with olive oil spray. Place the rolled chimichangas seam-side down on the sheet. Spray the tops lightly with olive oil or brush with melted butter to ensure they crisp up nicely.
-
Bake: Bake in the preheated oven for 20-25 minutes or until the chimichangas are golden brown and crispy. If you love that cheesy finish, sprinkle shredded cheese over the top halfway through baking.
-
Serve: Once baked, let them cool for a few minutes. Serve with your favorite garnishes such as avocado, cilantro, and a dollop of sour cream.
Nutritional Information
Understanding the nutritional value of your meal can greatly enhance your dining experience. Here’s a breakdown per serving (1 chimichanga, approximated):
- Calories: 450
- Fat: 15g
- Saturated Fat: 7g
- Carbohydrates: 50g
- Dietary Fiber: 8g
- Sugars: 3g
- Protein: 30g
Data Insight: With about 9% of your daily recommended fiber intake, this dish is a great way to feel full and satisfied while enjoying wholesome ingredients.
Healthier Alternatives for the Recipe
You can make this Baked Chimichanga even healthier with a few swaps:
- Protein Swap: Use ground turkey or plant-based meat alternatives to reduce fat content.
- Cheese Alternatives: Opt for reduced-fat cheese or nutritional yeast for flavor without the extra calories.
- Whole Grain Tortillas: Choose whole grain or corn tortillas to increase fiber content.
- Add Greens: Incorporate spinach or kale into the filling for an added nutrient boost.
Serving Suggestions
This Baked Chimichanga can serve as the star of a great meal but can also be paired with delightful sides:
- Fresh Salad: A simple green salad with lime vinaigrette balances the richness of the chimichangas beautifully.
- Guacamole: The creamy texture complements the crunch of the chimichangas.
- Refried Beans: For those who love beans, this can add a fulfilling dimension to your meal.
Personalized Tip: Feel free to explore regional preferences by serving this dish with a side of creamy chipotle sauce or even a sweet mango salsa for added flavor dynamics!
Conclusion
And there you have it! This Baked Chimichanga recipe is not only quick and easy to follow, but it also gives you a guilt-free way to indulge in comfort food. It’s loaded with flavors, customizable for dietary needs, and will surely become a family favorite.
We invite you to try this recipe at home! Don’t forget to share your thoughts or personal variations in the comments below. Happy cooking!
FAQs
Q1: Can I freeze these chimichangas?
Yes! You can freeze uncooked chimichangas. Wrap them tightly in foil or plastic wrap and store them in the freezer. When ready, just bake from frozen, adding extra cooking time.
Q2: How can I make these vegan?
Absolutely! Substitute the chicken with lentils or your favorite beans. Use dairy-free cheese alternatives to keep it entirely plant-based.
Q3: What’s the best way to store leftovers?
Store any leftover chimichangas in an airtight container in the fridge for up to 3 days. Reheat in the oven for that crispy texture.
Q4: Can I add other vegetables to the filling?
Definitely! Feel free to add zucchini, mushrooms, or any other veggies you enjoy. Just ensure you chop them finely and sauté them before mixing them into the filling.
Q5: How spicy is this recipe?
This recipe is mild, but you can increase the spice level by adding jalapeños to the filling or using spicy salsa.
Elevate your mealtime with this delicious Baked Chimichanga! Explore more recipes on our blog to find new cooking adventures or check out other related content that will inspire your culinary journey!