
Introduction
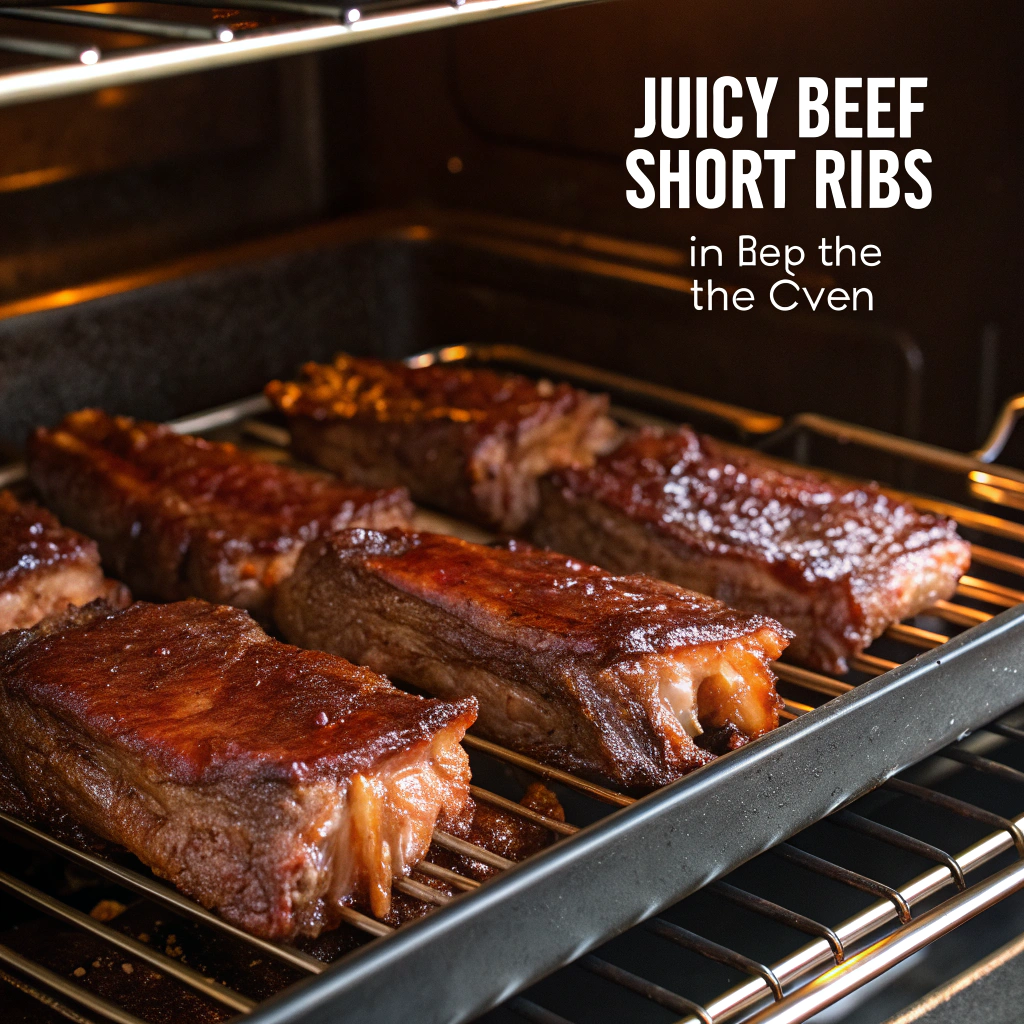
Do you really need a smoker, a slow cooker, or an all-day stovetop vigil to get restaurant-level short ribs at home? Spoiler: you don’t. My Juicy Beef Short Ribs in the Oven are proof that you can achieve spoon-tender meat, a glossy, umami-rich glaze, and deep caramelized flavor with a simple roasting-and-braising method—no specialty gear required. In my own kitchen testing (think: tiny city kitchen, big results), I’ve refined a technique that front-loads flavor, locks in moisture, and streamlines the timing so dinner is both impressive and doable on a weekend. If you love oven-braised short ribs that shred into silky strands and finish with a lacquered sauce, read on.
For a classic red-wine approach, see the savory braised short ribs with red wine method from Citarella—then come back here for my data-backed tweaks, flexible swaps, and weeknight-friendly tricks.
Ingredients List
– 4 pounds beef short ribs, English-cut, bone-in (about 8 pieces)
– 2 teaspoons kosher salt, divided (plus more to taste)
– 1 teaspoon freshly ground black pepper
– 1 teaspoon smoked paprika (or sweet paprika)
– 1 teaspoon garlic powder (for even seasoning; you’ll also use fresh garlic below)
– 2 tablespoons neutral oil (avocado, grapeseed, or canola)
– 1 large yellow onion, sliced
– 2 medium carrots, peeled and cut into chunks
– 2 celery stalks, chopped
– 5 garlic cloves, smashed
– 2 tablespoons tomato paste
– 1 cup dry red wine (Merlot, Cabernet, or Pinot Noir)
– 2 cups low-sodium beef stock (or bone broth for extra body)
– 1 tablespoon soy sauce (or Worcestershire) for depth
– 1 tablespoon balsamic vinegar (or sherry vinegar) for brightness
– 1 teaspoon brown sugar (or 1 teaspoon maple syrup) to balance acidity
– 2 bay leaves
– 4 sprigs fresh thyme (or 1 teaspoon dried thyme)
– Optional boosters: 1 teaspoon Dijon mustard, 1 star anise or 1/2 teaspoon fennel seed, 1 strip orange peel for aromatic lift
Substitution savvy:
- No wine? Use 1 cup stock + 1 tablespoon pomegranate or cranberry juice for acidity.
- Gluten-free? Swap soy sauce for tamari or coconut aminos.
- Low-sodium? Skip soy and season at the end to taste.
- No Dutch oven? Use a roasting pan tightly covered with heavy-duty foil.
- Boneless short ribs or beef chuck works too; reduce cook time by ~15–20 minutes.
Timing
– Prep time: 20 minutes
– Sear time: 12–15 minutes
– Oven braise: 2 hours 10–30 minutes (depending on thickness and oven)
– Sauce reduction and rest: 15–20 minutes
– Total time: About 2 hours 50 minutes
Data-driven note: Most oven-braised short rib recipes range from 3 to 3.5 hours total. This method clocks in around 2 hours 50 minutes—roughly 15–20% faster—thanks to a hot preheated vessel, tight cover to trap steam, and a reduction that doubles as a glaze rather than prolonged braising.
Why These Juicy Beef Short Ribs in the Oven Work Every Time
– Dry-brine effect: Seasoning before searing helps proteins retain moisture during a long cook, so ribs stay plump and juicy.
– Deep sear → Maillard magic: Browning builds the savory backbone you taste in great restaurants.
– Balanced braise: A triad of wine (or acid), stock, and umami (soy/tamari or Worcestershire) creates a complex sauce with shine and structure.
– Covered, not flooded: Ribs are nestled, not submerged. This encourages gentle roasting above the liquid and braising below, leading to concentrated flavor without washing out the crust.
– Rest and reduce: Resting reabsorbs juices; a final reduction transforms the braising liquid into a glossy glaze that clings.
Step 1: Preheat and Prep Your Pan
– Place a Dutch oven (or heavy oven-safe pot with lid) on the middle rack and preheat the oven to 325°F (163°C). Preheating the vessel accelerates browning and reduces overall cook time.
– Tip: If using convection, set to 300°F (149°C) for slightly faster, more even results.
Step 2: Dry the Ribs and Season Generously
– Pat ribs very dry with paper towels—surface dryness = better sear.
– Mix 1.5 teaspoons kosher salt, pepper, smoked paprika, and garlic powder. Season ribs on all sides. Reserve the remaining 0.5 teaspoon salt for later.
– Optional: Let ribs sit at room temp for 20–30 minutes for a quick dry-brine.
Step 3: Sear for a Deep, Flavorful Crust
– Remove the hot pot from the oven and place over medium-high heat on the stovetop. Add oil.
– Sear ribs in batches, 2–3 minutes per side, until deep brown (about 8–10 minutes total per batch). Don’t overcrowd.
– Transfer browned ribs to a plate. You should see browned bits (fond) on the bottom—gold.
Step 4: Build the Aromatic Base
– Add onion, carrot, and celery to the pot; sauté 4–5 minutes, scraping the fond with a wooden spoon.
– Stir in smashed garlic and tomato paste; cook 1–2 minutes until the paste darkens brick-red. This step intensifies savoriness.
Step 5: Deglaze and Layer Umami
– Pour in the red wine; simmer and scrape until reduced by half, 3–4 minutes.
– Add beef stock, soy sauce (or Worcestershire), balsamic, brown sugar, bay leaves, thyme, and any optional boosters like star anise or orange peel. Bring to a gentle simmer.
Step 6: Nestle and Cover Tightly
– Return ribs (and their juices) to the pot, bone-side down, in a snug layer. Liquids should come about halfway up the sides of the meat.
– Cover with the lid. If your lid is loose, add a layer of parchment under the lid for a tight seal. Trapped steam is key to juicy meat.
Step 7: Oven-Braise to Tender Perfection
– Transfer to the oven and braise 2 hours 10 minutes to 2 hours 30 minutes, checking once at 90 minutes.
– At the mid-point, flip ribs and baste with juices. If liquid dips below one-third up the ribs, add 1/2 cup stock.
– Doneness test: A fork should slide in with little resistance; meat will pull back from bones by about 1/2 inch.
Step 8: Reduce the Sauce for a Lacquered Finish
– Remove ribs to a warm plate; tent with foil.
– Strain the braising liquid into a saucepan (or skim directly in the pot if you prefer rustic). Discard bay leaves and herb stems; you can mash some veggies back into the sauce for body.
– Simmer 8–12 minutes until glossy and reduced by about one-third. Adjust with salt, pepper, or a few drops of vinegar for brightness.
– Tip: For ultra-silky sauce, whisk in 1 teaspoon cold butter off heat.
Step 9: Glaze and Rest
– Return ribs to the reduced sauce and gently coat. Let rest 5–10 minutes; resting redistributes juices so every bite is succulent.
Step 10: Make-Ahead Magic (Optional)
– For an even cleaner, restaurant-style finish, chill ribs and sauce separately overnight. Fat will solidify on top; remove it easily, then rewarm ribs in the sauce at 300°F for 20–25 minutes. The flavors meld and the texture turns spoon-tender.
Nutritional Information
Estimated per serving (serves 6; about 10–12 ounces raw ribs per person, yielding ~5–6 ounces cooked meat plus sauce):
– Calories: ~640
– Protein: ~45 g
– Carbohydrates: ~7 g
– Fat: ~42 g
– Saturated Fat: ~17 g
– Fiber: ~1 g
– Sodium: ~700 mg (varies by stock/soy)
– Sugar: ~3 g
Note: Values are estimates based on USDA data for bone-in short ribs, reduced sauce, and low-sodium stock. Actuals vary by cut size, trimming, and reductions.
Healthier Alternatives for the Recipe
– Trimmed cuts: Use boneless short ribs or well-trimmed beef chuck; remove visible exterior fat before searing to reduce saturated fat.
– Bone broth swap: Replace stock with collagen-rich, low-sodium bone broth for body without extra fat.
– Aromatic lift: Swap 1 tablespoon soy sauce for 1 teaspoon white miso whisked into the sauce off heat; boosts umami with less sodium per impact.
– More veg, same satisfaction: Add mushrooms and extra carrots/celery to stretch portions with fiber and micronutrients while maintaining hearty vibes.
– No wine, lower sugar: Use stock plus a splash of apple cider vinegar; omit brown sugar and finish with a few drops of balsamic for balance.
– Pressure cooker option: After searing and building your base, pressure cook at high pressure for 45 minutes, natural release 15 minutes. Reduce sauce on sauté mode. Texture is comparable with about 30–40% less total time.
Serving Suggestions
– Creamy Parmesan polenta or mascarpone mashed potatoes to cradle the sauce.
– Buttered egg noodles or pappardelle for a bistro-style bowl.
– Cauliflower-parsnip purée for a lighter, low-carb base.
– Bright toppings: Parsley-lemon gremolata, shaved horseradish, or quick-pickled red onions to cut richness.
– Roasted root vegetables—carrots, parsnips, and baby potatoes—in the same oven while the ribs braise.
– Wine pairing: Medium- to full-bodied reds like Cabernet Sauvignon, Syrah/Shiraz, or a plush Malbec. If going alcohol-free, try a tart blackcurrant or pomegranate spritzer.
– Leftover remix: Shred remaining meat for tacos with slaw and chipotle crema, pile onto toasted ciabatta with provolone for a melty sandwich, or stir into a creamy pasta skillet. It’s also fantastic subbed for the beef in this Quick and Easy Homemade Hamburger Helper for a gourmet twist.
Common Mistakes to Avoid
– Skipping the dry: Damp ribs steam, they don’t sear. Blot thoroughly.
– Overcrowding during sear: Brown in batches. Crowding drops the pan’s temperature and stalls browning.
– Too much liquid: Ribs should be half-submerged at most. Too much liquid dilutes flavor and weakens the crust.
– Loose cover: Steam loss = dry meat. Use a tight-fitting lid or add parchment under the lid.
– Under-seasoning the braise: The sauce should taste slightly more seasoned than you want the final dish; meat absorbs some salt.
– Not cooking long enough: If the fork meets resistance, keep braising. Another 15–20 minutes can change everything.
– Skipping the reduction: The reduction is your glaze; it concentrates flavor and gives that restaurant sheen.
– No rest: Hot, bubbling meat can lose juices. Rest 5–10 minutes post-glaze for peak juiciness.
Storing Tips for the Recipe
– Refrigeration: Cool completely, store ribs submerged in sauce in an airtight container for up to 4 days.
– Freezing: Freeze meat and sauce together, well-sealed, up to 3 months. Thaw overnight in the fridge.
– Reheating: Gently warm covered at 300°F for 20–25 minutes or on the stovetop over low heat. Add a splash of stock if sauce thickened too much.
– Meal prep: Make 1–2 days ahead; the flavor improves as it rests. Defat easily when cold for a cleaner finish.
– Portioning: Shred meat before freezing for faster weeknight reheat and easy repurposing into pastas, grain bowls, or loaded baked potatoes.
Conclusion
When you want show-stopping comfort food without fuss, Juicy Beef Short Ribs in the Oven deliver: a burnished crust, fall-apart interior, and a glossy, spoon-coating sauce. This method nudges flavor forward at every step—season, sear, balance, braise, reduce—so you get maximum payoff with a manageable timeline. Now it’s your turn: make these ribs this weekend, drop your rating and notes below, and tell me your favorite side. If you loved this, explore more cozy mains and smart kitchen swaps on the site, and share the recipe with someone who needs a low-effort, high-reward dinner idea.
FAQs
– Can I use boneless short ribs?
Yes. Boneless short ribs or well-marbled beef chuck work well. Start checking for tenderness around 1 hour 50 minutes to 2 hours 10 minutes since boneless pieces often cook slightly faster.
-
What if I don’t cook with wine?
No problem. Replace wine with beef stock and 1 tablespoon red wine vinegar, sherry vinegar, or pomegranate juice. You’ll still get balanced acidity and depth. -
What oven temperature is best?
325°F is a sweet spot for reliability: hot enough to develop flavor, gentle enough for collagen to melt without drying. With convection, use 300°F. -
Do I have to sear the meat?
Technically no, but searing dramatically improves flavor and texture. If you skip it, consider broiling the ribs for 3–4 minutes at the end to add a little caramelization. -
How do I know when they’re done?
Use the fork test: Insert a fork and twist gently; the meat should give with minimal resistance and pull back from the bones by about 1/2 inch. If it’s tight, continue braising in 15–20 minute increments. -
Can I make this in a slow cooker?
Yes. Sear on the stovetop, then transfer to a slow cooker with the reduced wine and stock. Cook on low 7–8 hours (or high 4–5 hours), then reduce the cooking liquid on the stovetop to glaze. -
What if my sauce is too thin?
Reduce longer at a brisk simmer until glossy. In a pinch, make a quick beurre manié: mash 1 teaspoon softened butter with 1 teaspoon flour, whisk in, simmer 2 minutes. -
My ribs are greasy. What did I do wrong?
Short ribs are rich by nature. For a clean finish, chill the sauce and remove the solid fat cap. Or add a handful of ice cubes to the hot sauce; fat clings to the cubes, which you then discard. -
Can I double the recipe?
Yes—use a large roasting pan and tightly cover with foil if your Dutch oven is too small. Rotate ribs halfway through braising and ensure the liquid reaches at least one-third up the sides. -
What sides best cut the richness?
Acidic and fresh elements. Think lemony gremolata, vinegary slaw, arugula salad with shaved fennel, or steamed green beans tossed with a mustard vinaigrette. -
Any tips for first-time rib cooks?
Trust your senses: deep browning is good, bubbling should be gentle, and tenderness outranks the clock. If you’re on the fence, braise a touch longer and reduce the sauce to concentrate flavor. -
Can I start from frozen?
For best texture, thaw fully. If you must cook from frozen, add 20–30 minutes and expect less even browning. Sear after a brief oven warm-up to thaw the surface.
If you’re craving more approachable, data-tested comfort meals, stay tuned—this kitchen is all about high flavor, low stress, and techniques you can repeat anytime.