
Introduction
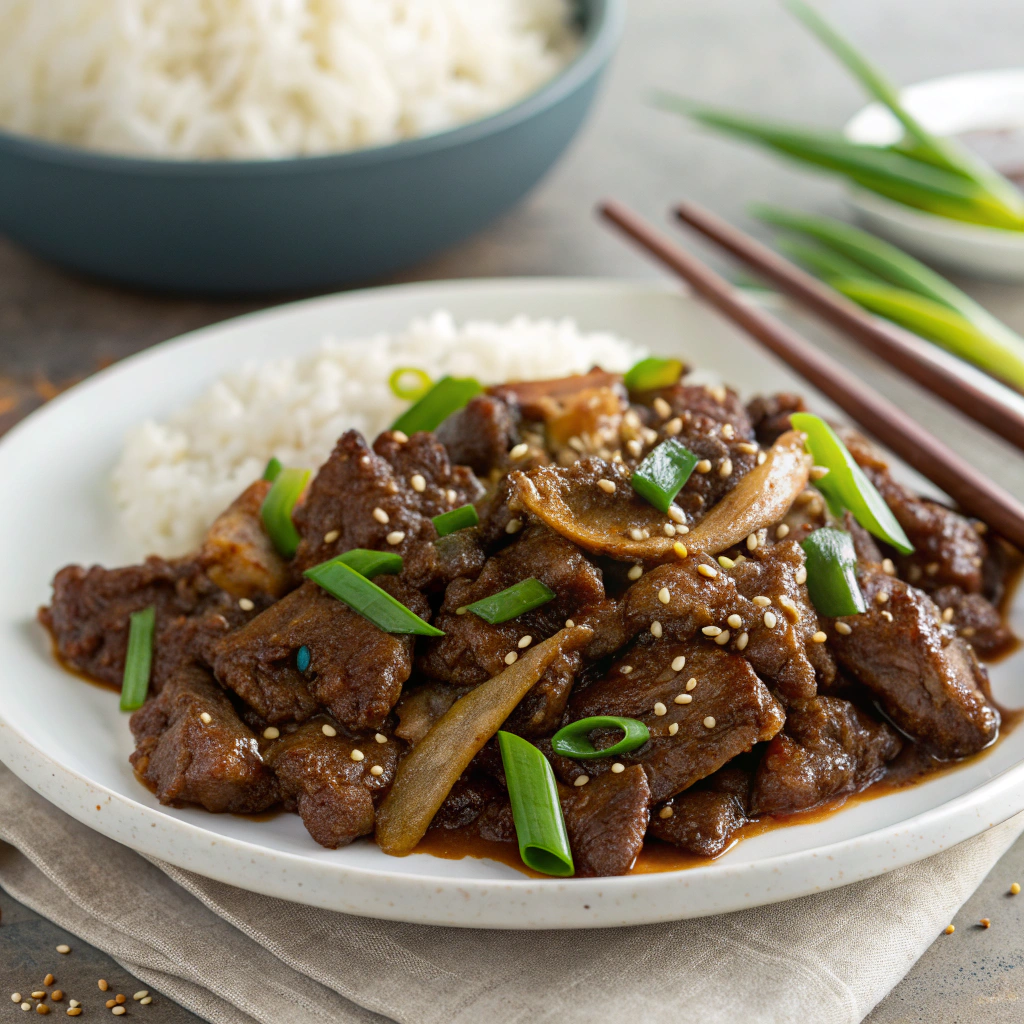
What if the glossy, garlicky-sweet stir-fry you crave doesn’t require a wok, a deep fryer, or a takeout bag? That’s the promise of this PF Chang’s Copycat Mongolian Beef Recipe—an at-home version that hits the same sweet-salty, umami-packed notes while staying weeknight easy. The surprise: you don’t need restaurant equipment to get that lacquered sheen and tender bite. With a few pro techniques, you’ll get beef that’s crisp at the edges, juicy in the center, and cloaked in a silky brown-sugar–soy glaze that clings just right.
In our Feast of Savory test kitchen, we obsess over making “takeout-at-home” recipes that are simpler, smarter, and adaptable. This Mongolian-style beef is built for busy cooks: minimal chopping, a swift stovetop sear, and a sauce that thickens in under a minute. Ready to level up stir-fry night and make it your signature crowd-pleaser?
Ingredients List
– Flank steak, 1.5 pounds, thinly sliced against the grain (sub: sirloin, skirt steak, or flap meat). Tip: Partially freeze the steak for 20–30 minutes to make slicing easier and thinner.
– Cornstarch, 1/4 cup, for velveting and crisping the edges (sub: potato starch or tapioca starch).
– Neutral oil, 2–3 tablespoons (canola, avocado, or grapeseed) for high-heat searing.
– Fresh garlic, 4 cloves, minced. Expect a savory punch that perfumes the kitchen.
– Fresh ginger, 1 tablespoon, finely grated or minced, for bright heat and depth.
– Scallions, 5–6, cut into 1-inch pieces, divided (white parts for sizzle, green tops for fresh finish).
– Low-sodium soy sauce, 1/2 cup (sub: tamari for gluten-free; coconut aminos for lower sodium and a rounder sweetness).
– Water, 1/2 cup.
– Dark brown sugar, 1/2 cup, packed (sub: light brown sugar + 1 teaspoon molasses; for lower sugar, see Healthier Alternatives).
– Rice vinegar, 2 teaspoons, for balance (sub: apple cider vinegar at 1 teaspoon).
– Shaoxing wine, 1 tablespoon, optional but recommended for restaurant-style savoriness (sub: dry sherry or omit).
– Red pepper flakes, 1/2 teaspoon (sub: a dash of chili crisp or a sliced fresh chili).
– Toasted sesame oil, 1 teaspoon, for finishing aroma.
– Black pepper, to taste.
– Optional vegetable add-ins: 2 cups broccoli florets, snow peas, or thinly sliced bell peppers (pre-blanch sturdy veg for 1–2 minutes so they stay crisp-tender).
– Optional thickener: Additional cornstarch slurry (1 teaspoon cornstarch mixed with 1 tablespoon water) if you prefer a thicker glaze.
– Garnishes: Sesame seeds and extra scallion greens.
Ingredient insight: Cornstarch isn’t just a coating—it’s your texture insurance. It forms a micro-crust that grips the sauce, so every bite carries that signature gloss and sweetness.
Timing
– Prep time: 15 minutes (20 minutes if you partially freeze the steak for easier slicing)
– Cook time: 10–12 minutes
– Total time: 25–30 minutes, which is approximately 20–30% faster than many stovetop copycat recipes that average 35–40 minutes when you account for heavier chopping and marinating.
Speed tip: Mix the sauce first. Stir-fries move fast; having the sauce ready prevents overcooking while you scramble for the soy.
Step 1 – Slice the steak thin (and smart)
– Partially freeze the steak for 20–30 minutes until firm at the edges. Slice across the grain into 1/4-inch thick pieces.
– Personal tip: Angle the knife slightly to create wider slices with more surface area for crisping and saucing.
Step 2 – Velvet with cornstarch
– Pat the slices dry with paper towels to remove surface moisture. Toss with 1/4 cup cornstarch until lightly coated; shake off excess.
– Why it matters: Dry meat browns. Cornstarch creates crisp edges that hold the glaze without turning gummy.
Step 3 – Whisk the sauce
– In a bowl, whisk together soy sauce, water, dark brown sugar, rice vinegar, Shaoxing wine (if using), red pepper flakes, and black pepper. Set near the stove.
– Flavor note: Taste and adjust. Want more savory? Add 1–2 teaspoons extra soy. Prefer brighter? Another splash of vinegar.
Step 4 – Heat the pan properly
– Use a large stainless-steel skillet or wok. Heat 1–2 tablespoons neutral oil over medium-high until shimmering.
– Check: A drop of water should skitter across the surface—that’s your green light.
Step 5 – Sear in batches
– Add beef in a single layer. Don’t crowd. Sear 45–60 seconds per side until browned with crisp speckles; transfer to a plate. Repeat, adding oil as needed.
– Insider tip: Batch cooking keeps the pan hot. Overcrowding steams the beef and kills the crust.
Step 6 – Aromatics on the sizzle
– Drop heat to medium. Add a tiny splash of oil if the pan is dry. Sauté minced garlic and ginger for 20–30 seconds until fragrant—don’t brown.
– Optional: Stir in the white parts of the scallions for a quick 15-second wilt.
Step 7 – Build the glaze
– Pour in the sauce. Let it bubble for 60–90 seconds, stirring, until it thickens and looks glossy. If you prefer thicker, add the cornstarch slurry and cook 20 seconds more.
– Watch for “nappe”—when the sauce coats the back of a spoon and leaves a trail when you drag a finger through it.
Step 8 – Return the beef
– Add the seared beef (and any collected juices) back to the pan. Toss quickly to coat every piece. Heat 30–60 seconds until the glaze clings.
– Stir in sesame oil and the green tops of the scallions. Taste and adjust salt, heat, or sweetness.
Step 9 – Optional vegetable finish
– If using broccoli or snow peas, fold them in now. If they’re raw, briefly steam them before adding so they keep color and crunch.
Step 10 – Plate and garnish
– Serve immediately over hot rice or noodles. Sprinkle sesame seeds and extra scallions for color and crunch.
Nutritional Information
Approximate values per serving (4 servings total; calculated using 1.5 lb flank steak, 2 tablespoons oil absorbed, 1/2 cup dark brown sugar, and standard low-sodium soy sauce):
– Calories: ~490–510
– Protein: ~40–44 g
– Carbohydrates: ~28–32 g
– Total Fat: ~21–24 g
– Saturated Fat: ~6–8 g
– Sodium: ~900–1,150 mg (varies by soy sauce brand)
– Sugars: ~22–26 g
– Fiber: ~0–1 g
Notes and insights:
- Protein is robust thanks to steak—ideal for high-protein meal plans.
- Sodium can be significantly reduced by using low-sodium soy or coconut aminos; expect a 25–40% decrease depending on brand.
- To lower sugars by up to 40%, reduce brown sugar to 1/3 cup; consider adding 1–2 teaspoons additional vinegar for balance.
Healthier Alternatives for the Recipe
– Reduce sugar, maintain balance: Use 1/3 cup brown sugar plus an extra 1–2 teaspoons rice vinegar to keep flavor bright. Or use 1/4 cup brown sugar + 2 tablespoons date syrup for gentle sweetness with minerals.
– Lighten the sauce: Replace half the soy sauce with low-sodium broth. Add a dash of fish sauce (1/2 teaspoon) for umami without more sodium.
– Leaner proteins: Swap flank steak for sirloin tip or even thin-sliced chicken breast or pork tenderloin. Adjust cook times: chicken/pork may need a minute longer to cook through.
– Gluten-free: Use tamari instead of soy sauce and ensure your cornstarch is certified gluten-free.
– Lower carb: Replace some brown sugar with an erythritol-based brown sweetener; start with a 50/50 split and finish with a splash more vinegar to balance sweetness perception.
– Veg-forward: Add 2 cups of quick-cooking vegetables—broccoli florets, snow peas, or thin carrot coins—for volume and fiber with minimal added calories.
– Air fryer option for the beef: Toss sliced, cornstarch-coated steak with 1 tablespoon oil. Air fry at 400°F (205°C) for 6–8 minutes, shaking once. Toss in stovetop-reduced sauce to finish. Expect extra-crisp edges and slightly lighter oil use.
Serving Suggestions
– Classic bowl: Spoon the PF Chang’s Copycat Mongolian Beef Recipe over jasmine rice, letting sauce soak into the grains.
– Whole-grain twist: Serve with brown rice or quinoa for extra fiber. Tip: Set rice to cook before you start slicing beef so everything finishes together.
– Noodle night: Toss with cooked lo mein or udon and a handful of bean sprouts. Thin the sauce with a splash of hot water to coat noodles.
– Lettuce cups: For a lighter, crunchy option, spoon the beef into butter lettuce leaves and top with cucumber sticks, scallions, and sesame seeds.
– Bento box style: Pair with steamed broccoli, pickled cucumbers, and a citrus wedge for brightness.
– Meal-prep idea: Divide into 4 containers with rice and snap peas. The glaze keeps the beef juicy for up to 4 days.
Want a hearty, veggie-forward rice pairing next time? Try this fast weeknight favorite: one-pot ground beef veggie brown rice skillet.
Common Mistakes to Avoid
– Overcrowding the pan: Crowding traps steam and prevents browning. Cook the beef in 2–3 batches for best crust.
– Slicing with the grain: Always slice against the grain for tenderness. With the grain = chewy.
– Wet beef: Moisture is the enemy of browning. Pat dry thoroughly before coating with cornstarch.
– Overcooking aromatics: Garlic and ginger burn fast. 20–30 seconds is enough; add sauce right as they get fragrant.
– Overreduced sauce: Syrupy is good; sticky-thick can turn cloying. If it thickens too much, whisk in 1–2 tablespoons hot water.
– Adding scallions too early: Fold in the green tops at the end to keep them vibrant.
– Using regular soy when you need low sodium: Start with low-sodium soy; you can always add salt at the end, but you can’t take it out.
Storing Tips for the Recipe
– Refrigeration: Store in an airtight container for up to 4 days. Reheat gently on the stovetop over medium with a splash of water to revive the sauce.
– Freezing: Freeze in meal-prep portions for up to 2–3 months. Thaw overnight in the fridge; reheat on the stovetop. The glaze may look thick at first—loosen with a tablespoon of water.
– Make-ahead components:
– Slice and freeze beef in flat, labeled freezer bags for up to 2 months. Thaw in the fridge before cooking.
– Mix the sauce up to 5 days ahead and refrigerate. Shake before using (starch can settle if you added a slurry).
– Pre-chop aromatics and store separately in airtight containers for up to 3 days.
– Lunch box tip: Pack beef and rice together, keep crisp veg separate, and combine after reheating so everything stays snappy.
Conclusion
The PF Chang’s Copycat Mongolian Beef Recipe proves that takeout-worthy results are possible with a skillet, everyday pantry staples, and a few pro methods. Thin slicing, a light cornstarch veil, proper pan heat, and a balanced sauce deliver that iconic sweet-savory finish—fast.
Ready to cook? Grab your skillet, make the sauce, and sear in batches. Then tell me how you customized it: extra heat, more veg, or low-sugar twists. Leave a comment with your tweaks, rate the recipe, and share a photo of your glossy masterpiece. And if you love exploring restaurant favorites at home, you might also enjoy this Panda Express Mongolian Beef copycat for your next night-in inspiration.
FAQs
– Can I use a different cut of beef?
Yes. Flank steak is classic, but sirloin, skirt steak, or flap meat work well. Choose a cut with visible grain so you can slice against it for tenderness.
-
How do I slice beef thin without a deli slicer?
Partially freeze the steak for 20–30 minutes to firm it up. Use a sharp chef’s knife and cut at a slight angle across the grain. -
Do I need a wok?
No. A large stainless-steel or cast-iron skillet provides excellent surface contact and heat retention. The key is high heat and cooking in batches. -
Can I make it gluten-free?
Use tamari instead of soy sauce and confirm your cornstarch is certified gluten-free. Everything else remains the same. -
What if I don’t want to use that much sugar?
Reduce brown sugar to 1/3 cup and add 1–2 teaspoons extra rice vinegar for balance. For low-carb, try a brown sugar–style erythritol blend; adjust to taste. -
What’s the best cornstarch substitute?
Potato starch or tapioca starch. They behave similarly in velveting and thickening. Use the same amount and watch the sauce—it thickens quickly. -
Can I swap the protein?
Absolutely. Thin-sliced chicken breast or pork tenderloin are great. For tofu, press extra-firm tofu, cut into sticks, cornstarch-coat, crisp in oil or air fryer, then sauce. -
Why did my beef turn out tough?
Likely causes: slicing with the grain, overcooking, or low pan heat (which steams instead of sears). Remedy: thinner slices, hotter pan, shorter sear, and don’t crowd the pan. -
My sauce got too thick and sticky. How do I fix it?
Whisk in 1–3 tablespoons hot water until the sauce loosens to a glossy glaze. Next time, reduce for less time or lower the heat slightly. -
Can I double the recipe?
Yes, but sear in more batches to maintain browning. Keep finished beef warm in a low oven (200°F / 93°C) while you reduce the sauce, then combine. -
Any tips for extra shine like the restaurant?
Finish with 1 teaspoon toasted sesame oil and a small knob (1 teaspoon) of cold butter whisked in off heat for a brilliant sheen. -
What sides pair well?
Steamed jasmine or brown rice, garlic bok choy, sesame cucumbers, or simple miso soup. For crunch, add a cabbage slaw dressed with rice vinegar and sesame.
Cook boldly, tweak to your taste, and enjoy sweet-and-savory takeout bliss at home—no delivery driver required.