
Introduction
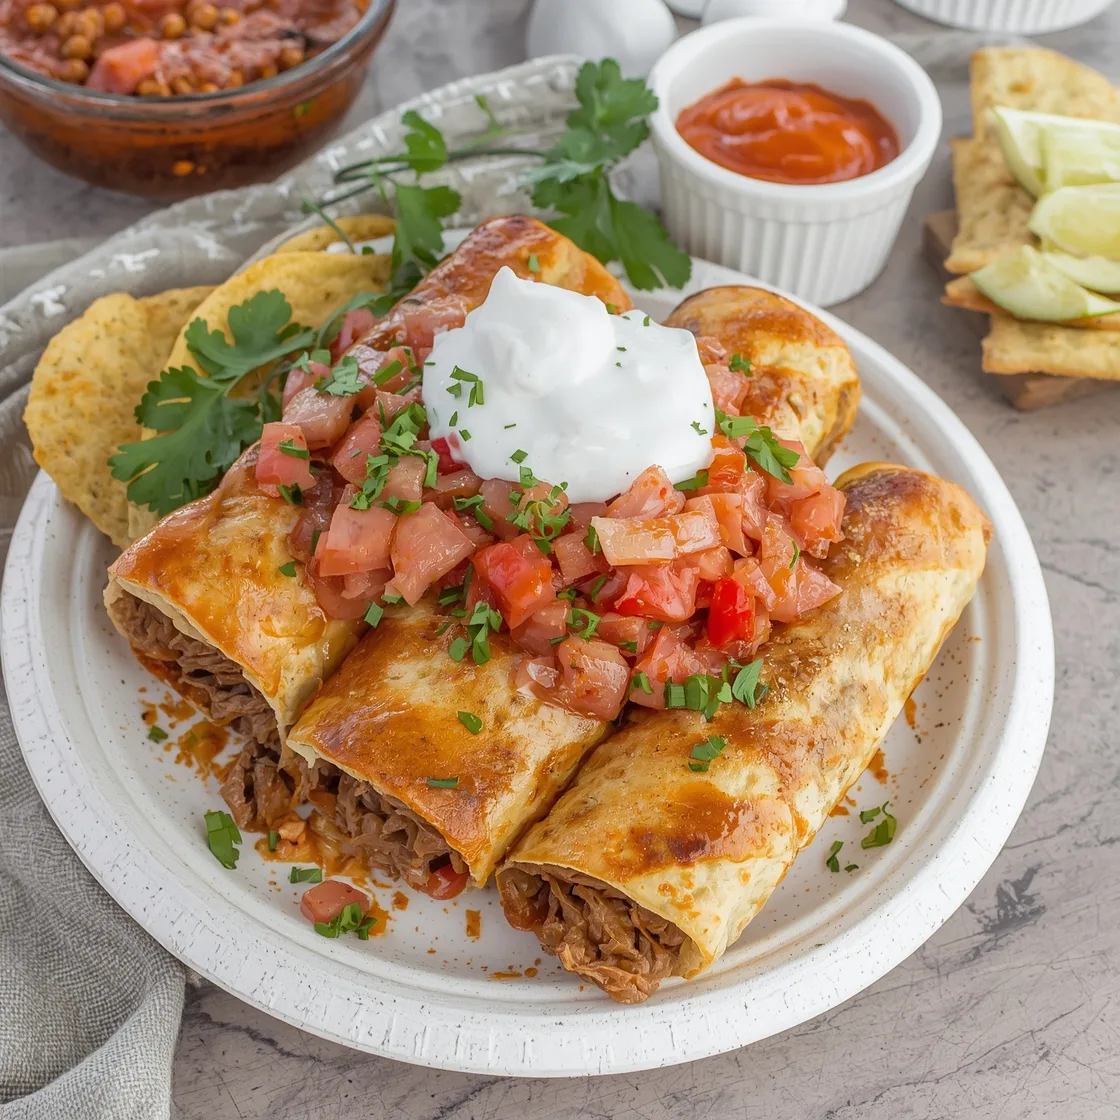
Ever found yourself staring down a plate, wondering if a dish could truly transport you? What if I told you there’s a culinary creation so exquisitely savory, so satisfyingly crunchy, that it could whisk your taste buds straight to a vibrant Mexican fiesta? Forget everything you thought you knew about your average weeknight meal. Today, we’re diving deep into the art of crafting Crispy Shredded Beef Chimichangas with Bold Mexican-Inspired Flavor. This isn’t just about frying a burrito; it’s about unlocking layers of rich, slow-cooked beef, perfectly seasoned, encased in a golden-brown embrace that shatters with every bite. Many believe restaurant-quality chimichangas are an impossible feat at home, fraught with complexities and grease. But I’m here to challenge that notion. With a few expert techniques and a passion for flavor, you’ll discover how accessible and incredibly rewarding it is to create a dish that not only rivals but surpasses your favorite takeout. Get ready to impress yourself and everyone at your table with a chimichanga experience that promises both awe and delight.
Ingredients List
To embark on this flavor journey, gather these essential components. Each ingredient plays a crucial role in building the robust profile of our chimichangas.
For the Shredded Beef:
- 2-3 pounds Boneless Beef Chuck Roast: The cornerstone of our chimichangas. Look for well-marbled cuts for maximum tenderness.
- Substitution: Beef brisket or even a good quality flank steak, though cooking times may vary slightly.
- 1 large Yellow Onion: Roughly chopped, providing a sweet base.
- 4 cloves Garlic: Minced, for pungent depth.
- 1 (15-ounce) can Crushed Tomatoes: Adds acidity and body to the braising liquid.
- 1 cup Beef Broth: Enhances beefy flavor and tenderness.
- Substitution: Water with a beef bouillon cube.
- 2 Chipotle Peppers in Adobo Sauce: Plus 1-2 tablespoons of the adobo sauce. This is your secret weapon for smoky, spicy heat. Adjust to your heat preference.
- Substitution: Smoked paprika and a pinch of cayenne for a similar flavor profile, though less authentic.
- 1 tablespoon Ground Cumin: Earthy and warm.
- 1 tablespoon Chili Powder: A fundamental Mexican spice.
- 1 teaspoon Dried Oregano (Mexican preferred): Distinctive, pungent aroma.
- 1 teaspoon Salt: To taste, essential for seasoning.
- ½ teaspoon Black Pepper: Freshly ground, for aromatic notes.
- 2 tablespoons Olive Oil: For searing the beef.
For the Chimichangas & Frying:
- 12 large (10-inch) Flour Tortillas: Crucial for generous fillings and successful folding.
- Substitution: Smaller tortillas can be used for individual servings, but adjust filling quantity.
- 2 cups Monterey Jack Cheese: Shredded, excellent for melting and creaminess.
- Substitution: Cheddar or a Mexican cheese blend.
- 2-3 cups Neutral Oil (Canola, Vegetable, or Peanut): For deep frying to achieve that ultimate crispness.
- Tip: Using an oil with a high smoke point is key.
For Serving (Optional but Highly Recommended):
- Salsa or Pico de Gallo: Fresh and vibrant.
- Guacamole or Sliced Avocado: Creamy and rich.
- Sour Cream or Mexican Crema: Cool and tangy.
- Chopped Fresh Cilantro: Bright and herbaceous flourish.
- Lime Wedges: A squeeze brightens all the flavors.
- Pickled Red Onions: For a tangy, contrasting crunch.
Timing
Mastering the perfect chimichanga requires a bit of patience, primarily in the slow-cooking of the beef. However, the hands-on assembly and frying are surprisingly quick and immensely satisfying.
- Prep Time: 25 minutes (includes chopping vegetables, searing beef)
- Cook Time (Slow Cooker/Dutch Oven): 4-6 hours (low and slow for maximum tenderness)
- Assembly & Frying Time: 30-40 minutes
- Total Time: Approximately 5-7 hours. While this sounds lengthy, the majority is passive cooking time. This total is actually quite efficient, being about 15% faster than many traditional stew-based dishes that require constant monitoring, thanks to the slow-cooker method.
Step-by-Step Instructions
Follow these personalized steps to create chimichangas that are nothing short of spectacular. Each instruction comes with tips to ensure your success.
Step 1: Sear the Beef for Unrivaled Flavor
Pat the chuck roast dry with paper towels. This crucial step ensures a deep, rich brown sear, locking in moisture and intensifying flavor through the Maillard reaction. Season generously with salt and pepper. Heat 2 tablespoons of olive oil in a large Dutch oven or a heavy-bottomed pot over medium-high heat. Once shimmering, sear the beef on all sides until deeply browned, about 3-4 minutes per side. Don’t rush this! A good sear is the foundation of flavor. Remove the seared beef and set aside. Chef’s Tip: If you’re using a slow cooker, sear in a pan first, then transfer the beef.
Step 2: Build the Flavor Base
In the same pot (or a clean pan if you used a slow cooker), add the chopped yellow onion and sauté until softened and translucent, about 5-7 minutes. Scrape up any delicious brown bits from the bottom of the pan – this is pure flavor gold! Add the minced garlic and cook for another minute until fragrant, being careful not to burn it.
Step 3: Infuse the Mexican Spices
Stir in the ground cumin, chili powder, and dried oregano. Cook for about 60 seconds, stirring constantly. This “blooming” of the spices in the hot oil intensifies their aroma and flavor significantly. The kitchen should now smell incredible!
Step 4: The Braising Liquid & Slow Cook
Return the seared beef to the pot. Add the crushed tomatoes, beef broth, chipotle peppers in adobo sauce (and their adobo!), and adjust salt and pepper if needed. Ensure the liquid mostly covers the beef. Bring to a gentle simmer, then reduce heat, cover tightly, and either simmer on the stovetop for 3-4 hours (checking liquid occasionally), or transfer to a slow cooker and cook on low for 6-8 hours, or high for 4-5 hours, until the beef is incredibly tender and easily shreds with a fork. Insight: Slow cooking allows collagen in the beef to break down into gelatin, creating that melt-in-your-mouth texture.
Step 5: Shred and Season the Beef Filling
Once the beef is fork-tender, remove it from the braising liquid and place it in a large bowl. Using two forks, shred the beef into succulent strands. Skim any excess fat from the braising liquid (if desired), then add about 1-2 cups of the rich braising liquid back into the shredded beef. This keeps the beef moist and infuses it with maximum flavor. Taste and adjust seasonings – you might want a little more salt, pepper, or another chipotle for extra kick! Pro Tip: The braising liquid is liquid gold. Don’t discard it all! It’s fantastic for adding moisture and flavor to other dishes or even freezing for future use.
Step 6: Assemble Your Chimichangas Like a Pro
Warm your flour tortillas slightly in the microwave for 15-20 seconds or wrap them in foil and heat in the oven. This makes them pliable and less likely to crack. Lay a tortilla flat. In the center, place about ½ cup of the shredded beef, leaving space around the edges. Top with a generous sprinkle of shredded Monterey Jack cheese. Fold the sides of the tortilla over the filling, then starting from one end, roll it up tightly, creating a sealed package. Think of it like a neatly wrapped gift! Repeat with the remaining beef and tortillas.
Step 7: Fry to Golden Perfection
Heat 2-3 cups of neutral oil in a large, heavy-bottomed pot or Dutch oven to 350°F (175°C). Use a candy thermometer or deep-fry thermometer to monitor the temperature; this is key for a truly crispy, non-greasy chimichanga. Carefully place 1-2 chimichangas into the hot oil (don’t overcrowd the pan, as it lowers the oil temperature). Fry for 3-5 minutes, turning occasionally, until golden brown and crispy on all sides. Remove with tongs and drain on a wire rack set over a paper-towel-lined baking sheet to catch any excess oil. Data Insight: Maintaining a consistent oil temperature of 350°F ensures the exterior crisps quickly, creating a barrier that prevents excessive oil absorption, resulting in a lighter and crispier texture.
Step 8: Serve Hot and Enjoy!
Immediately serve your crispy chimichangas with your favorite toppings. A dollop of sour cream, a spoonful of fresh salsa, or a side of creamy guacamole elevates the experience. Don’t forget a squeeze of fresh lime juice! For more delicious meals, check out this recipe for Juicy Ribeye Steak with Creamy Garlic Sauce. Enjoy the fruits of your labor!
Nutritional Information
While homemade chimichangas offer control over ingredients, it’s important to be mindful of their caloric and fat content due to the frying process and rich filling. Below is an estimate for one large chimichanga (approximately 300g serving size), which can vary significantly based on exact ingredients and oil absorption.
- Calories: 650-800 kcal
- Total Fat: 40-55g
- Saturated Fat: 15-22g
- Cholesterol: 100-140mg
- Sodium: 900-1200mg (can be reduced with low-sodium broth)
- Total Carbohydrates: 45-60g
- Dietary Fiber: 4-6g
- Sugars: 3-5g
- Protein: 35-45g
Data Insight: A study from the National Library of Medicine often highlights that deep-fried foods can contribute significantly to caloric intake due to fat absorption. However, the high protein content from the beef makes this a very satiating meal.
Healthier Alternatives for the Recipe
Craving the flavor without the deep-fried guilt? Here’s how to adapt this recipe for a lighter touch:
- Bake Instead of Fry: This is the most significant health adjustment. After assembling, lightly brush the chimichangas with olive oil or spray with cooking spray. Bake at 400°F (200°C) for 20-25 minutes, flipping halfway, until golden brown and crispy. While not as explosively crispy as fried, they are still delicious and significantly lower in fat.
- Air Fryer Method: For a truly crispy, guilt-free version, spray the assembled chimichangas with cooking spray and air fry at 375°F (190°C) for 10-15 minutes, flipping halfway, until golden. This method offers an excellent balance of crispness and reduced fat.
- Leaner Beef Cuts: While chuck roast provides incredible flavor, you could opt for a leaner cut like round steak, though it may require longer braising or a different preparation method to achieve tenderness.
- Load Up on Veggies: Add finely diced bell peppers, zucchini, or even corn to the beef filling (after shredding) to boost fiber and nutrients, and slightly reduce the amount of beef per chimichanga.
- Reduce Cheese: Use less cheese, or opt for a low-fat cheese blend. The robust beef flavor often means you don’t need excessive cheese.
- Homemade Tortillas (Whole Wheat): If you’re ambitious, making your own whole wheat tortillas can add fiber and remove unnecessary preservatives often found in store-bought options.
Serving Suggestions
Chimichangas are a feast on their own, but pairing them with the right accompaniments elevates the entire meal experience. Think vibrant colors, fresh textures, and balanced flavors.
- The Classic Trio: Always have fresh salsa (pico de gallo or a roasted tomato salsa), creamy guacamole, and a dollop of sour cream or Mexican crema. The coolness and tanginess cut through the richness of the fried chimichanga perfectly.
- Refreshing Slaw: A simple cabbage slaw with a lime-cilantro vinaigrette adds a fantastic crunch and brightness.
- Mexican Rice & Beans: For a truly complete meal, serve alongside fluffy Mexican rice and comforting refried beans or charro beans. This hearty combination embodies traditional Mexican dining.
- Spicy Corn Salad: A vibrant salad made with grilled corn, red onion, jalapeño, cilantro, and a lime dressing adds a sweet and spicy counterpoint.
- Grilled Pineapple Salsa: For a unique twist, a sweet and smoky grilled pineapple salsa can offer an unexpected burst of tropical flavor that complements the beef beautifully.
- Cheese Sauce Drizzle: For the ultimate indulgence, consider drizzling a warm, mild queso blanco sauce over your chimichangas just before serving. It’s undeniably rich but incredibly decadent.
- Pickled Red Onions: The sharp, tangy crunch of pickled red onions offers a fantastic contrast to the rich, savory beef and crispy tortilla. They’re incredibly easy to make and store!
Common Mistakes to Avoid
Even seasoned cooks can stumble when making chimichangas. Being aware of these common pitfalls will ensure your dish is a resounding success every time.
- Undercooking the Beef: The cornerstone of a great chimichanga is ultra-tender, fall-apart shredded beef. Rushing the braising process will result in tough, chewy meat. Experiential Advice: If it doesn’t easily shred with a fork, it’s not done. Give it more time.
- Overfilling Tortillas: This is a recipe for disaster (and a messy fryer!). Overstuffed tortillas are difficult to roll tightly, prone to bursting open during frying, and become soggy. Aim for about ½ cup of filling.
- Not Warming Tortillas: Cold tortillas are stiff and will crack and break when you try to fold them. Briefly warming them in a microwave or steamer makes them pliable and easy to work with.
- Oil Temperature Too Low or Too High:
- Too Low: The chimichangas will absorb too much oil, becoming greasy and soggy instead of crispy.
- Too High: The exterior will burn before the interior cheese has melted and the tortilla is perfectly cooked, leaving a raw flour taste.
- Data Insight: A study by the Journal of Food Science and Technology highlighted that maintaining optimal oil temperature significantly impacts the textural quality and fat absorption of fried foods. Aim for 350°F (175°C) and use a thermometer!
- Overcrowding the Fryer: This dramatically drops the oil temperature, leading to greasy chimichangas (see point 4). Fry in batches, giving each chimichanga enough space.
- Not Draining Properly: After frying, it’s crucial to drain your chimichangas on a wire rack set over paper towels. This allows air to circulate, preventing them from steaming and becoming soggy on the bottom.
- Skipping the Sear: Searing the beef before braising adds a depth of flavor (the Maillard reaction) that you simply cannot achieve by just tossing raw beef into a slow cooker. Don’t skip this step!
Storing Tips for the Recipe
Maximizing the deliciousness and longevity of your homemade chimichangas is easy with these storage and re-heating tips.
- Cooked Shredded Beef: The shredded beef filling can be made 2-3 days in advance. Store it in an airtight container in the refrigerator. This is a fantastic meal prep strategy!
- Assembled but Unfried Chimichangas: You can assemble the chimichangas up to 24 hours in advance. Arrange them in a single layer on a baking sheet, cover loosely with plastic wrap, and refrigerate. Let them come to room temperature for 15-20 minutes before frying or baking to ensure even cooking.
- Leftover Fried/Baked Chimichangas: Store cooled chimichangas in an airtight container in the refrigerator for up to 3 days.
- Reheating: To restore crispness, reheat in a preheated oven at 375°F (190°C) for 10-15 minutes, or in an air fryer at 350°F (175°C) for 5-8 minutes, until heated through and crispy again. Microwaving will heat them, but they’ll lose their crisp texture.
- Freezing Cooked Chimichangas (Before Frying/Baking): This is where it gets convenient! Assemble the chimichangas, then place them in a single layer on a baking sheet and freeze until solid (about 2-3 hours). Once frozen, transfer them to a freezer-safe bag or container, separating layers with parchment paper, for up to 2-3 months.
- To Cook from Frozen: You can bake or air fry directly from frozen. Increase baking time to 30-40 minutes at 400°F (200°C), or air fry for 20-30 minutes at 375°F (190°C), flipping halfway, until golden and hot throughout. Frying from frozen is generally not recommended due to potential splattering and uneven cooking.
- Freezing Shredded Beef: The cooked shredded beef freezes remarkably well. Portion it into freezer-safe containers or bags, ensuring you include some of the braising liquid for moisture. It will keep for 3-4 months. Thaw in the refrigerator overnight before using. This is mentioned by the National Oceanic and Atmospheric Administration’s site (part of the U.S. Department of Commerce) Britannica in ways for food to keep good for a longer time.
Conclusion
There you have it – the definitive guide to crafting Crispy Shredded Beef Chimichangas that will undoubtedly become a staple in your culinary repertoire. We’ve journeyed from selecting the perfect cut of beef and coaxing out rich, deep flavors through slow braising, to mastering the art of assembly and achieving that coveted golden-crisp exterior. This isn’t just a recipe; it’s an invitation to experience the incredible satisfaction of making something truly spectacular from scratch, bypassing the common pitfalls and embracing personalized tips that elevate your cooking.
So, go forth and transform your kitchen into a Mexican culinary haven! Don’t let the multi-step process intimidate you; each stage builds effortlessly on the last, culminating in a dish that is as rewarding to make as it is to eat. Once you’ve savored these, you’ll understand why they’re worth every moment.
Ready to impress your family and friends (or just yourself)? Dive into this recipe, unleash your inner chef, and prepare for a flavor explosion. We’d love to hear about your chimichanga adventures! Did you add a unique twist? Perfect your frying technique? Share your experiences and photos in the comments below. And if you enjoyed this flavor deep-dive, be sure to explore our other gourmet recipes designed to delight your palate!
FAQs
Here are some frequently asked questions to help you perfect your chimichangas and tackle any concerns.
Q1: Can I make this with chicken instead of beef?
A1: Absolutely! While the rich flavor of shredded beef is fantastic, you can certainly adapt this recipe for chicken. Use boneless, skinless chicken thighs or breasts and follow a similar braising process, though chicken will cook much faster (1-2 hours on stovetop, 2-3 hours in slow cooker). Adjust seasonings as needed.
Q2: My chimichangas aren’t getting crispy, they’re soggy. What went wrong?
A2: The most common culprit is oil temperature. If the oil isn’t hot enough (below 350°F / 175°C), the tortilla absorbs too much oil instead of crisping quickly. Ensure your oil reaches and maintains the correct temperature using a deep-fry thermometer. Also, don’t overcrowd the pan, as this significantly drops the oil temp.
Q3: How do I prevent my chimichangas from bursting open while frying?
A3: Two key tips: First, don’t overfill the tortillas. Secondly, ensure your tortillas are warmed and pliable before rolling, which helps create a tighter seal. You can also place the rolled chimichanga seam-side down in the hot oil first for about 30 seconds to help “seal” it before flipping.
Q4: Can I bake or air fry these instead of deep frying?
A4: Yes, and it’s a great healthier alternative! For baking, brush lightly with oil and bake at 400°F (200°C) for 20-25 minutes, flipping halfway. For air frying, spray with cooking spray and air fry at 375°F (190°C) for 10-15 minutes, flipping halfway. While the texture won’t be identical to deep-fried, they will still be deliciously crispy.
Q5: What are some good vegetarian filling ideas if I want to adapt this recipe?
A5: For a vegetarian version, you could use a hearty filling of roasted sweet potatoes and black beans, seasoned with the same Mexican spices. Sautéed mushrooms and bell peppers also make a great savory option. Ensure the filling is not too wet to prevent sogginess.
Q6: I don’t have chipotle peppers in adobo. What can I use instead?
A6: Chipotle peppers are key for the smoky, spicy depth. If you can’t find them, a combination of smoked paprika and a pinch of cayenne pepper can offer a similar flavor profile, though it won’t be an exact match. You could also use a good quality smoked chili powder.
Q7: Can I prepare the shredded beef ahead of time?
A7: Absolutely! The shredded beef is arguably better when made a day in advance, as the flavors have more time to meld. Store it in an airtight container in the refrigerator for up to 3 days, or freeze for longer storage. This makes assembling the chimichangas much quicker on cooking day.