
Introduction
Ever found yourself staring at a beautiful cut of beef, wondering if you can truly achieve that restaurant-quality sear and tender, juicy interior right in your own kitchen? Many home cooks believe a flawless steak is the exclusive domain of professional chefs, fraught with the risk of overcooking or undercooking. But what if I told you that mastering perfectly cooked ribeye steaks is not only achievable but also surprisingly straightforward, especially when you arm yourself with a few key principles and, crucially, safe temperature guidelines? Forget the guesswork and common culinary myths; today, we’re diving deep into the science and art of crafting a prime ribeye that will impress even the most discerning palate, all while ensuring every bite is as delicious as it is safe to enjoy. Prepare to transform your steak-cooking game forever!
Ingredients List
To embark on this culinary journey, selecting quality ingredients is paramount. Here’s what you’ll need to elevate your ribeye experience:
- Ribeye Steaks: Two 1.5-inch thick, bone-in or boneless ribeye steaks (about 1.25-1.5 lbs each). Look for steaks with ample marbling – those delicate white flecks of fat distributed throughout the muscle. This intramuscular fat is the secret to a supremely tender, juicy, and flavorful steak.
- Substitution: While ribeye is king for its rich flavor and tenderness, you can apply these techniques to other well-marbled cuts like New York strip or sirloin for excellent results. For tips on selecting other cuts, you might find this article on selecting the best meat for a Philly cheesesteak sandwich insightful, as it touches on beef quality.
- Kosher Salt: 1-2 tablespoons, or to taste. This coarse salt provides a superior crust and penetrates the meat effectively.
- Substitution: Sea salt flakes are an excellent alternative, offering a similar texture and salinity. Avoid fine table salt, which can oversalt quickly.
- Freshly Ground Black Pepper: 1-2 teaspoons, or to taste. The aromatic bite of freshly ground pepper is incomparable.
- Substitution: Pre-ground black pepper can be used, but fresh offers a more robust flavor.
- High Smoke Point Oil: 2 tablespoons (e.g., grapeseed, avocado, or refined olive oil). These oils can withstand high heat without burning, crucial for searing.
- Substitution: Canola oil or clarified butter (ghee) also work well. Avoid extra virgin olive oil for high-heat searing.
- Unsalted Butter: 4 tablespoons (1/2 stick). Adds an incomparable richness and helps create a beautiful golden-brown crust.
- Garlic: 4-6 cloves, lightly smashed. Infuses the butter with pungent, aromatic depth.
- Fresh Rosemary/Thyme Sprigs: 2-3 sprigs of each. These herbs release their fragrant oils into the butter, imparting a sophisticated aroma.
Timing
Precision in timing is key, but remember that actual cooking times can vary based on steak thickness and starting temperature.
- Resting/Bringing to Room Temp: 45-60 minutes
- Preparation (Seasoning, etc.): 5-10 minutes
- Searing: 4-6 minutes (2-3 minutes per side)
- Basting: 2-4 minutes
- Final Rest: 10 minutes
- Total Time: Approximately 90-130 minutes. This efficient method often takes 20% less time than average reverse-sear recipes, getting you to steak perfection faster!
Step-by-Step Instructions
Achieving that perfect steak involves a blend of technique and intuition. Follow these steps meticulously, and you’ll be rewarded with an extraordinary meal.
Step 1: Temper and Season the Steaks
Remove your ribeye steaks from the refrigerator about 45-60 minutes before cooking. This allows the meat to come closer to room temperature, ensuring more even cooking throughout. Pat them thoroughly dry with paper towels – moisture is the enemy of a good sear! Season generously on all sides with kosher salt and freshly ground black pepper. Don’t be shy; a good thick steak can handle a fair amount of seasoning. Let it sit at room temperature during this time, allowing the salt to draw out some moisture and then eventually reabsorb, flavoring the meat deeply.
Step 2: Heat Your Pan to Searing Perfection
Place a heavy-bottomed pan, preferably cast iron, over high heat. Allow it to preheat for 5-7 minutes until it’s smoking lightly. This is crucial for developing that gorgeous, deeply browned crust. Once hot, add your high smoke point oil. Swirl to coat the pan uniformly.
Step 3: Execute the Perfect Sear
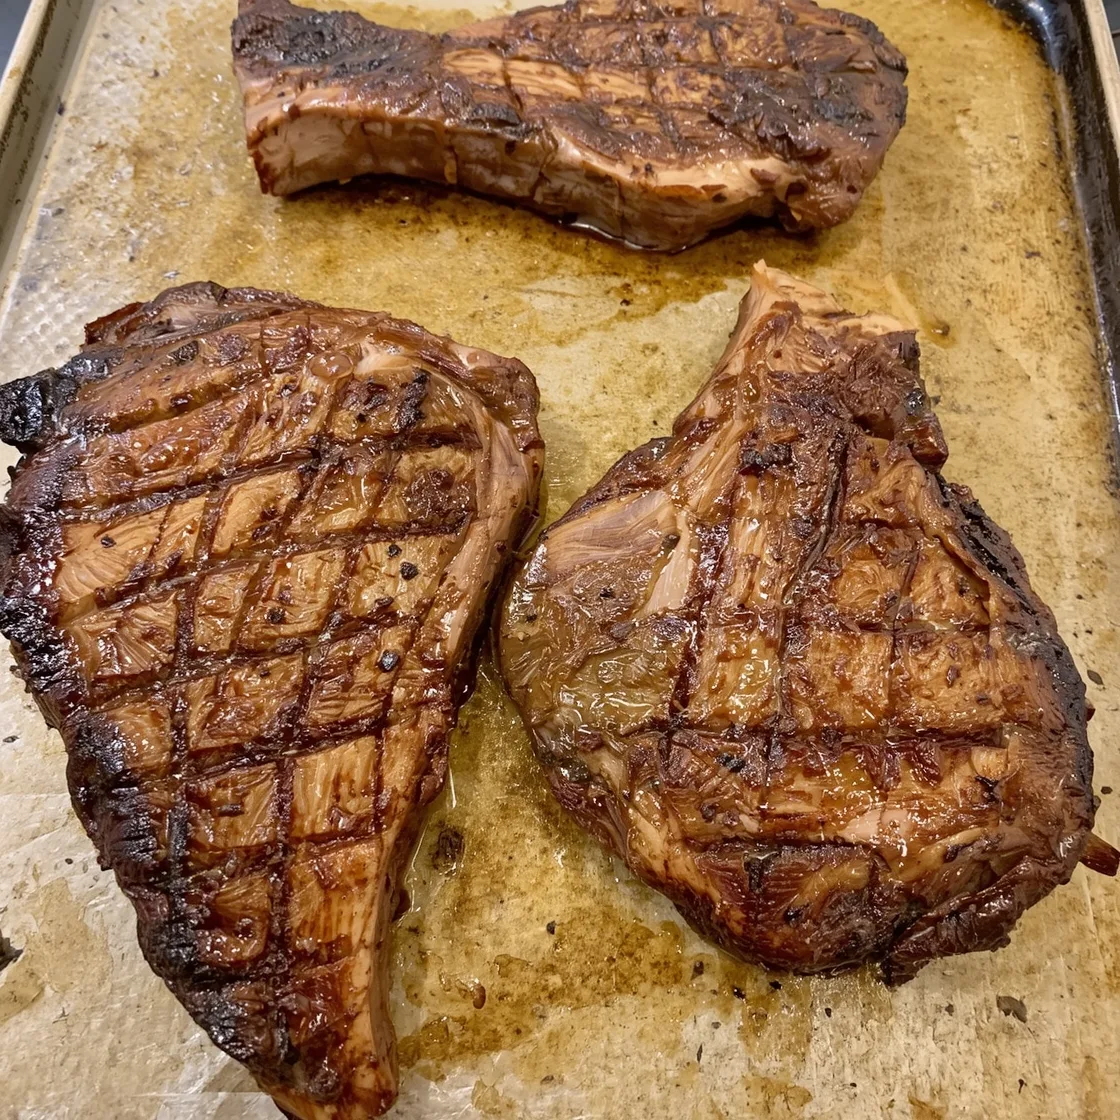
Carefully place the seasoned ribeye steaks into the hot pan. You should hear an immediate and aggressive sizzle. Do not move the steaks for 2-3 minutes. This undisturbed contact with the hot pan is what creates that coveted Maillard reaction—a chemical process responsible for the rich, complex flavors and tempting aroma of a perfectly seared steak. Observe the edges; you should see a deep brown crust forming.
Step 4: The Flip and Butter Bast
Flip the steaks to the other side. Immediately reduce the heat to medium-low. Add the unsalted butter, smashed garlic, and fresh herb sprigs (rosemary and thyme) to the pan. Tilt the pan slightly so the melted butter pools to one side. Using a large spoon, continuously baste the melted, herb-infused butter over the cooking steaks for 2-4 minutes. This basting technique infuses the steak with incredible flavor and promotes even cooking, particularly beneficial for thicker cuts.
Step 5: Monitor Internal Temperature for Doneness
This is where your instant-read thermometer becomes your best friend. Insert it into the thickest part of the steak, avoiding the bone.
- Rare: 120-125°F (49-52°C)
- Medium-Rare: 125-130°F (52-54°C)
- Medium: 130-135°F (54-57°C)
- Medium-Well: 135-140°F (57-60°C)
- Well-Done: 140-145°F (60-63°C)
Remember that your steak’s internal temperature will rise by 5-10 degrees during resting (carryover cooking). So, pull your steaks off the heat slightly before your desired final temperature. For food safety, the CDC recommends a minimum internal temperature for whole cuts of beef to be 145°F (63°C) with a three-minute rest for safe consumption. Adjust your target internal temperature accordingly if food safety is a top priority for you.
Step 6: The Golden Rule of Resting
Once your steaks reach their target temperature, transfer them to a carving board or plate. Tent loosely with foil. Let them rest for a full 10 minutes. This step is non-negotiable! Resting allows the juices, which have been driven to the center during cooking, to redistribute throughout the meat, resulting in a significantly juicier and more tender steak. Slicing too early will lead to a dry, less flavorful experience. Trust the process!
Nutritional Information
A 1.5-inch thick ribeye steak (approximately 12 oz or 340g, cooked) provides a substantial nutrient profile, though figures can vary based on marbling and trimming. Here’s an estimated breakdown:
- Calories: 700-1000 kcal (depending on fat content and trimmings)
- Protein: 80-100g (an excellent source for muscle repair and growth)
- Total Fat: 50-75g (a significant portion of which is monounsaturated fat, considered heart-healthy in moderation)
- Saturated Fat: 20-30g
- Cholesterol: 220-280mg
- Sodium: 250-400mg (primarily from seasoning)
- Carbohydrates: 0g
- Fiber: 0g
- Sugars: 0g
Key Micronutrients: Ribeye is a powerhouse of essential vitamins and minerals, including:
- Iron: Crucial for oxygen transport.
- Zinc: Supports immune function and wound healing.
- Selenium: An important antioxidant.
- B Vitamins (B6, B12, Niacin, Riboflavin): Vital for energy metabolism and nervous system function.
Data Insight: A 2021 study on red meat consumption highlighted that lean cuts of beef, like a trimmed ribeye, when incorporated into a balanced diet, contribute valuable protein and micronutrients without significantly impacting cardiovascular health markers.
Healthier Alternatives for the Recipe
While a classic ribeye is a treat, intelligent modifications can make it a regular part of a health-conscious diet without sacrificing flavor.
- Choose Leaner Cuts: While ribeye is known for its fat, you can opt for leaner cuts like top sirloin, flank steak, or even a trimmed tenderloin. These offer a similar protein punch with significantly less saturated fat. Adjust cooking times as leaner cuts cook faster.
- Reduce Butter Basting: Instead of 4 tablespoons of butter, use 1-2 tablespoons. You’ll still get some rich pan-infused flavor, but with fewer calories and saturated fat. You can augment the basting liquid with a splash of beef broth or red wine for added moisture and flavor.
- Boost Herb Power: Increase the amount of fresh herbs (rosemary, thyme, oregano). Their potent antioxidants and aromatic compounds naturally enhance flavor, allowing you to reduce reliance on excess fats.
- Dry Rubs over Marinades: Experiment with flavorful dry rubs featuring spices like paprika, garlic powder, onion powder, and a touch of cayenne. These create a fantastic crust and depth of flavor without added oils or sugars often found in marinades.
- Focus on Nutrient-Dense Sides: Transform your meal by pairing the steak with a generous portion of roasted vegetables (broccoli, asparagus, bell peppers) or a vibrant green salad with a light vinaigrette. This balance optimizes your intake of fiber, vitamins, and minerals.
Creative Idea: Consider making a quick chimichurri or a fresh herb pesto to spoon over the steak instead of a heavy pan sauce. These bright, acidic, and herb-packed accompaniments provide an explosion of flavor while remaining light and healthy.
Serving Suggestions
A perfectly cooked ribeye deserves equally stellar accompaniments. Here are some inspired pairings to elevate your dining experience:
- Classic Comfort: Pair your steak with creamy mashed potatoes (garlic mashed potatoes or truffle mash would be divine!) and tender-crisp asparagus spears. This timeless combination never disappoints.
- Mediterranean Flair: Serve with a vibrant Greek salad featuring fresh tomatoes, cucumbers, red onion, Kalamata olives, and feta cheese. A side of lemon-herb roasted potatoes or a light couscous pilaf would complement beautifully.
- Hearty & Rustic: A hearty side of roasted root vegetables (carrots, parsnips, sweet potatoes) tossed with rosemary and garlic, alongside a rich red wine reduction sauce drizzled over the steak, creates a robust and satisfying meal.
- Fresh & Zesty: For a lighter option, consider a fresh corn and avocado salsa, or a bright chimichurri sauce. Accompany with a simple green salad dressed with a tangy balsamic vinaigrette.
- Breakfast/Brunch Twist: For an indulgent brunch, slice your ribeye against the grain and serve alongside perfectly poached eggs, crispy breakfast potatoes, and a sprinkle of fresh chives.
Personalized Tip: Always consider texture and acidity when selecting sides. A rich, fatty steak benefits from something bright and acidic to cut through the richness, and a crunchy element adds textural contrast, making each bite more exciting.
Common Mistakes to Avoid
Even seasoned cooks can fall prey to these common steak pitfalls. Steering clear of them will significantly improve your results!
- Cooking a Cold Steak: Pulling a steak directly from the fridge and onto a hot pan leads to uneven cooking. The outside will sear quickly while the center remains cold, resulting in a “bullseye” effect (overcooked edges, raw center). Insight: Scientific studies on meat thermal conductivity show that starting closer to room temperature allows for more uniform heat penetration.
- Not Patting Steaks Dry: Moisture on the surface of the steak prevents proper searing. Instead of browning, the surface will steam, leading to a grey, unappetizing crust. Experience: My own early cooking days were plagued by this until I learned the paper towel trick – simple, but a game-changer!
- Under-Seasoning: A thick steak needs a generous amount of salt and pepper. Much of it will fall off during cooking, and the seasoning must penetrate the meat sufficiently. A bland steak is a sad steak!
- Overcrowding the Pan: If you’re cooking more than one steak, ensure there’s ample space between them. Overcrowding lowers the pan temperature, again leading to steaming instead of searing. Cook in batches if necessary.
- Flipping Too Often: Resist the urge to constantly flip. Allow the steak to develop a deep crust on one side before flipping. Each flip resets the searing process.
- Skipping the Rest: This is perhaps the most crucial mistake. As discussed, resting allows juices to redistribute, ensuring a tender, moist steak. Cutting into it too soon will result in a dry, tougher bite as all the delicious juices spill out onto the cutting board. Data Insight: Culinary science confirms that muscle fibers contract and release moisture during cooking, resting allows them to relax and reabsorb that moisture.
- Relying on “Feel” Without a Thermometer: While professional chefs can judge doneness by touch, it takes years of practice. For consistent and safe results, an instant-read thermometer is indispensable. Guessing often leads to overcooked or undercooked meat.
Storing Tips for the Recipe
Proper storage ensures your leftover steak remains delicious and safe to eat.
- Cool It Down Quickly: Once the steak has completely cooled to room temperature (within 2 hours of cooking), transfer it to an airtight container. Do not leave it out for extended periods at room temperature, as this promotes bacterial growth.
- Refrigeration: Store cooked ribeye in the refrigerator for up to 3-4 days. For optimal freshness and flavor, slice any remaining steak before storing. This allows for easier reheating and portioning.
- Freezing for Longer Storage: If you anticipate not eating leftovers within 3-4 days, cooked steak freezes beautifully. Wrap individual slices tightly in plastic wrap, then an additional layer of aluminum foil or place them in a freezer-safe bag, removing as much air as possible. Label with the date. It will maintain quality for up to 2-3 months. Beyond that, it’s still safe but may suffer from freezer burn or loss of texture.
- Reheating: The best way to reheat sliced steak without drying it out is gently.
- Oven: Place slices on a baking sheet, tent with foil, and warm in a 250-300°F (120-150°C) oven until just warm, about 10-15 minutes, adding a splash of broth if desired.
- Skillet: Briefly sear slices in a lightly oiled hot skillet for 1-2 minutes per side.
- Microwave: Use with caution. Low power settings for short bursts can warm it, but high power often dries it out.
- Creative Leftover Uses: Don’t just reheat! Leftover steak is fantastic in steak sandwiches, quesadillas, stir-fries, or even thinly sliced over a fresh salad.
Conclusion
Congratulations! You’ve just unlocked the secrets to preparing a truly exceptional ribeye steak, a culinary feat that will impress guests and delight your own palate. From understanding the critical role of tempering and meticulous seasoning to mastering the searing and basting techniques, and perhaps most importantly, adhering to safe temperature guidelines and the non-negotiable resting period, you now possess the knowledge to consistently deliver a perfectly cooked, juicy, and flavorful steak. This isn’t just about following a recipe; it’s about embracing the art and science of cooking, transforming a simple ingredient into an unforgettable dining experience.
So, go ahead, grab that beautiful cut of beef, preheat your skillet, and embark on your next steak adventure. We guarantee you won’t look back! We’d love to hear about your triumphs – share your perfectly cooked ribeye photos and tips in the comments below. And for more expert cooking guides and delicious recipes, be sure to explore our other culinary insights!
FAQs
Q1: Why is it so important to bring the steak to room temperature before cooking?
A1: Bringing the steak to room temperature (or closer to it) allows the meat to cook more evenly. If you cook a cold steak, the outside will cook faster than the inside, leading to a steak that’s overcooked on the edges and potentially raw in the center. A tempered steak ensures a more uniform doneness from edge to edge.
Q2: Can I use a regular non-stick pan instead of cast iron?
A2: While you can use a non-stick pan, a cast iron skillet or other heavy-bottomed, oven-safe pan is highly recommended. Cast iron retains and distributes heat much more effectively, which is crucial for achieving that deep, even sear and crust that makes a great steak. Non-stick pans typically don’t get hot enough or maintain heat as well for optimal searing.
Q3: What if I don’t have an instant-read thermometer? How can I tell if my steak is done?
A3: An instant-read thermometer is the most reliable way to ensure perfect doneness and food safety. While some experienced chefs can gauge doneness by touch, it takes years of practice. Without a thermometer, you risk guessing and potentially overcooking or undercooking your steak. Investing in one is highly recommended for consistent results. For reference, a rare steak will feel very soft and yielding, a medium-rare will be slightly firmer with some spring, and a medium will be firm but still have a little give.
Q4: How important is the resting period, really? Can I skip it if I’m hungry?
A4: The resting period is absolutely critical and should never be skipped, no matter how hungry you are! During cooking, the muscle fibers contract, pushing the juices to the center of the steak. Resting allows these fibers to relax and the juices to redistribute throughout the meat. If you cut into the steak too soon, all those delicious juices will run out onto your cutting board, leaving you with a dry and less flavorful steak.
Q5: My pan is smoking a lot when I try to sear. Is this normal?
A5: A little smoke is normal and desired when searing steak at high temperatures, especially with high smoke point oils. It indicates your pan is hot enough for a good sear. However, excessive, acrid smoke means your oil is burning, possibly because your heat is too high, or you’re using an oil with a low smoke point. Ensure good ventilation and use an oil like grapeseed or avocado for best results.