
Introduction
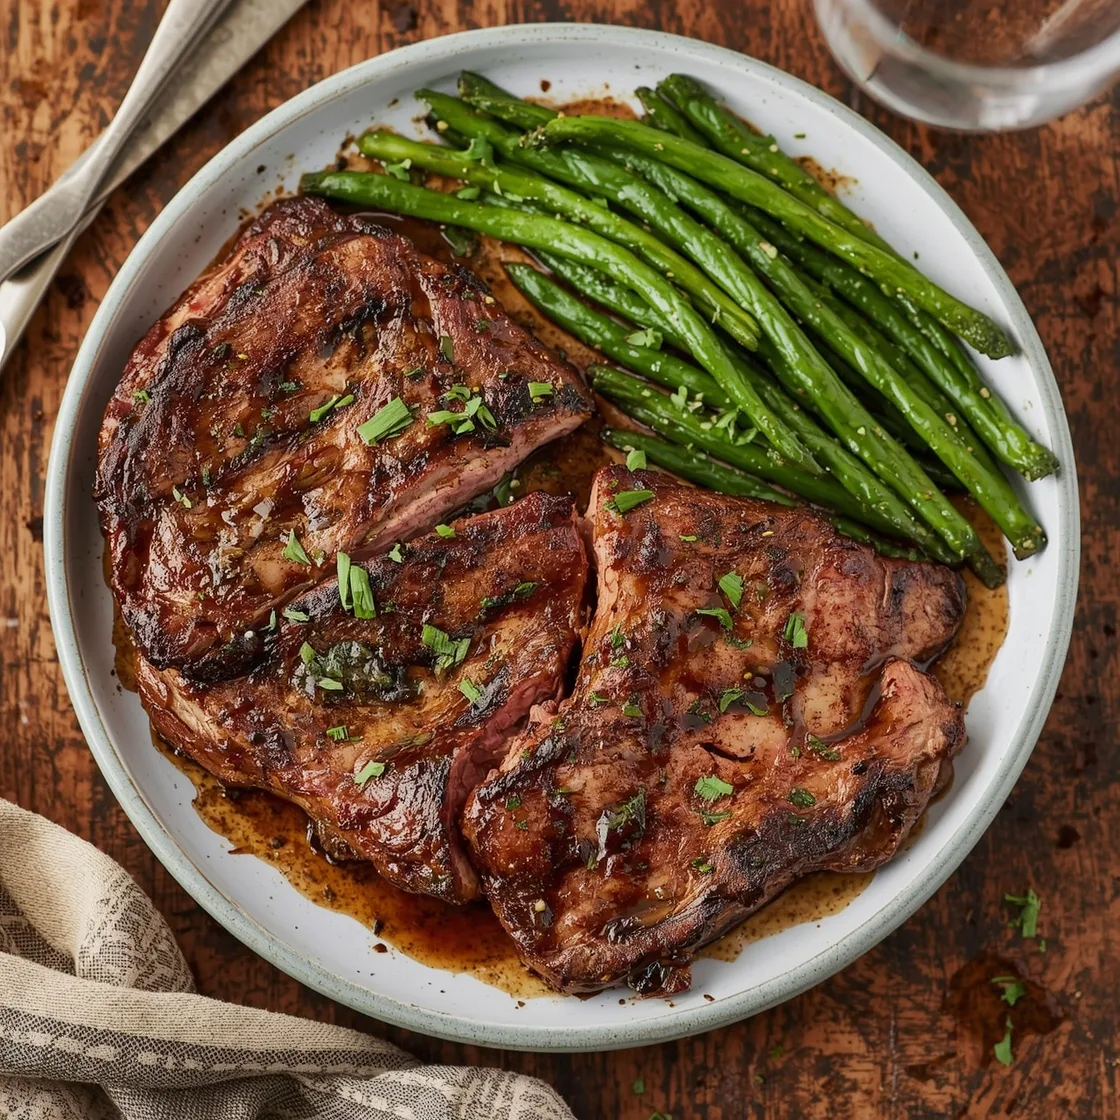
Ever wonder if that incredibly juicy, perfectly seared, melt-in-your-mouth steak you crave from a high-end restaurant is truly an unattainable culinary magic trick? Do you secretly believe it requires specialized equipment, years of training, or perhaps a culinary school diploma just to achieve that elusive crust and tender interior? What if I told you that mastering a Restaurant-Style Ribeye at Home is not only possible but genuinely straightforward, leveraging common cooking methods and a few insider secrets? Forget the exorbitant prices and the guesswork; today, we’re demystifying the art of steak perfection, proving that an extraordinary dining experience is well within your grasp, right in your own kitchen. Prepare to challenge your preconceived notions about home cooking and elevate your weeknight meals to gourmet status with shockingly simple techniques.
Ingredients List
To embark on this culinary adventure, focusing on quality ingredients is paramount. Think of this as your foundational investment in flavor.
- Ribeye Steaks (2, 1.5-2 inches thick): Opt for prime or choice cuts if your budget allows. Look for good marbling – those fine veins of fat distributed throughout the muscle, which render down during cooking, imparting unparalleled flavor and juiciness. Grass-fed options often have a richer, beefier taste.
- Kosher Salt (2-3 tablespoons): Essential for seasoning. Its larger crystals adhere better and draw out moisture more effectively than table salt.
- Freshly Ground Black Pepper (1-2 tablespoons): Coarsely ground is best for a noticeable peppery bite that complements the rich beef.
- High Smoke Point Oil (2 tablespoons): Grapeseed, avocado, or canola oil are excellent choices. They can withstand high heat without breaking down and imparting off-flavors. Avoid olive oil for searing, as its lower smoke point will lead to burning.
- Unsalted Butter (4 tablespoons): This is your secret weapon for basting, adding a luxurious richness and promoting that beautiful crust.
- Garlic Cloves (4-6, smashed): Adds an aromatic depth during basting. No need to mince; a simple smash releases their flavor.
- Fresh Rosemary Sprigs (2-3): Rosemary’s piney, earthy notes are a classic pairing with beef and infuse beautifully into the butter. Thyme can be a lovely alternative.
- Optional Flavor Enhancers:
- Onion Powder (1 teaspoon): For an extra layer of savory depth.
- Smoked Paprika (1 teaspoon): Adds a subtle smokiness and a touch of color.
- Worcestershire Sauce (1 teaspoon): A dash can enhance umami in the marinade if you choose to pre-marinate.
Substitutions & Tips:
- For the Steaks: While ribeye is king for this method due to its marbling, a New York strip or even a thick-cut sirloin can work if you adjust cooking times slightly.
- For Herbs: Fresh thyme is a great stand-in for rosemary, or you can use a combination. Dried herbs won’t impart the same fresh intensity.
- For Oil: If you don’t have high smoke point oil, a small amount of rendered beef fat can be used, but be mindful of splatter.
Timing
Achieving steak perfection doesn’t have to be an all-day affair. With a little planning, you can have a gourmet meal ready efficiently.
- Preparation Time: 20 minutes (includes patting dry, seasoning, and bringing to room temperature).
- Cooking Time: 15-20 minutes (depending on thickness and desired doneness).
- Resting Time: 10 minutes (crucial for juiciness).
- Total Time: Approximately 45-50 minutes.
This streamlined approach means you can enjoy a phenomenal meal in under an hour, which is often around 20% less time than some more complex multi-step recipes or the waiting time you might experience at a busy steakhouse. The key is efficient mise en place and disciplined execution through each stage.
Step-by-Step Instructions
Ready to transform raw meat into a culinary masterpiece? Follow these steps, and prepare to impress yourself.
Prepare Your Steaks for Maximum Flavor and Sear
Begin by removing your ribeye steaks from the refrigerator at least 30-40 minutes before cooking. This crucial step allows them to come closer to room temperature, ensuring a more even cook from edge to center. Pat them thoroughly dry with paper towels – moisture is the enemy of a good crust! Season generously on all sides with kosher salt and freshly ground black pepper. Don’t be shy; a thick cut of steak can handle a significant amount of seasoning. Some chefs even advocate for salting a few hours ahead and letting them chill uncovered in the fridge, a technique known as “dry brining,” which further tenderizes and enhances flavor.
Achieve an Unforgettable Crust with High Heat
Heat a heavy-bottomed pan, preferably a cast iron skillet, over high heat until it’s smoking slightly. A properly hot pan is paramount for developing that coveted, deeply browned crust. Add your high smoke point oil and swirl to coat the bottom. Carefully place the steaks in the hot pan, ensuring you don’t crowd the pan if cooking more than one. Avoid moving them for the first 2-3 minutes. This undisturbed contact time is what creates that beautiful, dark sear. Listen for that aggressive sizzle – it’s the music of a perfect crust forming.
Flip and Baste for Richness and Aroma
After 2-3 minutes, flip the steaks. Immediately add the unsalted butter, smashed garlic cloves, and fresh rosemary sprigs to the pan. Tilt the pan slightly and use a large spoon to continuously baste the melted, aromatic butter over the steaks. Continue cooking and basting for another 2-4 minutes on the second side, spooning that rich, infused butter over every inch of the steak. This basting technique not only adds incredible flavor but also helps cook the steak gently and evenly, preventing the exterior from burning while the interior reaches desired doneness.
Finish to Perfection and Check Doneness
Reduce the heat to medium-low and continue cooking, flipping every minute or so, and basting with the aromatic butter, until your desired internal temperature is reached. For medium-rare, aim for 130-135°F (54-57°C); for medium, 135-140°F (57-60°C). Use a reliable instant-read thermometer by inserting it into the thickest part of the steak, avoiding any bones. If you don’t have a meat thermometer, the “touch test” can be a rough guide: rare feels spongy, medium-rare is springy, and well-done is firm. However, for restaurant-quality results, a thermometer is highly recommended. For those looking to master even more steak cooking methods, I highly recommend exploring this comprehensive guide on restaurant-style steak dinner at home methods.
The Essential Resting Period
Once your steaks reach their target temperature, immediately remove them from the pan and transfer them to a cutting board. Tent loosely with foil and let them rest for at least 10 minutes, ideally 15. This step is non-negotiable! Resting allows the muscle fibers to relax and reabsorb the juices that have migrated to the center during cooking. Skipping this will result in a steak that bleeds all its delicious juiciness onto your plate, leaving you with a dry interior. Patience here truly pays dividends in tenderness and flavor.
Slice and Serve with Pan Juices
After resting, slice your ribeye against the grain into thick, succulent pieces. This technique shortens the muscle fibers, making each bite more tender. Drizzle any accumulated pan juices (or the flavorful butter from the skillet) over the sliced steak for an extra layer of decadence. Serve immediately and savor every bite of your perfectly cooked, restaurant-worthy ribeye.
Nutritional Information
While a ribeye steak is undeniably a delicious indulgence, it’s also a powerhouse of essential nutrients. Based on a 6-ounce (approx. 170g) cooked ribeye steak (without extra sauces beyond the cooking fats and herbs):
- Calories: Approximately 400-500 kcal (varies greatly with marbling and exact cut).
- Protein: 40-45g. Red meat is an excellent source of complete protein, crucial for muscle repair and growth.
- Total Fat: 25-35g, with about 10-15g of saturated fat. While higher in fat, a significant portion is monounsaturated, considered healthier.
- Cholesterol: 100-120mg.
- Sodium: 700-1000mg (largely dependent on seasoning).
- Iron: 30-40% Daily Value (DV). Essential for oxygen transport in the blood.
- Zinc: 50-60% DV. Important for immune function and cell growth.
- B Vitamins (B12, Niacin, B6): Excellent source, vital for energy metabolism and nervous system health.
Data Insights: According to USDA data, a single serving of ribeye can provide a substantial portion of your daily protein and several key micronutrients. While higher in saturated fat than leaner cuts, it’s important to remember that diet is about balance and moderation. For those monitoring sodium, be mindful of salt addition. For more comprehensive dietary guidelines and healthy eating habits, the Centers for Disease Control and Prevention (CDC) offers a wealth of information.
Healthier Alternatives for the Recipe
Enjoying a delicious steak doesn’t mean sacrificing health goals. Here are some modifications to make this recipe a bit lighter without compromising on flavor:
- Leaner Cut, Same Method: Instead of ribeye, consider a leaner cut like a sirloin or flank steak. While they have less marbling, the same high-heat sear and basting method will still yield fantastic results. Just be mindful that leaner cuts cook quicker and can dry out more easily.
- Reduce Butter, Boost Herbs: Cut the butter in half (2 tablespoons) and compensate with extra fresh herbs like thyme and rosemary, or even a few bay leaves. You’ll still get flavor infusion without as much saturated fat.
- Olive Oil Finish (Not Sear): Use your high smoke point oil for searing, but after the steak is done resting, drizzle a high-quality extra virgin olive oil over the sliced steak. This provides a fresh, peppery flavor without cooking out its beneficial compounds.
- Reduced Sodium Seasoning: Opt for low-sodium spice blends in place of a heavy hand with kosher salt. You can also experiment with other salt-free flavor enhancers like onion powder, garlic powder, or herbes de Provence.
- Vegetable-Forward Sides: Pair your steak with a vibrant, nutrient-dense side. Instead of heavy starch, think roasted asparagus, steamed green beans with lemon zest, or a large, fresh garden salad with a light vinaigrette. This significantly boosts fiber and micronutrient intake.
Creative Ideas for Diverse Diets:
- Dairy-Free: Substitute the butter with ghee (clarified butter, which has most milk solids removed) or a high-quality dairy-free butter alternative for basting.
- Keto/Low-Carb: This recipe naturally fits! Focus on the steak and consider creamed spinach (made with almond milk or heavy cream in moderation) or sautéed mushrooms as a side.
- Flexitarian Approach: Downsize your steak portion and increase the portion of your vegetable sides. Make the steak a complement rather than the sole focus of the plate.
Serving Suggestions
A perfectly cooked ribeye deserves equally stellar companions. Think about balancing the rich, savory meat with contrasting textures and flavors.
- Classic Steakhouse Sides: Elevate your plate with creamy mashed potatoes infused with roasted garlic, crisp-tender asparagus spears, or a simple yet elegant side salad with a tangy vinaigrette. These traditional pairings offer comfort and familiarity.
- Elevated Comfort: Consider preparing a vibrant chimichurri sauce – a fresh, zesty Argentinian condiment with parsley, oregano, garlic, red wine vinegar, and olive oil. Its bright, herbaceous notes cut through the richness of the steak beautifully. Alternatively, a mushroom-red wine reduction sauce adds an extra layer of sophisticated umami.
- Unexpected Pairings: Don’t shy away from lighter, more contemporary sides. Roasted Brussels sprouts with bacon and a drizzle of maple syrup, a fresh corn and avocado salsa, or even a quinoa pilaf with roasted vegetables can provide a delightful textural and flavor contrast.
- Personalized Touch: Think about what you enjoy most with your steak. Do you love a kick? A sprinkle of red pepper flakes over the finished steak, or a dash of hot sauce in a pan sauce, might be your preference. For a refreshing note, a squeeze of fresh lemon juice over the cooked steak before serving can brighten its flavors. Consider garnishing with fresh parsley or chives for a pop of color and subtle herby freshness.
Common Mistakes to Avoid
Even seasoned home cooks can fall victim to common steak pitfalls. Being aware of these and how to sidestep them will drastically improve your results.
- Not Patting Steaks Dry: This is arguably the biggest mistake. Any moisture on the surface of the steak means that when it hits the hot pan, the energy will first be used to evaporate that water rather than creating a beautiful, deep brown crust. Result: a grey, steamed steak instead of a perfectly seared one. Always, always pat dry.
- Starting with Cold Steaks: Cooking a steak straight from the fridge leads to uneven cooking. The outside will overcook before the center reaches your desired doneness, resulting in a tough, unappetizing steak. Letting it come to room temperature allows for more uniform heat penetration.
- Not Heating the Pan Enough: A lukewarm pan is another culprit for a poor sear. You need your pan screaming hot (smoking slightly with oil) to achieve that immediate crustformation. Don’t be afraid of the heat; just ensure you’re using a high smoke point oil.
- Overcrowding the Pan: If you’re cooking multiple steaks, avoid trying to fit too many in a single pan. This lowers the pan’s temperature dramatically, causing the steaks to steam rather than sear. Cook in batches if necessary, ensuring each steak has enough space.
- Flipping Too Frequently: While some techniques involve frequent flipping for even cooking, for a classic, deep crust, resist the urge to move the steak for the first 2-3 minutes. Let it develop that rich color undisturbed.
- Skipping the Rest: As highlighted earlier, resting is non-negotiable. Cutting into a steak immediately after cooking will cause all the delicious juices to rush out, leaving you with dry meat. This is a data-backed phenomenon, as muscle fibers contract during cooking and need time to relax and redistribute moisture.
- Not Using a Thermometer: Unless you are a highly experienced chef with an intuitive feel for steak doneness, guessing is a recipe for disappointment. An instant-read thermometer is an inexpensive tool that guarantees perfect results every time, eliminating guesswork and ensuring food safety.
Storing Tips for the Recipe
Proper storage ensures your leftover steak remains delicious and safe to eat. While steak is undoubtedly best fresh, here’s how to handle any tantalizing remnants.
- Cool Quickly: Allow the cooked steak to cool down to room temperature (but no longer than 2 hours) before storing. This prevents bacterial growth.
- Airtight Containers: Transfer any leftover steak to an airtight container. This protects it from air exposure, which can cause drying and flavor deterioration, and minimizes the risk of absorbing odors from other foods in your refrigerator.
- Refrigeration: Store cooked steak in the refrigerator for up to 3-4 days. For optimal freshness, consider wrapping individual portions tightly in plastic wrap or foil before placing them in the airtight container.
- Freezing: For longer storage, cooked steak can be frozen for up to 2-3 months. Wrap slices or whole pieces tightly in plastic wrap, then an additional layer of aluminum foil, and place in a freezer-safe bag or container. This double-layer protection helps prevent freezer burn.
- Reheating: The trick to reheating steak without drying it out is low and slow.
- Oven Method: Preheat your oven to 250°F (120°C). Place the steak on a wire rack over a baking sheet and heat for 20-30 minutes, or until warmed through. This gentle heat retains moisture.
- Skillet Method: Heat a skillet over medium-low heat with a small amount of butter or beef broth. Add the steak and heat gently for 2-3 minutes per side.
- Avoid Microwave: While convenient, the microwave is generally not recommended for reheating steak as it tends to overcook the edges and make the meat tough and rubbery.
- Meal Prep Idea: Cook extra steaks and slice them for meal prep throughout the week. They’re fantastic cold on salads, in sandwiches, or reheated gently for quick weeknight dinners.
Conclusion
There you have it – the definitive guide to conjuring a restaurant-worthy ribeye steak in the comfort of your own kitchen, using surprisingly simple cooking methods. We’ve journeyed from selecting the perfect marbled cut to achieving that enviable crust, ensuring internal juiciness through proper resting, and even navigating thoughtful nutritional considerations. Gone are the days of fearfully overcooking or under-seasoning; with the techniques outlined here, you’re now equipped to transform an ordinary ingredient into an extraordinary culinary experience.
This isn’t just about cooking a meal; it’s about reclaiming the joy of dining, impressing your loved ones (and yourself!), and discovering that gourmet doesn’t have to mean complicated. The satisfaction of slicing into a perfectly cooked, glistening ribeye that you crafted with your own hands is truly unparalleled. So, why wait? Dare to elevate your home cooking. Follow these steps, trust the process, and prepare to silence any skeptics at your dinner table.
Ready to unleash your inner chef? I urge you to try this recipe this week! Share your triumphs, tips, and any questions in the comments below. What was your favorite part of the process? Did you add any unique twists? We love hearing from our community of savory food enthusiasts. And if you’re hungry for more culinary inspiration, don’t forget to explore our other tantalizing recipes and cooking guides designed to make every meal a feast!
FAQs
Q1: Is it really necessary to bring the steak to room temperature? What’s the science behind it?
A1: Absolutely, and it’s a crucial step often overlooked. The science is straightforward: a cold steak will cook unevenly. When the center is very cold, the exterior will be significantly overcooked (or even burnt) by the time the internal temperature reaches your desired doneness. Bringing it closer to room temperature allows for more consistent heat penetration throughout the steak, leading to a much more evenly cooked, tender, and juicy result. Aim for 30-40 minutes out of the fridge.
Q2: How do I know if my pan is hot enough for searing?
A2: You’ll know it’s hot enough when you see wisps of smoke rising from the oil you’ve added (ensure it’s a high smoke point oil like grapeseed or avocado). If you flick a few drops of water into the dry pan, they should sizzle and evaporate almost instantly. Remember, a properly hot pan is essential for creating that desirable deep brown, crisp crust. Patience during preheating is key!
Q3: What’s the best way to tell if my steak is done without a thermometer?
A3: While a reliable instant-read thermometer is always the most accurate method, many chefs use the “touch test.” Gently press the center of the steak with your finger:
* Rare: Feels very soft and spongy, like the fleshy part of your palm below your thumb.
* Medium-Rare: Is slightly firmer but still has some give, akin to pressing your palm with your thumb and index finger lightly touching.
* Medium: Springs back more firmly, like pressing your palm with your thumb and middle finger touching.
* Well-Done: Is very firm with almost no give, similar to pressing your palm with your thumb and ring finger touching.
However, this method requires practice, and results can vary. For precision, a thermometer is your best friend.
Q4: Why is resting the steak so important, and what happens if I skip it?
A4: Resting is arguably as important as the cooking itself. During cooking, the muscle fibers contract, pushing the delicious internal juices to the center of the steak. If you cut into it immediately, those juices will gush out onto your cutting board, leaving your steak dry and less flavorful. Resting allows those muscle fibers to relax and reabsorb all that moisture, resulting in a significantly juicier, more tender, and flavorful steak. Think of it as a crucial “settling” period. Always rest for at least 10 minutes, tented with foil.
Q5: Can I use this method for other cuts of steak?
A5: Absolutely! While optimized for the rich marbling of a ribeye, this high-heat sear and butter-basting method works wonderfully for other premium cuts like New York strip, sirloin, or even filet mignon. Just be aware that leaner cuts will cook more quickly, and thinner cuts will require less cooking time, so adjust accordingly and always rely on your instant-read thermometer for perfect doneness.