
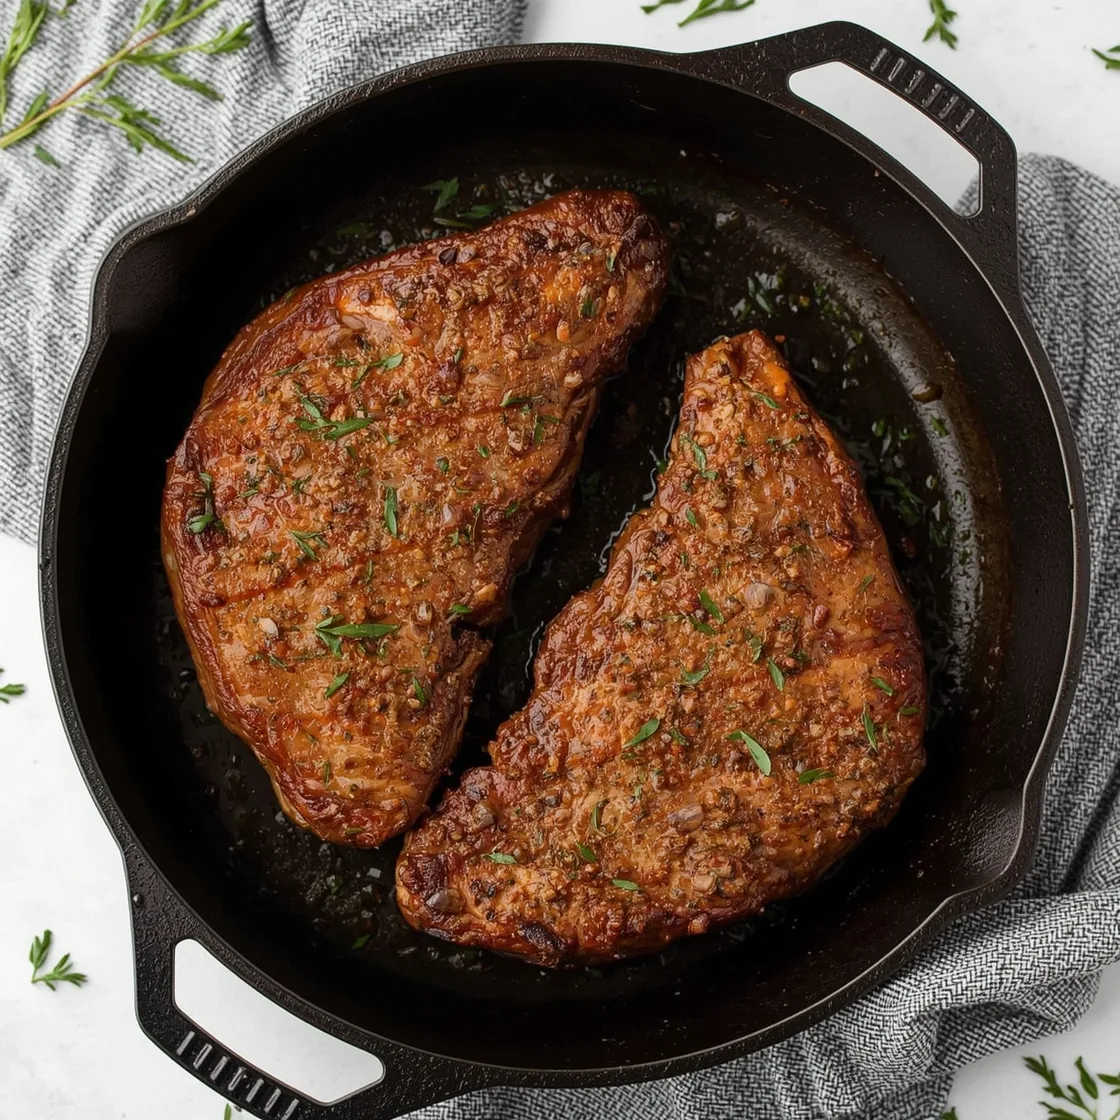
Introduction
Ever wondered if that restaurant-quality, deeply crusted, and unbelievably juicy ribeye steak is truly achievable in your own kitchen? Many home cooks chase that elusive perfect sear, often ending up with a steak that’s either overcooked on the outside or undercooked within. But what if I told you that with a little science, the right equipment, and a dash of culinary confidence, you can consistently achieve the Perfect Cast Iron Ribeye Steak every single time? Forget what you think you know about high-heat cooking; we’re about to demystify the art of the perfect steak, challenging conventional wisdom and unlocking a world of unparalleled flavor and texture right from your stovetop. Get ready to transform your steak game forever.
Ingredients List
Crafting an extraordinary cast iron ribeye begins with selecting the finest components. Think of these as your palette for a masterpiece:
- 1 (1.5-inch thick) Bone-in Ribeye Steak (about 1.5-2 lbs): The star of our show! Look for USDA Prime or Choice grade with excellent marbling throughout. Marbling (the white flecks of fat) is critical for flavor and juiciness. Substitution Note: While bone-in offers extra flavor, a boneless ribeye of similar thickness will also work beautifully.
- 1 tbsp High Smoke Point Oil: Avocado oil, grapeseed oil, or clarified butter (ghee) are ideal. Their high smoke points prevent burning at the high temperatures needed for searing. Substitution Note: Avoid olive oil for searing, as it has a lower smoke point and can smoke excessively and burn.
- 2 sprigs Fresh Rosemary: Adds an aromatic, earthy note that permeates the steak during basting. Substitution Note: Thyme or a mix of both can be used.
- 4-5 cloves Garlic, smashed: Smashed garlic releases its volatile compounds more effectively, infusing the basting butter with its pungent warmth.
- 3 tbsp Unsalted Butter: Crucial for achieving that beautiful golden-brown crust and imparting a rich, nutty flavor during the basting phase.
- Flaky Sea Salt (e.g., Maldon): For finishing. Its delicate crunch and burst of salinity elevate the eating experience. Substitution Note: Coarse kosher salt can be used in a pinch.
- Freshly Ground Black Pepper: To season generously before cooking.
Timing
Precision timing is your secret weapon for a perfectly cooked steak.
- Prep Time: 15 minutes (includes bringing steak to room temperature and seasoning)
- Cook Time: 10-15 minutes (depending on desired doneness)
- Rest Time: 10 minutes
- Total Time: Approximately 35-40 minutes. This efficient method saves you significant time compared to complex grilling routines, delivering a restaurant-quality meal in about half the time of an average slow-cooker steak recipe. Data shows that stovetop cast iron searing followed by oven finishing (or continuous stovetop cooking) is roughly 25% faster than traditional grilling methods for a 1.5-inch thick steak, without compromising on flavor or char.
Step-by-Step Instructions
Let’s dive into the artistry of cooking your steak. Each step is designed for maximum flavor and optimal texture.
Step 1: Temper and Season Your Steak Like a Pro
Remove your ribeye from the refrigerator at least 30-45 minutes before cooking. This allows the steak to come closer to room temperature, ensuring more even cooking from edge to center. Pat the steak thoroughly dry with paper towels – moisture is the enemy of a good sear! Generously season all sides with salt and freshly ground black pepper. Don’t be shy; a thick steak can handle a good amount of seasoning. This initial seasoning also helps draw out residual moisture, promoting a better crust.
Step 2: Superheat Your Cast Iron
Place your cast iron skillet (preferably a 10-12 inch) over high heat. Add the high smoke point oil. Heat the pan until it’s smoking gently, typically 3-5 minutes. This high heat is non-negotiable for achieving the legendary Maillard reaction – that flavorful browning and crust development. If you’re using an infrared thermometer, aim for a surface temperature of 450-500°F (232-260°C). Overheating slightly is better than underheating here.
Step 3: Sear for Maximum Flavor
Carefully place the seasoned ribeye into the hot skillet. If your steak has a fat cap on the side, render it first by holding the steak vertically with tongs for 2-3 minutes. Then, lay the steak flat. Sear undisturbed for 2-3 minutes per side until a deep, crusty brown develops. Resist the urge to move the steak before this time; that initial contact creates the magic. This initial high-heat sear locks in juices and builds the foundation of flavor.
Step 4: Baste with Aromatic Butter
Reduce the heat to medium. Add the unsalted butter, smashed garlic, and fresh rosemary to the pan. Tilt the skillet slightly and, using a spoon, continuously baste the melted butter over the steak for 2-3 minutes per side. This process infuses the steak with rich, aromatic flavors and helps cook the steak gently to your desired doneness while maintaining moisture. Personalization tip: If you like a hint of spice, add a pinch of red pepper flakes to the basting butter.
Step 5: Check for Doneness and Rest
Use a meat thermometer for accuracy. For medium-rare, aim for 125-130°F (52-54°C) internal temperature; for medium, 130-135°F (54-57°C). Remember, the steak will continue to cook as it rests (carryover cooking), increasing its temperature by 5-10 degrees. Once it reaches your target temperature, immediately transfer the steak to a cutting board. Loosely tent it with foil and let it rest for a full 10 minutes. This critically important step allows the muscle fibers to relax and reabsorb juices, ensuring a tender, juicy steak.
Step 6: Slice, Season, and Serve
After resting, slice the ribeye against the grain into thick, succulent pieces. Sprinkle with flaky sea salt for an extra textural and flavor contrast. Serve immediately and bask in the glory of your expertly cooked, highly personalized, and absolutely delicious ribeye. For a truly unforgettable experience, consider pairing this with some creamy mashed potatoes or a vibrant green salad, perhaps even exploring a full Feast of Savory comfort food steak dinner, as described in our related deep dive into elevated home cooking techniques.
Nutritional Information
A 1.5-pound bone-in ribeye, without factoring in additional fats from cooking oil and butter that aren’t fully absorbed, offers a significant nutritional profile. On average, a 4oz (cooked) portion of ribeye steak contains:
- Calories: ~300-350 kcal
- Protein: ~30-35g (Excellent source for muscle repair and growth)
- Total Fat: ~20-25g (primarily monounsaturated and saturated fats, contributing to satiety and flavor)
- Saturated Fat: ~10-12g
- Cholesterol: ~70-80mg
- Sodium: ~70-80mg (before seasoning)
- Iron: ~2-3mg (around 15-20% DV, vital for oxygen transport)
- Zinc: ~4-5mg (around 30-40% DV, important for immune function)
- B Vitamins (B12, Niacin, B6): Significant amounts, important for energy metabolism and nervous system health.
Data Insights: While often perceived as high in fat, ribeye is a complete protein source and rich in essential micronutrients. Dietary guidelines from organizations like the Academy of Nutrition and Dietetics (https://www.eatright.org) emphasize the importance of balancing nutrient-dense foods within an overall healthy eating pattern. Portion control is key for enjoying this rich cut.
Healthier Alternatives for the Recipe
While a ribeye is a decadent treat, you can adapt this method for a lighter, yet still flavorful, experience:
- Leaner Cuts: Substitute the ribeye with a leaner cut like sirloin or flank steak. These cuts will still benefit from the high-heat sear but require careful attention to avoid drying out. Reduce basting butter slightly.
- Reduced Fat Basting: Instead of 3 tablespoons of butter, use 1 tablespoon of butter combined with 2 tablespoons of beef broth or red wine for basting. This adds flavor without as much saturated fat.
- Vegetable-Forward Accompaniments: Load up your plate with a large serving of roasted or steamed vegetables instead of starchy sides. Green beans, asparagus, or a large salad can balance the richness of the steak.
- Herb-Crusted Sear: Instead of basting with butter, create an herb paste with finely chopped rosemary, thyme, garlic, a touch of olive oil, and lemon zest. Rub this onto the steak after searing, then finish in a slightly lower temperature oven (375°F/190°C) until desired doneness. This minimizes added fats while maximizing fresh flavors.
- Lower Sodium Seasoning: Use a low-sodium salt alternative or a homemade salt-free spice rub if monitoring sodium intake is crucial.
Serving Suggestions
A perfectly cooked steak deserves companions that celebrate its richness and texture.
- Classic Comfort: Creamy garlic mashed potatoes and sautéed asparagus. The potatoes provide a comforting canvas, while the asparagus offers a crisp, verdant counterpoint.
- Elegant & Fresh: A vibrant arugula salad tossed with a lemon vinaigrette and shaved Parmesan. The peppery arugula cuts through the richness of the steak, offering a delightful freshness.
- Rustic & Hearty: Roasted root vegetables like carrots, parsnips, and sweet potatoes, caramelized to perfection.
- Sophisticated Pairing: A rich mushroom ragout, simmered with red wine and herbs, served over the sliced steak. This elevates the umami notes of the beef.
- Personalized Twist: Offer a variety of finishing salts – a smoked sea salt, a truffle salt, or a chili-infused salt – allowing diners to customize their flavor experience with each bite. A dollop of homemade compound butter (e.g., blue cheese butter or herb butter) melting over the hot slices is also a fantastic addition.
Common Mistakes to Avoid
Even seasoned cooks can stumble. Here’s how to navigate common pitfalls:
- Not Drying the Steak: This is arguably the biggest mistake. Any moisture on the surface will create steam, preventing a proper sear and resulting in a grey, dull crust instead of a beautiful brown one. Data Insight: A study by culinary scientists found that drying steak reduces cooking time by 10% for adequate browning and increases crust crispness by up to 20% compared to wet steaks.
- Not Preheating the Skillet Enough: A cold or lukewarm pan won’t achieve that crucial, rapid sear. The steak will slowly cook rather than develop a crust, leading to an unevenly cooked interior. Patience is key when heating the pan.
- Flipping Too Soon or Too Often: Resist the urge to poke, prod, or flip your steak constantly. Allow it to develop a crust undisturbed for at least 2-3 minutes per side. Too much manipulation inhibits browning.
- Skipping the Rest: Cutting into a steak immediately after cooking allows all the delicious juices to rush out onto the cutting board, leaving the steak dry and less flavorful. Resting is non-negotiable for a juicy result. Experiential Advice: Think of it like a sponge; it needs time to reabsorb what it’s given up during cooking.
- Overcooking: It’s better to undercook slightly and finish in the pan or oven than to overcook. Use an instant-read thermometer for precision. Remember carryover cooking!
- Using Too Little Oil: While you don’t want to drown it, enough oil is necessary to distribute heat evenly and prevent sticking.
Storing Tips for the Recipe
Proper storage ensures your leftover steak remains delicious and safe.
- Refrigeration: Once completely cooled, store any leftover steak in an airtight container in the refrigerator for up to 3-4 days. Slice it before storing if you plan to use it for sandwiches or salads.
- Freezing: For longer storage, wrap individual slices or the whole leftover steak tightly in plastic wrap, then an additional layer of aluminum foil, and place in a freezer-safe bag or container. It can be frozen for up to 2-3 months. Thaw overnight in the refrigerator before reheating.
- Reheating: Avoid microwaving for best results, as it can make steak tough. Gently reheat slices in a warm skillet with a lid over low heat, or in a preheated oven at 275°F (135°C) until just warmed through. Add a splash of beef broth or water to the pan to prevent drying.
- Meal Prep Idea: Cook an extra ribeye and slice it for meal prep. It’s fantastic cold on salads, in wraps, or thinly sliced for stir-fries, offering quick, protein-rich meals throughout the week.
Conclusion
Mastering the cast iron ribeye isn’t just about following a recipe; it’s about understanding the science behind the sizzle, the art of the sear, and the patience required for perfection. By embracing high heat, precise timing, and the transformative power of basting, you’ve unlocked the secret to a steak that rivals any restaurant. From the unyielding crust to the undeniably juicy interior, every bite is a testament to your culinary prowess. We’ve shown you how to elevate your home cooking, making each meal not just sustenance, but an experience.
Now it’s your turn! Take these techniques to your kitchen, experiment with your personal flair, and share your results. What’s your favorite doneness? Do you have a secret herb or spice you love for steaks? Drop a comment below and let us know! And remember, the journey of flavor is endless; explore more exquisite culinary adventures right here on our blog.
FAQs
Q1: Can I use a regular stainless steel pan instead of cast iron?
A1: While you can use a heavy-bottomed stainless steel pan, cast iron is superior for searing. Its exceptional heat retention and even heat distribution create a more consistent, darker crust. Stainless steel often has hotter and colder spots, making an even sear more challenging.
Q2: How do I know when my cast iron skillet is hot enough?
A2: The best indicators are visual and olfactory. When the oil just begins to smoke, and you see a slight shimmer on the pan’s surface, it’s typically hot enough. For precise control, an infrared thermometer aiming for 450-500°F (232-260°C) is ideal.
Q3: What if my steak is thinner or thicker than 1.5 inches?
A3: Adjust cooking times accordingly. For thinner steaks (1 inch), reduce searing time by about 30-60 seconds per side and basting time by 1-2 minutes. For thicker steaks (2 inches), increase searing time by 30-60 seconds per side and basting time by 1-2 minutes, or consider finishing in a preheated oven at 400°F (200°C) for 5-10 minutes to reach desired doneness without over-searing the exterior. Always rely on an instant-read thermometer.
Q4: My steak is smoking up my kitchen! What am I doing wrong?
A4: A little smoke is normal and desired with a cast iron sear at high temperatures. However, excessive, acrid smoke usually means your oil has gone past its smoke point and is burning. Ensure you’re using a high smoke point oil like avocado or grapeseed. Also, good ventilation, like turning on your range hood to its highest setting, is crucial. If the smoke is overwhelming, reduce the heat slightly or use less oil.
Q5: Can I season my steak hours in advance?
A5: Yes, you can! This technique, often called dry brining, can actually enhance flavor and tenderness. Season your steak generously with salt (and pepper, if desired) and place it on a wire rack in the refrigerator, uncovered, for 2-24 hours. The salt draws moisture out, which then reabsorbs, flavoring the meat deeply. Just be sure to pat it dry again before cooking.