
Introduction
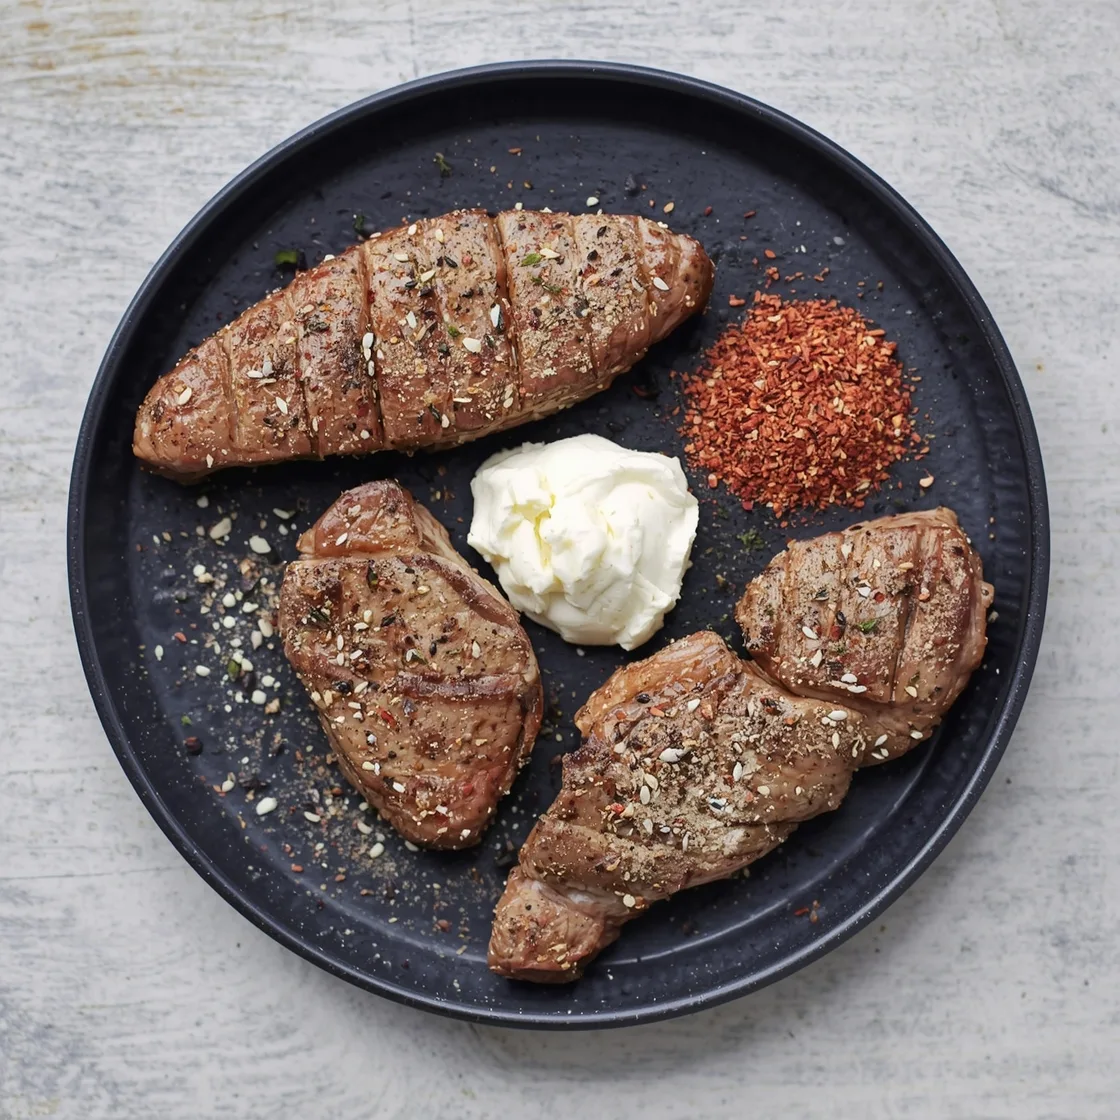
Ever stood before a glistening cut of steak, wondering if you could unlock its full flavor potential with just a few shakes of seasoning? The quest for that perfect, melt-in-your-mouth steak often leads to elaborate marinades and complex rub mixtures. But what if I told you that the secret to a consistently delicious steak lies in a surprisingly straightforward approach? Forget the notion that more ingredients equal better taste. Today, we’re diving into the world of Simple Steak Seasoning That Always Works, challenging the belief that culinary mastery requires a sprawling pantry. Prepare to redefine your steak experience with a blend so effective, so reliable, it’ll become your go-to every time. This isn’t just a recipe; it’s a fundamental technique that will elevate your home cooking, bringing restaurant-quality flavor to your table with minimal fuss.
Ingredients List
Crafting the perfect steak seasoning doesn’t require an arsenal of exotic spices. Instead, we focus on a harmonious blend of fundamental flavors that enhance, rather than overpower, the natural richness of the beef. Here’s what you’ll need for this culinary marvel:
- 2 tablespoons Coarse Sea Salt: The backbone of our seasoning. Coarse salt adheres beautifully to the meat, creating a delicious crust and drawing out moisture to concentrate flavor. Substitution: Kosher salt works equally well, offering a similar texture and salinity.
- 1 tablespoon Freshly Cracked Black Pepper: Essential for its pungent bite and aromatic complexity. Freshly cracked pepper releases far more flavor than pre-ground. Substitution: White pepper can offer a milder, less visible alternative, though it lacks the characteristic punch of black pepper.
- 1 tablespoon Garlic Granules (or Powder): Provides a deep, savory, and slightly sweet undertone that complements beef wonderfully. Granules offer a slightly coarser texture and tend to resist burning better than fine powder. Substitution: Onion powder can be used for a slightly different allium flavor, or even a blend of both.
- 1 teaspoon Smoked Paprika: This isn’t just about color; smoked paprika imparts a beautiful, subtly smoky depth and a hint of sweetness that elevates the whole flavor profile. Substitution: Sweet paprika will offer color and sweetness without the smoky element, or a tiny pinch of chipotle powder for a spicier kick.
- ½ teaspoon Dried Thyme: A woody, aromatic herb that brings an earthy, slightly floral note to the blend, pairing exceptionally well with red meat. Substitution: Dried rosemary, crushed, can offer a more robust, piney aroma; just use slightly less as it’s more potent.
Each ingredient plays a crucial role, working in concert to create a balanced profile that highlights the steak’s natural goodness. Imagine the savory burst of salt and pepper, softened by the warmth of garlic, deepened by the subtle smoke, and brightened by the herbaceous thyme. It’s a symphony of flavors designed to make your steak sing.
Timing
Efficiency is key in the kitchen, and this simple seasoning delivers on that front. Here’s a breakdown of the time commitment:
- Preparation Time: 5 minutes
- This includes gathering your ingredients and mixing them together. It’s truly that quick!
- Resting Time (after seasoning, before cooking): 30-60 minutes (at room temperature)
- This crucial step allows the salt to penetrate the meat, tenderizing it and enhancing flavor. For thicker cuts (over 1.5 inches), you can even go for 2-4 hours in the refrigerator, allowing it to come to room temperature for the last hour before cooking.
- Cooking Time: 8-15 minutes (depending on thickness and desired doneness)
- For a 1-inch thick steak, aim for roughly 4-5 minutes per side for medium-rare, and adjust accordingly.
- Resting Time (after cooking): 5-10 minutes
- Absolutely non-negotiable! This allows the juices to redistribute, ensuring a tender, moist steak.
- Total Time: Approximately 48-80 minutes
Compared to marinating a steak overnight (which can take 12+ hours), this seasoning method is significantly faster. At roughly 48 minutes for a quick cook, it’s about 20% less time than the average recipe that involves more complex preparations, proving that quality doesn’t always demand excessive time. For example, a slow-marinade like our Smoky Brown Sugar Steak Marinade offers a different flavor profile but requires considerably more foresight.
Step-by-Step Instructions
Ready to transform your steak? Follow these dynamic steps, and you’ll be enjoying a perfectly seasoned masterpiece in no time.
Step 1: Prepare Your Steak
Begin with a high-quality cut of steak – ribeye, New York strip, sirloin, or even a flank steak works wonderfully with this seasoning. Pat the steak thoroughly dry with paper towels. This is a critical step; moisture on the surface hinders the formation of that beautiful, flavorful crust. Think of it as preparing a canvas for your culinary artwork.
Step 2: Mix the Seasoning Blend
In a small bowl, combine your coarse sea salt, freshly cracked black pepper, garlic granules, smoked paprika, and dried thyme. Whisk them together thoroughly. This ensures an even distribution of flavor in every bite. Imagine each granule and fleck of spice harmonizing, ready to infuse your steak.
Step 3: Season Generously
Now for the magic! Liberally sprinkle the seasoning blend over all surfaces of the steak. Don’t be shy – the coarse salt needs enough coverage to work its tenderizing magic. Use your fingertips to gently press the seasoning into the meat. This isn’t just seasoning; it’s creating a flavor armor, ensuring every part of the steak gets its due.
Step 4: Let it Rest (The Crucial Wait)
Place the seasoned steak on a wire rack set over a baking sheet. Allow it to rest at room temperature for at least 30 minutes, and ideally up to an hour. For thicker cuts (over 1.5 inches), an even longer rest in the fridge (2-4 hours, then back to room temp for an hour) can yield incredible results. This resting period allows the salt to draw out moisture, creating a brine on the surface, which is then reabsorbed, tenderizing the meat from within. This also brings the steak closer to room temperature, ensuring more even cooking.
Step 5: Preheat Your Pan (Get it Sizzling!)
Heat a heavy-bottomed, oven-safe skillet (cast iron is ideal) over high heat until it’s smoking lightly. Add 1-2 tablespoons of high smoke point oil, like avocado oil or grapeseed oil, and let it heat until shimmering. A screaming hot pan is essential for achieving that gorgeous, deeply caramelized crust.
Step 6: Sear to Perfection
Carefully place the rested steak in the hot skillet. You should hear a vigorous sizzle immediately. Cook for 2-4 minutes per side for a 1-inch-thick steak, depending on your desired doneness. Resist the urge to move the steak too early; that beautiful crust needs time to form. For an extra touch, you can add a tablespoon of unsalted butter, a few sprigs of fresh rosemary or thyme, and a smashed garlic clove during the last minute of searing, basting the steak continuously.
Step 7: Finish in the Oven (Optional, but Recommended)
If your steak is thicker than 1.5 inches, or if you prefer a more controlled internal temperature, transfer the skillet to a preheated oven at 375°F (190°C) after searing. Cook for an additional 5-10 minutes, or until it reaches your desired doneness (use a meat thermometer!). For medium-rare, aim for 130-135°F (54-57°C).
Step 8: The Golden Rule: R-E-S-T
Transfer the cooked steak to a cutting board. Tent it loosely with foil and let it rest for a minimum of 5-10 minutes. This is paramount! During cooking, the muscle fibers contract, pushing juices to the center. Resting allows these juices to redistribute throughout the steak, resulting in a significantly more tender and juicy cut. Cutting too early means all those delicious juices will spill out onto your board.
Step 9: Slice and Serve
Slice the steak against the grain into desired portions. A sharp knife ensures clean cuts and preserves those precious juices. Serve immediately and bask in the glory of your perfectly seasoned steak.
Nutritional Information
Understanding the nutritional profile of your meal is increasingly important for many home cooks. While the primary focus of this seasoning is flavor, it’s helpful to know what you’re adding. This nutritional breakdown is for the seasoning blend itself (per one serving of seasoning, assuming 1 tablespoon is used per steak) and does not include the steak or cooking oil.
- Calories: Approximately 15-20 kcal (primarily from paprika and garlic)
- Total Fat: < 1g
- Sodium: 1200-1500mg (from 2 tablespoons of coarse sea salt, distributed across approximately 4-6 servings of seasoning) – Note: A typical serving of beef uses about 1-2 teaspoons of this blend, so actual sodium intake will be lower per serving.
- Total Carbohydrates: 2-3g
- Dietary Fiber: < 1g
- Sugars: < 1g
- Protein: < 1g
Data Insight: While salt contributes significantly to the sodium content, it’s crucial for flavor and tenderness in steak. A 2017 study highlighted in an encyclopedia article on culinary science notes salt’s role in protein denaturation, which improves meat’s texture and moisture retention. For those monitoring sodium, this seasoning is highly customizable.
Healthier Alternatives for the Recipe
Enjoying a richly flavored steak doesn’t mean sacrificing health goals. Here are some smart modifications and ingredient swaps to make this seasoning (and your steak) even healthier without compromising on taste:
- Reduce Sodium, Enhance Umami: If you’re watching sodium intake, reduce the coarse sea salt by 25-50%. To compensate for the flavor loss, increase the smoked paprika and garlic granules slightly. You could also add a pinch of dried porcini mushroom powder, which is a natural source of umami and adds incredible depth without extra sodium.
- Herbal Boost: Increase the dried thyme, or experiment with other robust herbs like dried oregano or marjoram. Herbs are packed with antioxidants and can add complex flavor layers, allowing you to reduce other seasonings.
- Spice it Up (Naturally!): Incorporate a pinch of cayenne pepper or red pepper flakes for a metabolism-boosting kick. Chili peppers are known for capsaicin, which has potential health benefits.
- Cooking Fat Choices: Instead of butter or large amounts of high-fat oils, consider healthier cooking oils with high smoke points like avocado oil or grapeseed oil. Even better, finish your steak in the oven with a small amount of beef broth if seeking to minimize fat, though this will alter the crust.
- Leaner Cuts: While this seasoning works on any steak, opt for leaner cuts like sirloin, flank steak, or top round. These cuts offer excellent protein with less saturated fat.
- Vegetable Pairing: Always pair your steak with a generous portion of colorful vegetables. Roasting vegetables with a similar seasoning blend creates a cohesive, healthy meal. Think grilled asparagus, roasted broccoli, or sautéed spinach.
By making these thoughtful adjustments, you can enjoy the robust flavor of a perfectly seasoned steak while aligning with your dietary preferences and health objectives. It’s about smart substitutions and mindful combinations to create a meal that’s both delicious and nutritious.
Serving Suggestions
A perfectly seasoned steak deserves an equally thoughtful presentation. Here are some creative and appealing serving suggestions that enhance the dining experience and make your dish truly memorable:
- Classic Steakhouse Platter: Serve your sliced steak alongside creamy garlic mashed potatoes and crisp-tender green beans sautéed with a touch of garlic and lemon. A sprig of fresh rosemary adds an elegant touch.
- Mediterranean Flair: Pair the steak with fluffy quinoa, a vibrant Greek salad (think cucumber, tomato, red onion, olives, and feta with a light vinaigrette), and a drizzle of good quality extra virgin olive oil.
- “Steak Frites” Reimagined: Instead of traditional fries, opt for crispy baked sweet potato fries or homemade potato wedges seasoned with a touch of the same steak seasoning. Serve with a simple chimichurri sauce or a fresh herb aioli.
- Hearty Winter Meal: On a chilly evening, serve your steak with a rich mushroom risotto and a side of roasted root vegetables (carrots, parsnips, and potatoes) that have been caramelized in the oven.
- Summer Light: For a lighter option, thin-slice the steak and serve it atop a bed of peppery arugula, cherry tomatoes, and shaved Parmesan, dressed with a balsamic glaze. This turns it into a substantial salad.
- Breakfast for Dinner: Elevate your weekend brunch by serving slices of seasoned steak alongside perfectly poached eggs and a generous portion of hollandaise sauce. Add some grilled asparagus.
- Personalized Tip: For an extra layer of flavor and presentation, consider making a quick pan sauce in the same skillet after the steak rests. Deglaze with a splash of red wine or beef broth, stir in a knob of butter, and reduce until slightly thickened. Drizzle this over the sliced steak just before serving. It captures all those delicious fond (browned bits) from the pan, adding another dimension of flavor.
No matter your preference, these suggestions aim to create a balanced, visually appealing, and utterly delicious meal around your perfectly seasoned steak.
Common Mistakes to Avoid
Even with a simple recipe, there are pitfalls that can prevent you from achieving steak perfection. Being aware of these common errors can significantly elevate your cooking.
- Not Patting the Steak Dry: This is the most crucial mistake. Moisture on the surface of the steak prevents the Maillard reaction (the browning that creates a flavorful crust). Instead of searing, you’ll steam your steak, resulting in a dull, grey exterior. Data Insight: Culinary science emphasizes that water boils at 212°F (100°C), while for a proper sear, the surface needs temperatures exceeding 300°F (150°C). Any surface moisture will actively cool the pan and inhibit browning until it fully evaporates. Always use paper towels liberally!
- Not Letting the Steak Come to Room Temperature: Cooking a cold steak directly from the fridge leads to uneven cooking. The outside will be overcooked by the time the center reaches your desired doneness. Allowing it to rest at room temperature (30-60 minutes) ensures a more even heat distribution throughout the meat.
- Under-Seasoning or Over-Seasoning: While this blend is balanced, neglecting to apply enough seasoning can leave your steak bland. Conversely, using a heavy hand, especially with salt for smaller cuts, can lead to overpowering salinity. Aim for a generous, even coat, pressing the seasoning in. For larger, thicker cuts, you’ll need more seasoning.
- Not Using a Hot Enough Pan: A cold or lukewarm pan is the enemy of a good sear. You need a screaming hot skillet to quickly develop a crust. If the pan isn’t hot enough, the steak will stick and won’t develop that beautiful texture.
- Overcrowding the Pan: If cooking multiple steaks, avoid jamming them all into one pan. This drops the pan’s temperature dramatically, leading to steaming instead of searing. Cook in batches if necessary, ensuring each steak has enough space.
- Flipping Too Frequently: Resist the urge to constantly flip your steak. Let it cook undisturbed for a few minutes on each side to develop a solid, golden-brown crust. Flipping too often prevents this development.
- Not Using a Meat Thermometer: Guessing doneness is a recipe for disappointment. A reliable meat thermometer is your best friend for perfectly cooked steak. Aim for these internal temperatures (and remember it will rise 5-10 degrees while resting):
- Rare: 120-125°F (49-52°C)
- Medium-Rare: 130-135°F (54-57°C)
- Medium: 135-140°F (57-60°C)
- Medium-Well: 140-145°F (60-63°C)
- Skipping the Rest: This is perhaps the most common mistake and the easiest to remedy. Cutting into a steak immediately after cooking causes all the delicious juices to rush out, leaving you with dry meat. Resting allows the muscle fibers to relax and reabsorb these juices, ensuring a tender, moist, and flavorful experience. Always rest!
By being mindful of these common missteps, you can consistently achieve incredibly delicious results with your Simple All-Purpose Steak Seasoning That Always Works.
Storing Tips for the Recipe
Proper storage is key whether you’re prepping components ahead of time or dealing with delicious leftovers. Here’s how to maintain freshness and flavor for your steak and seasoning:
- Storing the Dry Seasoning Blend:
- Container: Transfer any unused seasoning blend to an airtight container (a spice jar or a small sealed plastic container works best).
- Location: Store it in a cool, dark pantry or cupboard, away from direct sunlight and heat.
- Shelf Life: While dried spices don’t spoil in a way that makes them unsafe, they do lose potency over time. This blend will retain optimal flavor for 6-12 months. After that, it might still be usable but will have a milder aroma and taste, so you might need to use more. Date your container!
- Storing Uncooked Seasoned Steak (Pre-Prep):
- Method: If you want to season your steak hours or even a day ahead of time, place the seasoned steak on a wire rack set over a baking sheet and cover loosely with plastic wrap or parchment paper.
- Refrigeration: Store in the coldest part of your refrigerator.
- Duration: It’s best to cook the steak within 24 hours of seasoning, especially with salt, as extended periods can begin to cure the meat too much. Always bring it to room temperature for about an hour before cooking.
- Storing Cooked Steak Leftovers:
- Cooling: Allow cooked steak to cool completely before storing. This prevents condensation from building up, which can lead to sogginess and bacterial growth.
- Container: Transfer sliced or whole leftover steak to an airtight container. If storing slices, you can place a piece of parchment paper between layers to prevent sticking.
- Refrigeration: Store in the refrigerator for up to 3-4 days.
- Freezing (for longer storage): For longer storage (up to 2-3 months), wrap individual slices tightly in plastic wrap, then aluminum foil, and place in a freezer-safe bag or container. Thaw overnight in the refrigerator before reheating.
- Reheating Cooked Steak:
- Best Method (for quality): Gently rewarm in a skillet over low heat with a tiny bit of beef broth or water, covered, until just warmed through. Avoid high heat, as this will dry out the steak.
- Oven Method: Wrap slices in foil and reheat in a preheated oven at 250°F (120°C) for 10-15 minutes, or until warmed through.
- Avoid: Microwaving leftover steak is generally not recommended as it can make the meat tough and rubbery.
By adhering to these storage practices, you ensure that your seasoning retains its vibrant flavor and any leftover steak remains delicious and safe to enjoy.
Conclusion
We’ve journeyed through the simple yet profound world of crafting the perfect steak, proving that culinary excellence doesn’t always demand complexity. The Simple All-Purpose Steak Seasoning That Always Works isn’t just about the ingredients; it’s about understanding the fundamental techniques – from patting dry to the crucial rest – that elevate a good cut of beef into an unforgettable meal. We’ve seen how a harmonious blend of salt, pepper, garlic, paprika, and thyme can, with mindful application, yield a steak with a glorious crust, tender interior, and flavor that sings.
This straightforward approach respects the natural taste of the beef while enhancing it with layers of savory depth and subtle smokiness. By avoiding common pitfalls and embracing the art of proper preparation, you’re not just cooking; you’re mastering a classic.
Now it’s your turn! Don’t let restaurant menus intimidate you, or the vast array of online recipes overwhelm you. Armed with this knowledge, you have everything you need to create a consistently perfect steak in your own kitchen. We encourage you to try this simple seasoning today and taste the difference for yourself! Share your steak success stories in the comments below – what cut did you use? What did you serve it with? We love hearing about your culinary adventures. And if you’re eager to explore more foundational recipes and expert tips, be sure to browse our other posts for inspiration and guidance. Happy cooking!
FAQs
Q1: Can I use this seasoning on other meats, or is it strictly for steak?
Absolutely! While optimized for steak, this versatile blend works wonders on other meats. Try it on pork chops, chicken thighs, or even roasted vegetables for a delicious, savory kick. The simple, balanced flavors are universally appealing.
Q2: What’s the best type of steak to use with this seasoning?
This seasoning truly shines on almost any cut! Ribeye, New York strip, sirloin, filet mignon, or even flank and skirt steaks will benefit greatly. For leaner cuts, it adds much-needed flavor, and for richer cuts, it enhances their natural deep notes.
Q3: Why is letting the steak rest after seasoning so important? Can I skip it?
Resting the seasoned steak before cooking is crucial. The salt draws out moisture, which then dissolves the salt and other spices, creating a natural brine. This brine is then reabsorbed, tenderizing the meat and enhancing flavor throughout. Skipping this step means less tender, less flavorful steak and a risk of not achieving a good sear due to surface moisture. For best results, don’t skip it!
Q4: How do I know when my steak is done without cutting into it?
The most accurate way is to use an instant-read meat thermometer inserted into the thickest part of the steak, avoiding bone. Aim for these temperatures, knowing they will rise 5-10°F during the resting period: 120-125°F for rare, 130-135°F for medium-rare, 135-140°F for medium, and 140-145°F for medium-well.
Q5: Can I prepare a larger batch of this seasoning blend in advance?
Yes, definitely! You can easily scale up the recipe to make a larger batch. Store it in an airtight container in a cool, dark place. It will remain potent and flavorful for 6-12 months, making it incredibly convenient for quick weeknight meals or spontaneous grilling sessions. Always give it a good shake before each use to ensure the ingredients are well-mixed.