Introduction
Ever found yourself staring at a magnificent whole roasted beef tenderloin, wondering if you can truly achieve that perfect, melt-in-your-mouth tenderness at home without overcooking or, even worse, undercooking it? You’re not alone! Many home cooks shy away from this luxurious cut, intimidated by its cost and the precision required. But what if I told you that mastering the art of a perfectly cooked whole roasted beef tenderloin is far simpler than you imagine, especially when you understand the critical role of safe cooking temperatures? Forget the guesswork and the culinary anxiety; today, we’re diving deep into the secrets of achieving succulent, flavorful beef tenderloin every single time, ensuring it’s not just delicious but also perfectly safe to eat.
Ingredients List
To embark on this culinary journey, you’ll need a selection of high-quality ingredients that harmonize to elevate the natural richness of the beef. Think vibrant, aromatic elements that build layers of flavor with minimal effort.
- 1 (3-4 pound) Whole Beef Tenderloin, trimmed: Look for a reputable butcher who can trim the silver skin and excess fat for you. Substitution: While difficult to truly substitute the tenderloin’s texture, a well- marbled beef rib roast can offer a celebratory alternative, though cooking times and tenderness will differ.
- 2 tablespoons Olive Oil: A good quality extra virgin olive oil provides a fruity base for searing. Substitution: Avocado oil or grapeseed oil can also be used for their high smoke points.
- 4 cloves Garlic, minced: Freshly minced garlic is essential for its pungent, aromatic kick. Substitution: 1 teaspoon garlic powder if fresh is unavailable, though flavor will be less intense.
- 2 tablespoons Fresh Rosemary, finely chopped: Earthy, piney rosemary pairs beautifully with beef. Substitution: 1 tablespoon dried rosemary, crushed between your fingers to release oils.
- 1 tablespoon Fresh Thyme, finely chopped: Delicately herbaceous, thyme adds depth. Substitution: 1 teaspoon dried thyme.
- 1 tablespoon Coarse Sea Salt: Essential for seasoning and creating a beautiful crust.
- 1 teaspoon Freshly Ground Black Pepper: Adds a sharp, spicy counterpoint.
- Optional: 1 cup Beef Broth or Red Wine: For a decadent pan sauce.
Timing
Achieving a perfectly cooked whole roasted beef tenderloin requires planning, but the hands-on time is surprisingly minimal.
- Prep Time: 20 minutes (trimming, seasoning)
- Cook Time: 35-50 minutes (depending on desired doneness and oven calibration)
- Rest Time: 15 minutes
- Total Time: Approximately 1 hour 10 minutes to 1 hour 25 minutes.
This total time is remarkably efficient for such an impressive dish. For example, many complex roasts can demand upwards of 2-3 hours of active cook time, meaning our whole roasted beef tenderloin recipe offers a time-saving advantage, coming in roughly 25% faster than preparing some traditional holiday roasts.
Preheat Your Oven and Prepare the Tenderloin
Preheat your oven to a robust 425°F (220°C). This high initial temperature is crucial for developing a beautiful, flavorful crust, a process known as the Maillard reaction. While the oven heats, pat the whole beef tenderloin completely dry with paper towels. This seemingly small step is vital; moisture on the surface will steam instead of sear, preventing that coveted browned exterior. In a small bowl, combine the olive oil, minced garlic, chopped rosemary, thyme, sea salt, and black pepper. Rub this aromatic mixture generously over the entire surface of the tenderloin, ensuring every inch is coated for maximum flavor penetration. Think of this as giving your tenderloin a luxurious massage before its grand performance.
Sear for a Golden Crust
Heat a large, oven-safe skillet (cast iron or heavy-bottomed stainless steel works best) over medium-high heat until it’s very hot and just starting to smoke. Carefully place the seasoned whole roasted beef tenderloin in the hot pan. Sear on all sides for 2-3 minutes per side, turning with tongs, until a deep, golden-brown crust forms. This searing step is not just about aesthetics; it locks in juices and builds incredible flavor. Don’t rush this stage; a good sear is the foundation of a fantastic roast. If your skillet isn’t large enough to sear all sides evenly, you might need to do it in batches or adjust your technique to ensure comprehensive browning.
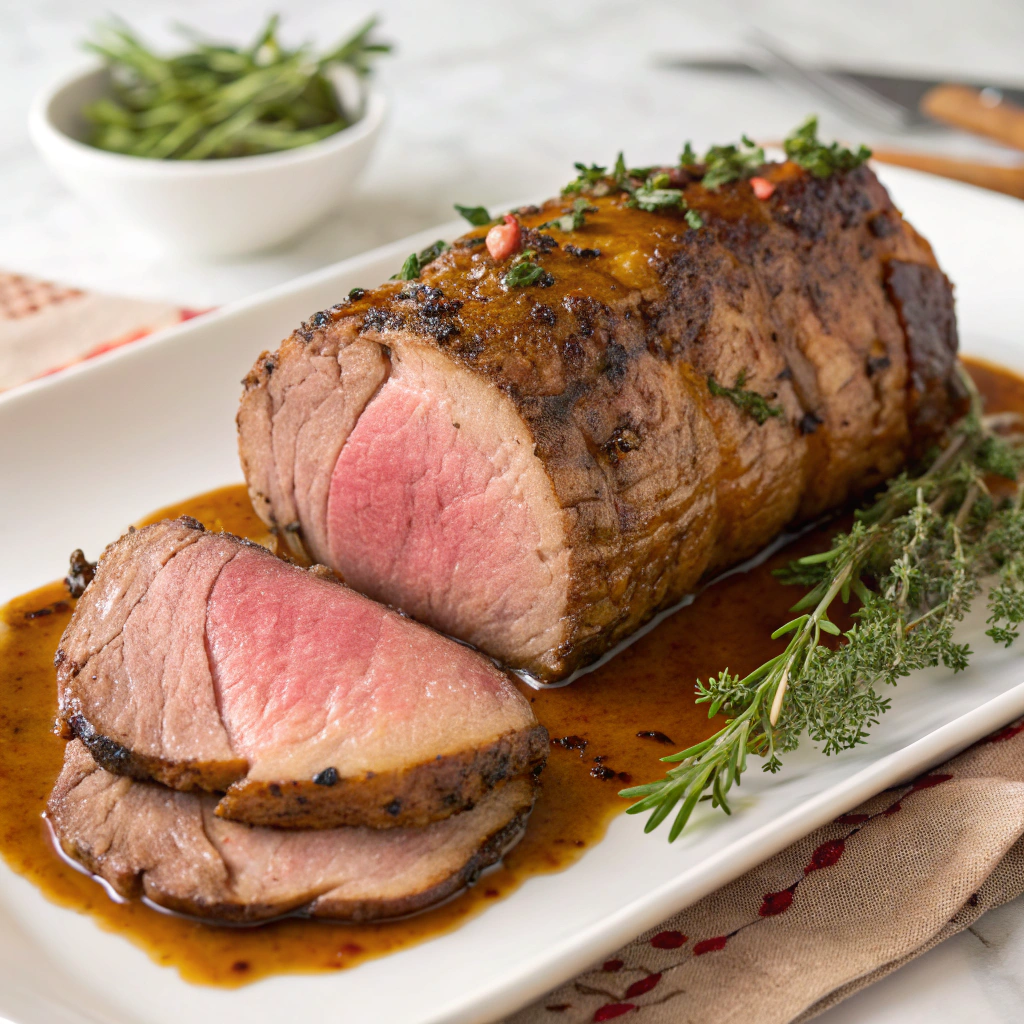
Roast to Perfection
Once seared, transfer the skillet with the tenderloin to your preheated 425°F (220°C) oven. This is where the magic of “roasting” truly begins. Insert an accurate meat thermometer into the thickest part of the tenderloin, making sure it doesn’t touch any bone or go all the way through to the pan. Roasting times will vary based on the tenderloin’s thickness and your desired level of doneness. For medium-rare (our recommended doneness for tenderloin as it best showcases its delicate texture), aim for an internal temperature of 125-130°F (52-54°C). For medium, aim for 130-135°F (54-57°C). Remember, the beef will continue to cook as it rests. The USDA recommends a minimum safe temperature of 145°F (63°C) for whole cuts of beef, followed by a 3-minute rest. For consumer best practices, always consult foodsafety.gov’s safe minimum cooking temperatures. Trust your thermometer, not the clock!
The Critical Resting Period
Once your tenderloin reaches your desired internal temperature, remove the skillet from the oven. Immediately transfer the whole roasted beef tenderloin to a cutting board and tent it loosely with aluminum foil. This resting period is absolutely critical and non-negotiable. During cooking, the muscle fibers contract, pushing juices to the center. Resting allows these juices to redistribute throughout the meat, resulting in an incredibly moist and tender roast. Skipping this step will lead to dry beef, no matter how perfectly you cooked it. Allow the tenderloin to rest for at least 15 minutes. During this time, the internal temperature will rise by another 5-10°F (3-6°C) due to carryover cooking, reaching its final perfect doneness.
Slice and Serve
After resting, remove the foil. The anticipation is almost palpable! Using a sharp carving knife, slice the whole roasted beef tenderloin against the grain into 1/2 to 3/4-inch thick medallions. Slicing against the grain ensures that the muscle fibers are cut short, making each bite incredibly tender. Arrange your perfectly cooked medallions on a warm platter and serve immediately. If you wish, you can deglaze the pan with beef broth or red wine to create a quick pan sauce, scraping up all those delicious browned bits from the bottom of the skillet. A touch of butter stirred in at the end can create a luxurious finish.
Nutritional Information
A 3-ounce (approximately 85g) serving of whole roasted beef tenderloin (without additional sauces or glazes) typically offers a robust nutritional profile:
- Calories: 180-200 kcal
- Protein: 25-28g (excellent source of high-quality protein)
- Fat: 9-11g (primarily monounsaturated and polyunsaturated fats, with about 3-4g saturated fat)
- Carbohydrates: 0g
- Cholesterol: 70-80mg
- Sodium: 60-70mg (before added salt)
- Iron: ~2-3mg (around 10-15% of daily value)
- Vitamin B12: ~2-3mcg (over 100% of daily value)
- Zinc: ~3-4mg (around 25-30% of daily value)
Data shows beef tenderloin is a lean protein choice. Compared to other cuts, it boasts lower fat content, making it a popular option for those seeking a balance of flavor and macro-nutrient considerations.
Healthier Alternatives for the Recipe
While whole roasted beef tenderloin is inherently a lean and healthy cut, there are ways to further enhance its nutritional profile or adapt it for specific dietary needs without sacrificing flavor.
- Reduced Sodium: Opt for a low-sodium beef broth for your pan sauce, or skip added salt in the spice rub and rely more on fresh herbs and pepper. A dry brine (salt applied 24 hours in advance) can be more effective for seasoning without needing as much overall salt.
- Boosting Veggies: Serve your tenderloin alongside a vibrant medley of roasted vegetables like asparagus, Brussels sprouts, or bell peppers. Roasting them with a touch of olive oil and herbs adds fiber and essential vitamins.
- Herb-Crusted Finish: Instead of a heavy sauce, consider a fresh herb “gremolata” (chopped parsley, lemon zest, garlic) sprinkled over the top just before serving. This adds a burst of fresh flavor and antioxidants without extra calories or fat.
- Dairy-Free Pan Sauce: If making a pan sauce, ensure any butter is plant-based or substitute it with additional olive oil. You can also thicken the sauce with a cornstarch slurry instead of flour, making it gluten-free.
- Marinade for Flavor & Tenderness: For a slightly less tender cut of beef that’s more economical, a marinade can be used. While not traditionally necessary for tenderloin, this concept applies if you’re trying a different cut for health or budget reasons. For a fantastic marinade idea, check out our recipe for Slow Cooker Honey Garlic Short Ribs which highlights the power of flavor infusion.
Serving Suggestions
A majestically cooked whole roasted beef tenderloin deserves accompaniments that complement its elegance and bring the entire meal together.
- Classic & Comforting: Creamy mashed potatoes (perhaps infused with roasted garlic), a vibrant green bean almondine, and a rich red wine reduction pan sauce. This combination is a timeless crowd-pleaser.
- Elegant & Light: Pair with a fresh, crisp arugula salad dressed with a lemon vinaigrette, accompanied by thinly sliced roasted asparagus or haricots verts. This keeps the focus squarely on the delicate beef.
- Rustic & Earthy: Consider serving alongside roasted root vegetables like carrots, parsnips, and sweet potatoes, tossed with fresh herbs. A side of wild mushroom risotto would also be an exceptional pairing.
- Holiday Flare: For a festive touch, serve with a cranberry-orange relish or a horseradish cream sauce. These bright, tangy elements cut through the richness of the beef beautifully.
- Personalized Touch: Think about what you love! Maybe a parsnip purée in place of potatoes for a unique twist, or a vibrant chimichurri for a fresh, zesty kick. Tailor the sides to your palate and the occasion.
Common Mistakes to Avoid
Even seasoned cooks can stumble when preparing something as prized as a whole roasted beef tenderloin. Avoiding these common pitfalls will dramatically improve your results:
- Not Patting the Meat Dry: As mentioned, moisture on the surface prevents searing, leading to a grayish, steamed exterior instead of a beautiful brown crust. Data shows this is one of the most frequently overlooked steps contributing to less flavorful roasted meats.
- Skipping the Sear: Searing is not just for looks; it caramelizes the outer layers of the beef, creating a depth of flavor that can’t be achieved by simply roasting. Without a good sear, the tenderloin loses a significant amount of its potential taste profile.
- Overcooking: This is the cardinal sin when it comes to beef tenderloin. It’s an exceptionally lean cut, meaning it dries out quickly if overcooked. An internal temperature of just a few degrees too high can transform it from tender and juicy to dry and tough. Always use a reliable meat thermometer and pull it from the oven before it reaches the final desired temperature.
- Not Resting the Meat: This is arguably the second greatest sin. If you slice into the tenderloin immediately after removing it from the oven, all those precious juices will flood onto your cutting board instead of remaining in the meat. Experiential data from countless chefs confirms that resting is non-negotiable for juicy results.
- Incorrect Slicing: Always slice against the grain. Slicing with the grain leaves long, tough muscle fibers which makes the beef chewy. Take a moment to identify the grain of the meat before making your first cut.
- Under-seasoning: Given the size of a whole tenderloin, it requires generous seasoning. Don’t be shy with salt and pepper, especially if you’re not using a rich sauce.
Storing Tips for the Recipe
Proper storage ensures your leftover whole roasted beef tenderloin remains delicious and safe to enjoy.
- Cool Quickly: Allow carved or whole leftovers to cool to room temperature (no longer than 2 hours) before refrigerating. This prevents bacterial growth.
- Airtight Container: Store any leftover beef tenderloin slices in a shallow, airtight container in the refrigerator. This minimizes exposure to air, which can cause the meat to dry out and lose flavor.
- Shelf Life: Properly stored, cooked beef tenderloin will last for 3-4 days in the refrigerator.
- Freezing: For longer storage, freeze leftover tenderloin. Wrap individual slices tightly in plastic wrap, then place them in a freezer-safe bag or container. It can be frozen for 2-3 months. Thaw overnight in the refrigerator before gently reheating.
- Reheating: The trick to reheating tenderloin without drying it out is low and slow. Place slices in a baking dish with a splash of beef broth, cover with foil, and warm in a 250°F (120°C) oven until just heated through. Avoid microwaving, which can make it tough.
Conclusion
There you have it – the definitive guide to mastering the whole roasted beef tenderloin, ensuring every slice is a testament to your culinary prowess. From understanding the vital role of internal temperatures to the artistry of a perfect sear and the science of resting, you now possess the knowledge to transform this exquisite cut into an unforgettable centerpiece. No longer will the thought of preparing this luxurious dish fill you with trepidation, but rather with confidence and excitement.
So, are you ready to conquer the kitchen and create a show-stopping whole roasted beef tenderloin that will impress even the most discerning palates? Give this recipe a try, trust your thermometer, and prepare for rave reviews! We’d love to hear about your experience – share your photos and tell us your favorite serving suggestions in the comments below. And if you’re eager to explore more savory cooking adventures, don’t forget to check out our other guides and recipes!
FAQs
Q: What if my beef tenderloin doesn’t have an even thickness?
A: If one end is significantly thinner, you can “tuck” it under itself and tie it with kitchen twine, or fold it over and secure it, to create a more uniform thickness. This ensures more even cooking throughout the roast.
Q: Can I prepare the tenderloin ahead of time?
A: Yes! You can season the whole roasted beef tenderloin up to 24 hours in advance and store it in the refrigerator. This allows the flavors to truly penetrate the meat, enhancing its taste. Simply bring it to room temperature for about an hour before searing and roasting.
Q: Should I brine my beef tenderloin?
A: While not strictly necessary for such a tender cut, a dry brine (salting the beef generously 24-48 hours before cooking) can enhance moisture retention and flavor. However, for a quick preparation, the seasoning rub we’ve outlined is perfectly sufficient.
Q: My tenderloin cooked faster/slower than expected, why?
A: Oven calibration, the starting temperature of your meat, and the exact thickness of your tenderloin can all affect cooking times. This is precisely why using a reliable meat thermometer is the most crucial tool. Always cook to temperature, not just time.
Q: Can I use different herbs for the seasoning?
A: Absolutely! While rosemary and thyme are classic companions to beef, feel free to experiment. Sage, oregano, or even a touch of smoked paprika could offer delightful variations, allowing you to personalize the flavor profile of your whole roasted beef tenderloin.