
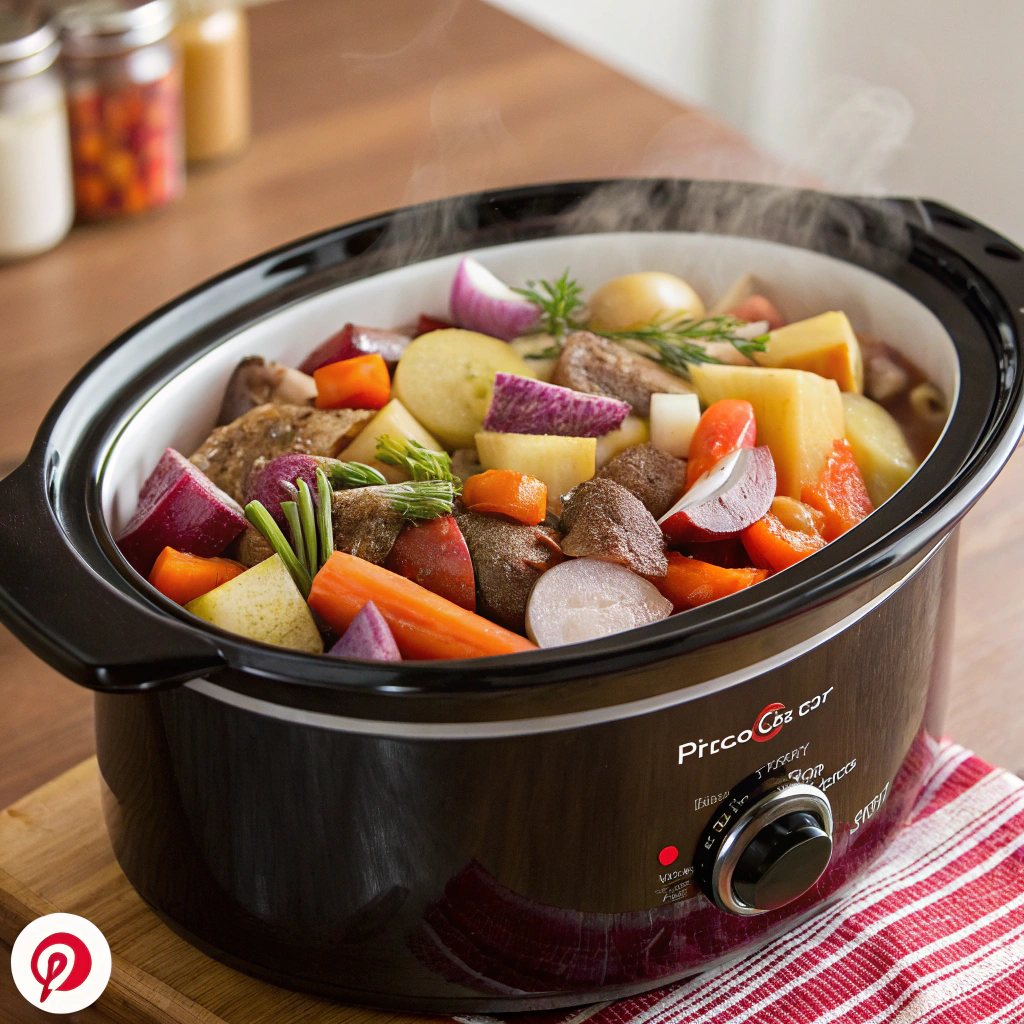
Introduction
Can you really set a frozen roast in a crockpot, pile in hearty vegetables, and come home to a tender, juicy, hands-off dinner? This is the kind of kitchen myth I love to test. As a recipe developer who lives for practical, family-friendly meals, I’ve fine-tuned a frozen roast in crockpot with vegetables method that balances food safety, deep flavor, and true set-it-and-forget-it ease. If your weeknights are busy or you want a reliable Sunday supper that practically cooks itself, this approach turns a solid chuck roast plus pantry staples into a comforting, spoon-tender pot roast with rich gravy—and yes, it starts from frozen.
Ingredients List
Think classic pot roast meets weeknight convenience. The ingredients below are chosen for flavor, texture, and slow-cooker compatibility. Substitution ideas follow each to personalize your dinner.
- 3–4 lb chuck roast, frozen solid
- Substitutions: rump roast or bottom round (leaner, slightly less tender); brisket (richer, may require extra time). For a pork variation, use pork shoulder and swap broth to chicken or pork stock.
- 1.5 lb baby gold or red potatoes, halved
- Substitutions: russet chunks (larger pieces), sweet potatoes (cut into big chunks so they don’t over-soften), or parsnips for an earthy twist.
- 1 lb carrots, peeled and cut into large chunks
- Substitutions: baby carrots (whole), celery chunks, or winter root mix (turnips/parsnips).
- 1 large yellow onion, cut into thick wedges
- 4 cloves garlic, smashed
- 2 cups low-sodium beef broth, heated until steaming
- Why hot? It helps the slow cooker reach a safe temperature faster when starting with a frozen roast.
- Substitutions: 1 cup broth + 1 cup dry red wine for a bolder sauce; bone broth for extra protein.
- 1 tablespoon tomato paste
- Substitutions: 1/2 cup crushed tomatoes or 1 tablespoon ketchup for light sweetness and body.
- 1 tablespoon Worcestershire sauce
- Substitutions: 1 teaspoon soy sauce or coconut aminos (gluten-free/paleo-friendly).
- 1 tablespoon balsamic vinegar (optional, for brightness)
- 2 teaspoons kosher salt (divided), plus more to taste
- 1.5 teaspoons freshly cracked black pepper (divided)
- 1 teaspoon dried thyme
- 1 teaspoon dried rosemary (crushed between fingers)
- 2 bay leaves
- 2 tablespoons cornstarch + 2 tablespoons cold water (optional, for slurry)
- Substitutions: 3 tablespoons flour whisked into broth (add at the start), or arrowroot slurry for grain-free.
- 1–2 tablespoons unsalted butter (optional, to finish sauce)
- Fresh parsley, chopped (optional garnish)
Flavor boosters you can add:
- 1 packet onion soup mix (reduces need for extra salt)
- 1 teaspoon smoked paprika for gentle smokiness
- 1 teaspoon garlic powder if you love extra savory notes
Timing
- Prep time: 10–15 minutes (under 15 minutes of active work)
- Cook time (from frozen): 8–10 hours total
- Recommended: 1–2 hours on High to accelerate temperature rise, then 6–8 hours on Low
- Total time: 8–10 hours, 15 minutes
Why this feels faster:
- Active time is less than most oven roasts (often 25–30 minutes of active prep). You’ll save roughly 40–60% on hands-on time.
- Energy efficiency: A typical slow cooker uses about 200–300 watts vs. an oven at ~2,000+ watts. Running a 250-watt slow cooker for 9 hours is about 2.25 kWh, often comparable or less than using an oven for 2–3 hours, depending on your appliance and local rates.
Step-by-Step Instructions
Step 1: Preheat the slow cooker and heat your broth
- Turn the slow cooker to High while you prep. Heat the beef broth until steaming (stovetop or microwave). Preheating plus hot liquid helps move the roast more quickly through the 40°F–140°F “danger zone” for safer results.
Pro tip: If your slow cooker has a sear function, warm it for 10–15 minutes. If not, let it heat while you chop vegetables.
Step 2: Layer the vegetables for even cooking
- Add potatoes, carrots, onion wedges, and smashed garlic to the bottom of the crock. Season with 1 teaspoon salt and 1/2 teaspoon pepper.
- This base lifts the roast slightly, promotes circulation, and ensures vegetables braise rather than disintegrate.
Step 3: Build flavor in the braising liquid
- In a bowl, whisk hot broth with tomato paste, Worcestershire, balsamic (if using), thyme, rosemary, and remaining salt and pepper. Pour half of this mixture over the vegetables.
Flavor swap: For a richer, French-style sauce, replace 1 cup broth with dry red wine and add a bay leaf now.
Step 4: Add the frozen roast—no searing needed
- Place the frozen chuck roast on top of the vegetables. Pour the remaining seasoned broth over the roast. Add bay leaves.
- If the roast is oddly shaped or very thick, ensure it fits with the lid fully closed for even heating.
Safety note: Starting with hot liquid plus the first hour on High helps speed safe heating. Avoid oversized roasts that strain your slow cooker capacity (aim for 2/3 full).
Step 5: Cook—first High, then Low
- Cook on High for 1–2 hours to jumpstart the temperature rise, then switch to Low for 6–8 hours.
- Target internal temp: About 190–205°F for shreddable tenderness. At 180°F, it’s sliceable; at 190°F+, collagen breaks down for that classic pot-roast texture.
Don’t lift the lid in the first 3–4 hours; every peek can add 20–30 minutes of cook time.
Step 6: Adjust vegetables if you like them firmer
- If you prefer extra-firm vegetables, add half the carrots and potatoes at the start and the other half about 2–3 hours before the end. This stagger keeps texture lively.
Step 7: Check seasoning and tenderness
- At 7 hours total, test a potato for doneness and a fork in the roast. If the fork turns with little resistance, you’re close. Taste broth; adjust salt/pepper.
Optional boost: Stir in an extra splash of Worcestershire or a teaspoon of Dijon for brightness.
Step 8: Make silky gravy (optional but worth it)
- Remove roast and vegetables to a platter; tent with foil. Strain or skim excess fat from cooking liquid if desired.
- Whisk together cornstarch and cold water (1:1). Set slow cooker to High and whisk slurry into the liquid. Simmer 5–10 minutes until glossy and lightly thickened. Finish with butter for sheen.
Gluten-free? Use arrowroot slurry (1 tablespoon arrowroot + 1 tablespoon cold water) and simmer briefly; avoid overcooking.
Step 9: Rest, slice or shred, and serve
- Let the roast rest 10 minutes. Slice across the grain for neat portions, or shred for ultra-tender bites that soak up gravy.
- Garnish with chopped parsley and ladle with sauce. Serve straight from the crock for a cozy family-style presentation.
Step 10: Food safety recap (especially when starting from frozen)
- Use a thermometer to verify the roast reaches at least 160°F internally for safe consumption; for fall-apart texture, 190–205°F is ideal.
- Always start with hot liquid, preheat the crock, and keep the lid on. If your slow cooker runs cool or the roast is over 4 pounds and very thick, thawing overnight in the refrigerator is the safer choice.
For an alternate perspective and additional tips on slow cooking from frozen, see this helpful guide: frozen roast in the crockpot.
Nutritional Information
Estimated per serving (8 servings, including vegetables and a modest amount of gravy):
- Calories: ~465
- Protein: ~38 g
- Carbohydrates: ~24 g
- Dietary Fiber: ~3.8 g
- Total Fat: ~24 g
- Saturated Fat: ~9 g
- Sodium: ~780 mg (varies by broth and added salt)
- Potassium: ~1,100 mg
- Iron: ~4.3 mg
Notes:
- Using low-sodium broth reduces total sodium significantly.
- Chuck roast fat renders during cooking; skimming before making gravy lowers total fat.
- Nutritional numbers are estimates based on standard databases for chuck roast, potatoes, carrots, and broth.
Healthier Alternatives for the Recipe
- Leaner cut swap: Use bottom round or sirloin tip. Expect slightly less richness; compensate with 1 tablespoon olive oil whisked into the broth or finish gravy with 1 teaspoon butter instead of 2.
- More vegetables: Increase carrots and add parsnips, mushrooms, or green beans (last 1–2 hours). Up to 50% of the volume can be non-starchy veg to reduce calories per serving.
- Lower sodium: Choose no-salt-added broth, skip onion soup mix, and season with herbs, garlic, and lemon zest at the end. Finish with a splash of vinegar for perceived saltiness without added sodium.
- Gluten-free and grain-free: Thicken with arrowroot or tapioca starch. Use coconut aminos instead of soy-based sauces.
- Low-carb approach: Swap potatoes for large cauliflower florets added in the final 1.5–2 hours, or keep the potatoes but reduce quantity and add extra mushrooms and celery.
- Dairy-free finish: Skip butter in the sauce and finish with olive oil for silkiness.
Serving Suggestions
- Classic plate: Slices or shreds of roast over buttery mashed potatoes with carrots and onions, smothered in gravy.
- Lighter bowl: Serve with garlicky cauliflower mash or lemony green beans. Add a crunchy side salad with a Dijon vinaigrette.
- Meal-prep bowls: Roast + carrots + quinoa or brown rice. Pack gravy separately to keep textures fresh.
- Open-faced sandwiches: Layer shredded roast on toasted sourdough, top with caramelized onions and a ladle of gravy.
- Next-day ideas:
- Beef and vegetable hash with eggs
- Roast beef tacos with pickled onions and cilantro
- Savory pot pie using leftover gravy as the sauce base
- Pairings:
- Wine: Cabernet Sauvignon or Malbec with classic version; Pinot Noir if you use mushrooms.
- Non-alcoholic: Black tea with lemon, spiced apple cider, or a rosemary-lemon sparkling water.
If you love comforting beef dishes, you might also enjoy my stovetop favorite: Classic Stovetop Beef Tips and Gravy.
Common Mistakes to Avoid
- Adding cold liquid: Cold broth delays heating and can keep meat too long below 140°F. Always use hot broth.
- Overloading the crock: Overfilling past two-thirds capacity can cause uneven cooking. Scale ingredients to your slow cooker size.
- Lifting the lid too often: Heat loss adds time and risks uneven texture.
- Cutting vegetables too small: They’ll break down. Keep chunks large and uniform.
- Using the wrong cut: Lean roasts can be dry; chuck roast excels because its connective tissue melts into tenderness.
- Forgetting to season in layers: Season vegetables and broth, not just the roast, for a fully flavored sauce.
- Not accounting for salt in mixes: If using onion soup mix or soy-based sauces, reduce added salt.
- Skipping the rest: A brief rest before slicing keeps juices in the meat rather than on the board.
- Expecting shredded texture at 160–170°F: That temp is safe but won’t be pull-apart. For shredding, cook to 190–205°F.
Storing Tips for the Recipe
- Refrigeration: Cool leftovers within 2 hours. Store meat, vegetables, and gravy together or separately in airtight containers for 3–4 days.
- Freezing: Portion into meal-size containers with enough gravy to keep meat moist. Freeze up to 3 months. Label with date and amount.
- Reheating: Thaw overnight in the refrigerator. Reheat gently on the stovetop or in the microwave with a splash of broth. Avoid boiling; it tightens meat fibers.
- Make-ahead prep:
- Veg pack: Pre-chop vegetables 24 hours ahead; keep submerged in cold water in the fridge to prevent browning.
- Freezer kit: If planning ahead, season a raw roast (not cooked) with salt/pepper and freeze it with a labeled bag of pre-measured herbs and tomato paste. On cook day, dump into preheated crock with hot broth.
Conclusion
This frozen roast in crockpot with vegetables proves you can start from rock-solid and still end up with succulent, fall-apart beef, sweet carrots, and buttery potatoes—plus a glossy gravy that ties it all together. By preheating the crock, using hot broth, and giving the roast the right time at the right temperatures, you’ll enjoy reliable results without babysitting the stovetop or heating the whole kitchen.
I’d love to hear how it turns out in your home. Drop a comment with your tweaks—did you go wine or bone broth, parsley or thyme? If you found this helpful, share it with a friend who needs an effortless family dinner this week and explore more comforting, make-ahead-friendly meals on the site.
FAQs
-
Can I put a frozen roast directly into a crockpot?
Yes, with precautions. Preheat the slow cooker, use hot broth, start on High for 1–2 hours, then switch to Low until the roast reaches at least 160°F internally (and ideally 190–205°F for shredding). If your slow cooker runs cool or the roast is very thick, thawing in the refrigerator first is the safest approach. -
Do I need to sear the roast?
Not required when starting from frozen. Searing adds flavor but this recipe builds depth with Worcestershire, tomato paste, and herbs. If starting with a thawed roast, you can sear 2–3 minutes per side in a hot skillet for extra browning before slow cooking. -
How do I keep the vegetables from turning mushy?
Cut large chunks, layer them on the bottom, and avoid overcooking. For ultra-firm texture, add half the veg 2–3 hours before the roast is done. -
How much liquid should I use?
About 2 cups is usually perfect for a 3–4 lb roast in a 6-quart slow cooker. The roast releases juices, and you’ll finish with a sauce—not soup. -
What size slow cooker works best?
A 6-quart model handles a 3–4 lb roast plus vegetables comfortably. Don’t exceed two-thirds capacity for even heating. -
How do I thicken the gravy?
Whisk a cornstarch slurry (1:1 with cold water) into simmering cooking liquid on High until glossy. For grain-free, use arrowroot. For flour-based gravy, whisk flour into the broth at the start. -
Can I cook on High the entire time?
You can, but the texture is typically better with a High-then-Low approach. All-High might finish in about 5–6 hours, but check tenderness and avoid overcooking vegetables. -
Is chuck roast the only cut that works?
Chuck is best for tenderness and flavor. Rump or bottom round work but may slice rather than shred. Brisket yields rich results with a bit more fat and time. -
Can I add frozen vegetables?
Frozen pearl onions or peas are fine in the last 30–45 minutes. Avoid adding frozen items at the beginning besides the roast; they’ll slow heating. -
What internal temperature should I aim for?
For safe consumption, at least 160°F. For classic, fall-apart pot roast, 190–205°F is the sweet spot where connective tissues fully break down. -
How long can leftovers last?
Refrigerate for 3–4 days or freeze up to 3 months. Reheat gently with a splash of broth to keep the meat juicy.
Make this once, and you’ll have a new weeknight hero—deeply savory, family-pleasing, and wonderfully forgiving. Enjoy every saucy bite!