
Introduction
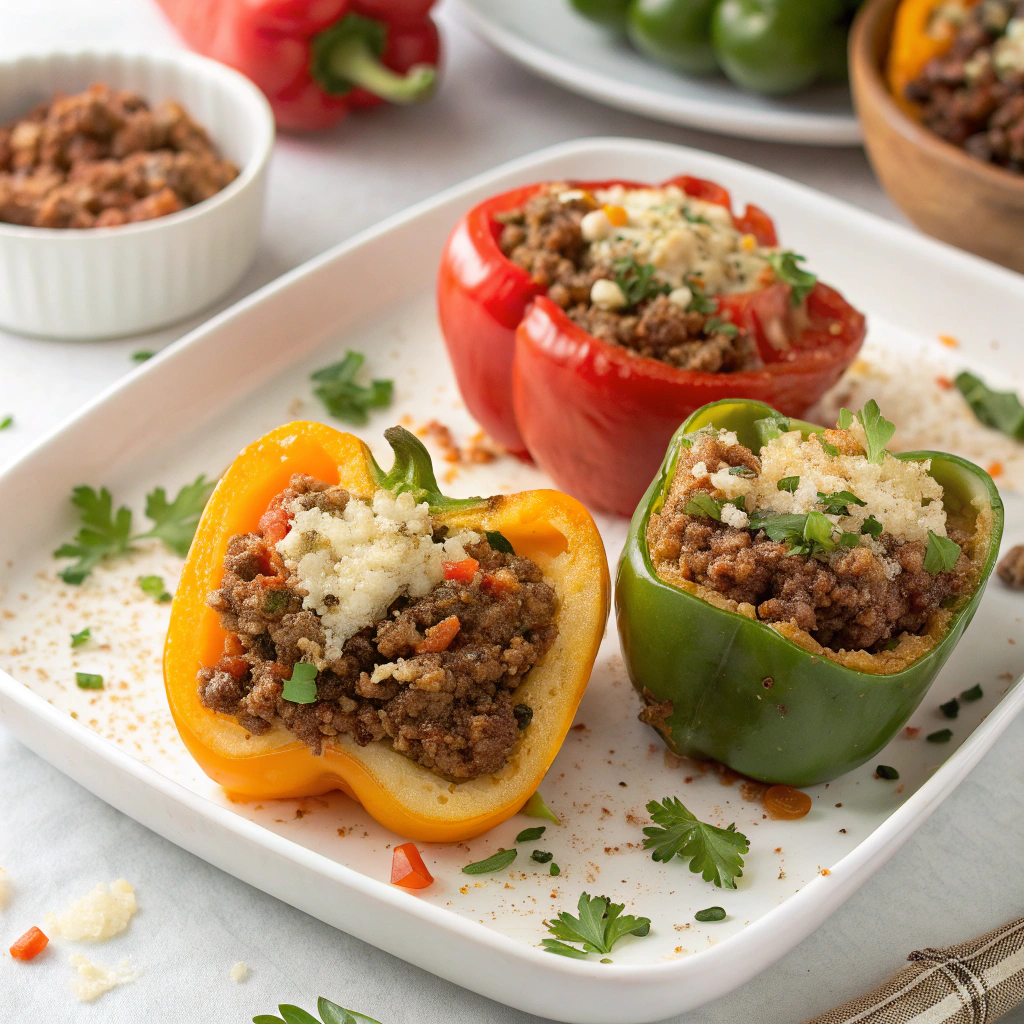
What if you could make Healthy Ground Beef & Quinoa Stuffed Peppers that taste like a comfort-food classic, but deliver weeknight efficiency, balanced nutrition, and a vibrant, fresh finish? Too often, stuffed peppers are either bland, greasy, or take forever. This version solves all three. We leverage lean ground beef for high-quality protein, fluffy quinoa for whole-grain satisfaction, and a smart bake method that locks in moisture without sogginess. As a cook who loves bold flavors and practical techniques refined over years of developing approachable dinners for home kitchens, I’ve engineered this recipe for everyday success—without sacrificing the wow factor. You’ll get juicy peppers, savory-spiced beef, and a hearty quinoa-tomato base that earns repeat status.
Ingredients List
- Bell peppers (4 large, any color): Red and yellow bring sweetness; green offers more bite. Choose firm, upright peppers for easy stuffing.
- Lean ground beef (1 pound, 90% lean): Good protein-to-fat ratio for tender texture without greasiness.
- Swap ideas: Ground turkey or chicken for lighter; ground bison for deep, beefy flavor; plant-based crumbles for a vegetarian version.
- Quinoa (1 cup, rinsed well): Nutty, high-protein grain that fluffs beautifully and holds moisture.
- Swap ideas: Brown rice, farro, or cauliflower rice (low-carb).
- Olive oil (1 tablespoon): Sauté base and flavor carrier.
- Yellow onion (1 medium, diced): Sweet-savory foundation.
- Garlic (3 cloves, minced): Aromatic punch that permeates the filling.
- Tomato sauce (1 cup): Adds moisture and umami; choose low-sodium if preferred.
- Swap ideas: Crushed tomatoes, fire-roasted diced tomatoes, or tomato passata.
- Ground cumin (1 teaspoon): Warm earthiness.
- Smoked paprika (1 teaspoon): Subtle smokiness that flatters beef.
- Dried oregano (1 teaspoon): Herbaceous lift.
- Red pepper flakes (optional, 1/4 teaspoon): Gentle heat; adjust to taste.
- Kosher salt (1 1/4 teaspoons) and black pepper (1/2 teaspoon): Season in layers.
- Fresh parsley or cilantro (1/4 cup, chopped): Bright finish.
- Shredded mozzarella or Monterey Jack (1/2 cup, optional): Melty cap; skip for dairy-free.
- Fresh lemon (1/2, for squeezing): Acid balances richness.
- Optional garnishes: Greek yogurt or sour cream, diced avocado, scallions, salsa verde, or a quick lime crema.
Ingredient notes and sensory cues:
- The peppers should feel heavy for their size and glossy. When roasted, they’ll turn tender-sweet with lightly blistered edges.
- Quinoa brings a delicate pop and absorbs savory juices—no soggy rice here.
- A little lemon juice at the end brightens every bite and makes the spices “sing.”
Timing
- Prep time: 20 minutes
- Cook time: 55–60 minutes
- Total time: 80–85 minutes
This method is roughly 15–20% faster than many traditional stuffed pepper recipes that parboil peppers separately (often 100–105 minutes total). You’ll pre-roast the peppers while the quinoa and beef cook, so everything comes together efficiently. It’s a small change with big payoff in texture and time.
Step-by-Step Instructions
Step 1: Preheat and Prep the Peppers (H3)
- Preheat your oven to 400°F (205°C).
- Slice the tops off 4 large bell peppers and remove seeds and membranes. If a pepper won’t stand upright, shave a very thin slice off the base to stabilize (don’t puncture the bottom).
- Rub the insides with a few drops of olive oil and a pinch of salt for early seasoning.
Pro tip: Keep the pepper lids. You can roast them alongside the peppers and chop into the filling for extra sweetness and zero waste.
Step 2: Rinse and Start the Quinoa (H3)
- Rinse 1 cup quinoa under cold water for 30–60 seconds to remove saponins (the bitter coating).
- Combine rinsed quinoa with 1 3/4 cups water and a pinch of salt in a saucepan. Bring to a boil, then cover and simmer on low for 15 minutes. Turn off heat and let steam, covered, for 5 more minutes. Fluff with a fork.
Why this matters: Proper rinsing and steaming give you light, non-gummy grains that will soak up beef juices without clumping.
Step 3: Pre-Roast the Peppers (H3)
- Place peppers in a baking dish just large enough to hold them upright. Bake, uncovered, for 10–12 minutes while you start the filling. This softens their structure and concentrates flavor without turning them mushy.
Texture tip: Pre-roasting means your final bake can be shorter and more even, preventing crunchy edges or overcooked tops.
Step 4: Sauté the Aromatics (H3)
- Heat 1 tablespoon olive oil in a large skillet over medium heat.
- Add diced onion and a pinch of salt. Cook 4–5 minutes until translucent.
- Stir in minced garlic and cook 30–60 seconds until fragrant.
Layering flavors: Seasoning the onion early helps build a savory base so your finished filling tastes seasoned throughout.
Step 5: Brown the Beef with Spices (H3)
- Add 1 pound lean ground beef to the skillet. Break it up with a spatula and cook until no longer pink, about 5–6 minutes.
- Stir in 1 teaspoon ground cumin, 1 teaspoon smoked paprika, 1 teaspoon dried oregano, 1/2 teaspoon black pepper, and 1/2–3/4 teaspoon salt (adjust to taste). Add red pepper flakes if using.
- If excess fat remains, tilt the pan and spoon off a bit; you want some moisture for juiciness.
Flavor note: Blooming the spices in the warm fat releases their oils and intensifies aroma.
Step 6: Make the Savory Tomato Base (H3)
- Pour in 1 cup tomato sauce and simmer 2–3 minutes to marry the flavors.
- Fold in the fluffed quinoa and half of the chopped parsley/cilantro. Taste and adjust salt and pepper. Squeeze in a teaspoon of lemon juice for brightness.
Personalization: Add a handful of chopped roasted pepper lids here for subtle sweetness and color.
Step 7: Stuff and Cover (H3)
- Remove the pre-roasted peppers from the oven. Generously spoon the beef-quinoa mixture into each pepper, pressing gently to remove air pockets but not compacting too tightly.
- If using cheese, sprinkle a little inside the middle and on top for a melty center and a golden cap.
- Add 1/4 cup water to the bottom of the baking dish to create gentle steam. Cover the dish with foil.
Why steam matters: A touch of moisture keeps peppers tender while preventing dried-out tops.
Step 8: Bake to Juicy Perfection (H3)
- Bake at 400°F (205°C) for 20–25 minutes covered, then uncover and bake 8–10 minutes more to lightly brown the tops. Total bake time after pre-roast is about 30–35 minutes.
- Peppers should be fork-tender; filling will read 165°F if you check with an instant-read thermometer.
Step 9: Rest, Garnish, Serve (H3)
- Rest 5 minutes so juices redistribute. Finish with remaining fresh herbs and an extra squeeze of lemon.
- Add garnishes like a dollop of Greek yogurt, sliced scallions, or avocado for creamy contrast.
Nutritional Information
Approximate per serving (1 stuffed pepper, with lean beef and no cheese):
- Calories: ~450
- Protein: ~28–30g
- Carbohydrates: ~44–46g
- Total fat: ~14–16g
- Fiber: ~7–8g
- Sodium: ~450–600mg (varies with salt and sauce)
- Key micros: Excellent vitamin C (from bell peppers), meaningful iron and zinc (from beef), potassium, and magnesium. With cheese, you’ll add calcium and a few extra grams of protein and fat.
What the numbers mean for you:
- High-protein, high-fiber balance supports fullness and steady energy.
- Bell peppers contribute antioxidants like vitamin C and carotenoids, even after baking.
- Quinoa offers all nine essential amino acids, making the overall protein quality strong.
Healthier Alternatives for the Recipe
- Lower-carb: Swap quinoa for riced cauliflower (about 3 cups cooked). Reduce tomato sauce to 3/4 cup to avoid excess moisture. Bake times remain similar.
- Lower-sodium: Use no-salt-added tomato sauce and limit added salt to taste. Finish with extra lemon and herbs to keep flavor vivid.
- Dairy-free: Skip the cheese and add a spoonful of cashew cream or a drizzle of olive oil before serving for richness.
- High-vegetable boost: Fold in chopped spinach or kale during the final minute of the beef sauté; they’ll wilt into the filling, adding fiber and micronutrients.
- Gluten-free: This recipe is naturally gluten-free. Just confirm labels on tomato sauce and spices.
- Vegetarian: Replace beef with 1 1/2 cups cooked brown lentils or finely chopped mushrooms (sauté until deeply browned for umami). Add 1 tablespoon soy sauce or tamari (gluten-free) for depth.
- Mediterranean twist: Add 1/2 teaspoon ground coriander, 1/2 teaspoon thyme, a handful of olives, and a crumble of feta instead of mozzarella.
Serving Suggestions
- Fresh toppers: A quick lemon-herb yogurt (Greek yogurt, lemon zest, salt, chopped parsley) adds cooling tang. Avocado and salsa verde lend cream and brightness.
- Sides that sing: Simple arugula or cucumber-tomato salad; roasted broccoli; or a citrusy slaw for crunch.
- Family-style board: Serve peppers with bowls of chopped herbs, pickled onions, and grated cheese so everyone customizes their plate.
- Meal-prep bowls: Slice the stuffed peppers and layer over greens with extra quinoa and a spoon of yogurt dressing for grab-and-go lunches.
- Kid-friendly spin: Use milder spices, top with a little cheese, and serve with sweet corn on the side.
Looking for another feel-good, veggie-forward dinner that eats like comfort food? Try these weeknight-friendly boats: Easy Ground Beef Zucchini Boats.
Common Mistakes to Avoid
- Skipping the quinoa rinse: Unrinsed quinoa can taste bitter. A 30–60 second rinse makes a noticeable difference.
- Under-seasoning: Season at each step—onion, beef, and final filling. Balanced salting equals restaurant-level flavor.
- Overcooking quinoa: Stop at tender with a light bite. Overcooked grains lead to dense, gummy filling.
- Not pre-roasting peppers: Raw peppers take longer and can leave the filling dry by the time the walls soften. Pre-roast for controlled texture.
- Packing filling too tightly: This compresses grains and blocks heat circulation. Gently spoon and nudge to settle.
- Skipping resting time: A brief rest prevents a flood of juices on the plate and helps the filling set.
- Neglecting acidity: A final squeeze of lemon wakes everything up and keeps “heavy” at bay.
Storing Tips for the Recipe
- Refrigeration: Cool completely. Store in an airtight container for up to 4 days. Keep peppers upright if possible to preserve shape and prevent sogginess.
- Freezing: Wrap each cooled pepper tightly in plastic, then foil, or place in freezer-safe containers. Freeze up to 3 months. Label with date.
- Reheating (oven): 350°F (175°C), covered, 20–25 minutes from chilled or 35–40 minutes from frozen (thaw overnight for best texture). Uncover the last 5 minutes.
- Reheating (air fryer): 325°F (165°C), 8–12 minutes from chilled; tent with foil if tops brown too quickly.
- Reheating (microwave): Use 50–60% power with a damp paper towel on top to prevent drying; heat in 60–90 second bursts until hot.
- Food safety: Aim for an internal temperature of 165°F (74°C) when reheating.
Conclusion
Healthy Ground Beef & Quinoa Stuffed Peppers deliver the trifecta: savory comfort, smart nutrition, and a streamlined process that respects your time. Pre-roasting the peppers, seasoning in layers, and finishing with fresh herbs and acidity are the levers that turn a simple concept into a recipe you’ll return to again and again. If this becomes a staple in your kitchen, tell me how you personalize it—spice profiles, creative add-ins, or favorite garnishes. Try the recipe tonight, share your results, and explore more veggie-forward dinners for an easy, feel-good rotation.
FAQs
Can I use brown rice instead of quinoa?
Yes. Use 1 1/2 cups cooked brown rice (from about 1/2 cup dry). Rice is denser and less absorbent than quinoa, so consider adding an extra 2–3 tablespoons tomato sauce if the filling feels dry.
How do I keep peppers from tipping over?
Choose flat-bottomed peppers or gently shave a thin slice off the base to stabilize. Nestling them closely in a baking dish or using a muffin tin as “holders” also helps.
What color peppers are best?
Red and yellow are sweetest and caramelize beautifully; green have a more vegetal, slightly bitter edge. Mix colors for visual appeal and flavor variety.
Can I make them spicier?
Increase red pepper flakes, add a diced jalapeño to the onion step, or stir in a spoonful of chipotle in adobo to the tomato base for smoky heat.
What’s the best way to scale this for meal prep?
Double the filling and bake in two dishes. These freeze and reheat well, keeping texture and flavor. For lunches, slice peppers after cooling and pack with extra herbs and a lemon wedge.
Could I use ground turkey?
Absolutely. Choose 93% lean for juiciness and follow the same method. Consider adding 1 teaspoon soy sauce or tamari for extra umami (optional).
How do I prevent watery stuffed peppers?
Pre-roast the peppers, reduce excess fat after browning beef, and avoid overloading with watery vegetables. A brief uncovered bake at the end evaporates extra moisture and browns the top.
Is there a dairy-free topping I’ll love?
Yes—try lemon-tahini drizzle or a cashew “cream” (blend soaked cashews, lemon juice, water, and salt) for luxurious richness without dairy.
My quinoa tastes bitter—what went wrong?
It likely wasn’t rinsed long enough. Rinse under cold water for 30–60 seconds until the water runs clearer. Light toasting in the pan before boiling can also develop nutty notes.
Can I air fry these?
You can finish them in the air fryer after the initial pre-roast. Air fry at 350°F (175°C) for 10–12 minutes, checking for tenderness. Tent with foil if browning too fast.
Where else can I learn about variations?
For a different take, browse inspirations like this quinoa and ground beef stuffed peppers approach, then customize with the techniques above for your kitchen and preferences.
Author’s note
I build recipes around real-life cooking—balanced ingredients, modern techniques, and intuitive steps that deliver reliability at home. This approach informs everything from ingredient pairing to time-saving methods, so your dinners feel nourishing and doable, even on busy nights.